BackBeginners-Infos
Basic information for beginners. Which seeds should you start with, which technique is needed, how to proceed?

Vertical cannabis cultivation: How to optimize your space with a multi-tier grow system
- What Is Vertical Cannabis Farming?
- Advantages of Vertical Cannabis Farming
- Key Components of a Vertical Grow Setup
- Best Practices for Multi-Layer Cannabis Growing
- Challenges & Pitfalls in Vertical Growing
- Who Benefits From Vertical Cannabis Farming?
- HowTo – Vertical Homegrow Setup Step-by-Step
- Conclusion: Vertical Cannabis Farming for Homegrowers
- FAQ – Vertical Cannabis Farming
Vertical cannabis farming is one of the most exciting innovations in modern indoor cultivation. For homegrowers working with limited space, a cannabis vertical grow system or vertical grow setup can dramatically improve efficiency and production — provided it is properly designed and executed.
In this guide, you will learn what vertical cannabis farming actually means, how a multi-layer cannabis grow system works, what equipment it requires, and how to design a safe, efficient system to maximize grow space. We also highlight compact strains that thrive inside indoor cannabis vertical racks and multi-tier grow rooms.
If you are just starting out and would prefer to begin with a classic, level grow, we recommend that you first read our Indoor Grow Guide.
What Is Vertical Cannabis Farming?
Traditional indoor growing uses a single layer: one lamp above, plants below. With cannabis vertical cultivation, the grow expands upward. Instead of one layer, you stack multiple levels and use the entire room height. This transforms one square meter of floor space into two or even three square meters of productive canopy.
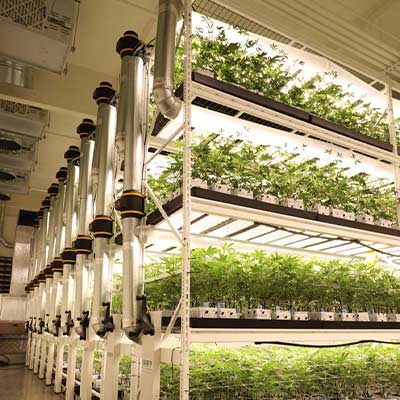
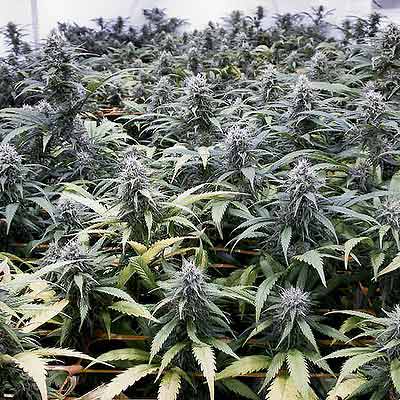
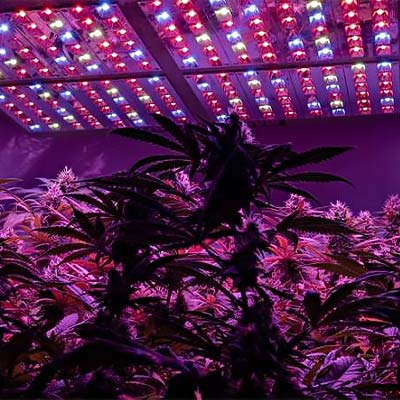
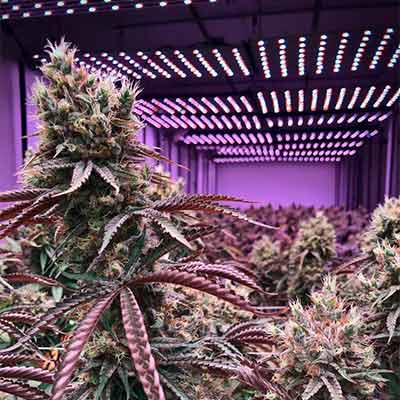
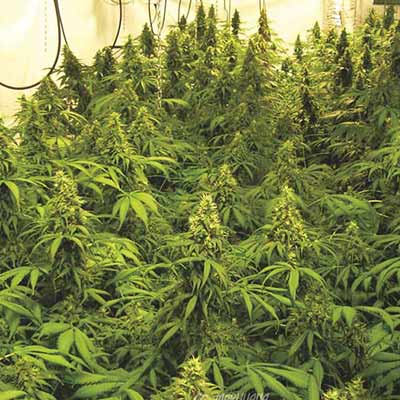
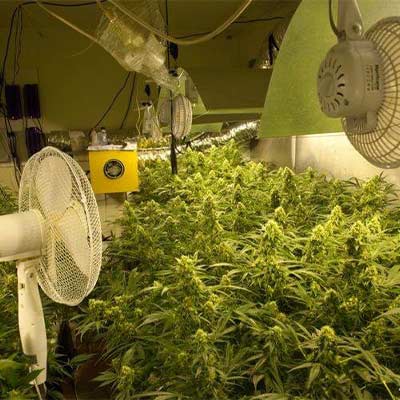
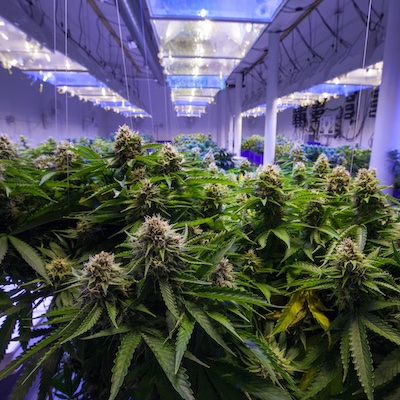
This is vertical cultivation. There are several ways to do it. In this mass production setup, you can see multiple vertical shelving units.
Basic Principles of a Multi-Layer Cannabis Grow System
A multi-layer cannabis grow system typically uses one of two structures:
- Vertical shelving or indoor cannabis vertical racks: metal racks or professional grow structures designed for multiple tiers of plants. Every layer has its own LED lighting, irrigation, and airflow.
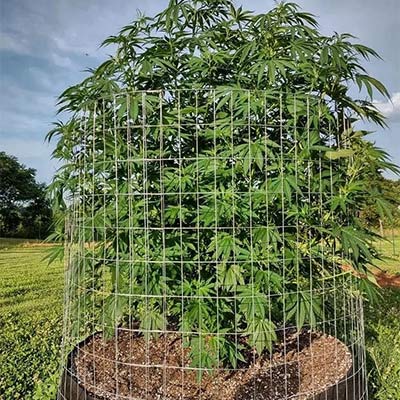
- Cylindrical / tower systems: plants grow along the vertical walls of a cylinder while LED bars illuminate from the center.
In both models, the primary objective is to maximize grow space by multiplying canopy area within the same floor footprint.
How Vertical Growing Differs From Traditional Indoor Cultivation
Compared to a classic single-layer setup, vertical cannabis farming allows:
- far more plants per square meter of floor area,
- more efficient distribution of LED grow lights vertical systems,
- more complex airflow management (warm air rises into upper tiers),
- higher demands on irrigation, safety, and system organization.
Vertical systems often combine well with hydroponic vertical cannabis methods or even a specialized aeroponic vertical system to maintain consistent root-zone conditions across multiple layers.
Advantages of Vertical Cannabis Farming
Why are more growers switching to vertical cannabis farming? In dense cities or small apartments, space is extremely limited. A well-designed vertical grow setup allows you to maximize grow space without increasing your cultivation footprint.
1. Maximum Space Efficiency & Increased Yield per Square Meter
The most obvious advantage of a cannabis vertical grow system is far better space utilization. In small rooms, closets, or attics, growers can:
- double or triple their usable canopy,
- fit more plants into the same floor area,
- boost indoor yield optimization without expanding the room.
You’re not only adding more plants — you’re increasing the efficiency of the entire system. With proper lighting, airflow, and nutrient management, you can significantly boost your grams-per-watt and total yearly harvests.
2. LED Technology Makes Vertical Farming Possible
Vertical cannabis farming would be nearly impossible with old HID or HPS lamps — they produce too much heat and require too much overhead space. Modern LED grow lights vertical systems make vertical cultivation feasible thanks to:
- high efficiency with reduced energy consumption,
- customizable spectrum to match veg and bloom phases,
- minimal heat output, essential for multi-layer setups,
- slim bar-shaped LEDs ideal for mounting onto vertical racks.
These features allow consistent climate control inside any vertical cannabis farming environment and dramatically reduce cooling costs.
3. Improved Workflow & Grow Room Optimization
Setting up a multi-layer cannabis grow system forces growers to think more intentionally about grow room optimization. The result is usually a cleaner, more professional grow environment:
- clear airflow pathways,
- organized cable management,
- defined irrigation routes,
- structured routine for plant inspection and care.
Many growers find that once their system is arranged vertically, their workflow becomes smoother and more efficient — even if they eventually return to a single-layer style.
4. Indoor Cannabis Vertical Racks Provide Flexibility
One of the major benefits of indoor cannabis vertical racks is the flexibility to adjust your system over time. High-quality vertical racks offer:
- adjustable tier height,
- custom mounting options for irrigation lines, fans, and LED bars,
- modular expansion if you want to scale up later.
This makes vertical growing an excellent option for homegrowers who want to improve yield gradually rather than investing in a full-scale commercial system upfront.
Key Components of a Vertical Grow Setup
Before planning your vertical grow setup, it helps to understand the essential building blocks. Many elements match traditional indoor grows, but they must be arranged differently in a multi-layer cannabis grow system.
1. Racks, Shelving Units, and Grow Tents
A cannabis vertical grow system depends on strong, reliable racks. These can be industrial metal shelves, specialized vertical grow racks or just a modified growing tent built specifically for vertical racks for cannabis. Important factors:
- Weight capacity: pots, water, substrate, and equipment add significant load.
- Material: metal racks resist moisture far better than wood.
- Dimensions: choose depth and width that allow easy access for plant training and inspections.
- Access: you must reach every plant — even those on the back rows or upper tiers.
Some small-scale growers use modified warehouse-style shelving inside grow tents to create a low-cost entry into vertical cannabis farming.
2. LED Grow Lights for Vertical Cannabis Farming
In a vertical grow setup, one large lamp isn’t enough. Instead, multiple slim LED bars provide uniform coverage. When selecting LEDs, consider:
- Shape: slim LED bars fit perfectly across multi-layer racks,
- Coverage: even PPFD across each tier is essential,
- Heat management: reduced heat allows closer plant-to-light distances.
Look for features such as adjustable wattage, full-spectrum output, and high efficiency (μmol/J). These characteristics are vital for indoor yield optimization within a cannabis vertical cultivation environment.
3. Irrigation: Soil, Coco, Hydroponics, or Aeroponics?
Vertical cannabis farming works with any substrate, but some systems scale better:
- Drip irrigation — great for soil or coco, easy to manage.
- Hydroponic vertical cannabis setups — NFT or DWC systems maximize root-space efficiency.
- Aeroponic vertical system — provides exceptional oxygenation for advanced growers.
Key requirements for irrigation in a multi-layer cannabis grow system:
- no uncontrolled dripping from upper layers,
- individual feed lines and drainage for each tier,
- early leak detection via trays or moisture sensors.
For beginners, soil or coco with drip irrigation is often the easiest entry point. Avoid thick organic nutrients, as they clog emitters quickly in vertical cannabis farming layouts.
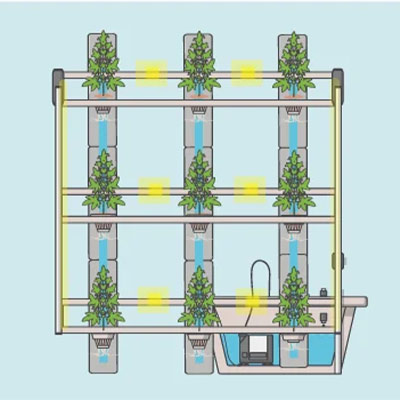
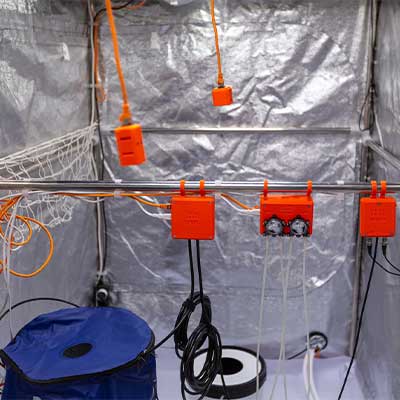
Here’s a visual example of how drip irrigation functions in vertical cannabis cultivation systems.
4. Climate & Airflow Management
Climate control is one of the most challenging aspects of vertical cannabis farming. Hot air rises, making the upper levels more difficult to cool. You will need:
- a powerful exhaust system,
- fresh air intake (active or passive),
- circulation fans for each layer,
- ideally a climate controller to balance temperature & humidity.
Air should move from intake → through all tiers → out the exhaust. This prevents hotspots and maintains stable conditions across your vertical grow setup.
Best Practices for Multi-Layer Cannabis Growing
A multi-layer cannabis grow system is less forgiving than a classic single-layer grow. With the following best practices, you can reduce risk and make the most of your cannabis vertical cultivation.
1. Choosing the Right Strains for Vertical Cannabis Farming
The basic rule is simple: the more compact the genetics, the better they fit into a vertical cannabis farming setup. Very tall, heavily stretching sativas tend to grow into the next tier and cause problems. Ideal are:
- compact indica-dominant strains,
- hybrids with moderate, controllable stretch,
- autoflower strains with predictable plant height.
Equally important is yield in relation to height. You want a strain that stays relatively short but still produces well — perfect for a cannabis vertical grow system that aims to maximize grow space and production.
Recommended Compact Strains for Vertical Setups
Several strains from the Linda Seeds range are particularly well suited for indoor cannabis vertical racks, as they stay compact, respond well to training, and deliver strong yields. Here’s an overview:
| Strain | Genetics / Type | Characteristics for Vertical Systems | Link |
|---|---|---|---|
| Afghan Kush Ryder (World of Seeds) | Autoflower, Indica | Extremely compact structure with heavy buds, ideal for lower tiers when you need robust, stress-resistant plants in a dense cannabis vertical grow system. | Afghan Kush Ryder |
| Auto Bubba's Gift (00 Seeds Bank) | Autoflower, Hybrid | Vigorous but well-controllable structure, resinous flowers; a strong choice for mid-level tiers when you want a balance of density, aroma, and stability. | Auto Bubba's Gift |
| Gnomo (Kannabia Seeds) | Autoflower, Indica | Very low, bushy plants, ideal for tight vertical racks for cannabis where each tier has limited height. | Gnomo |
| Speed Auto (Sweet Seeds) | Autoflower, Hybrid | Very fast from seed to harvest with solid yields at compact size — great if you plan multiple cycles per year in a hydroponic vertical cannabis or soil-based setup. | Speed Auto |
| Cookies Kush (Barney's Farm) | Feminized, Indica | Dense, compact plants with high yield potential; ideal for upper tiers with strong LED grow lights vertical setups and plenty of light intensity. | Cookies Kush |
| Killer Kush F1 Fast Version (Sweet Seeds) | Feminized, Indica-dominant | Fast flowering strain with controllable stretch — perfect when you need predictable height in a multi-layer cannabis grow system with tight vertical spacing. | Killer Kush F1 Fast Version |
| Master Kush (White Label Seeds) | Feminized, Indica | A classic compact indica with a solid, stable structure — excellent for middle tiers in indoor cannabis vertical racks. | Master Kush |
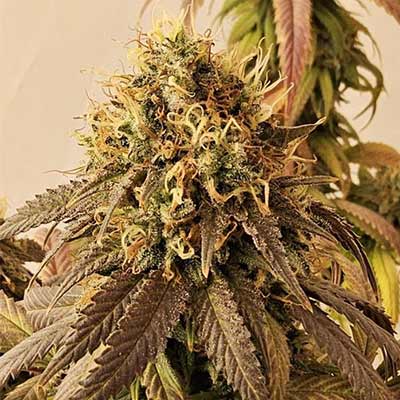
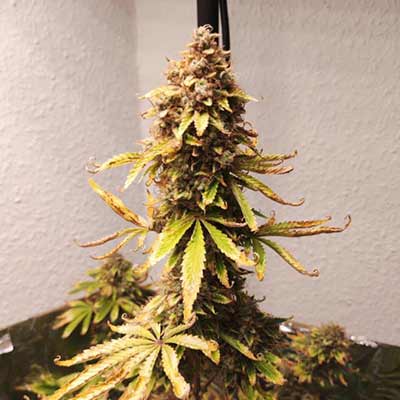
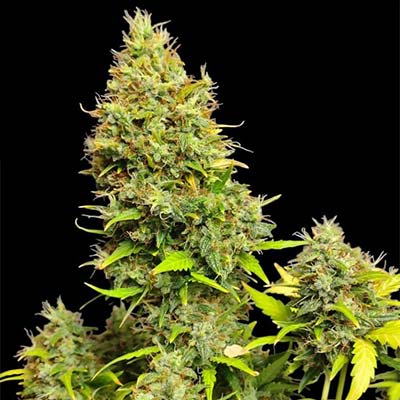
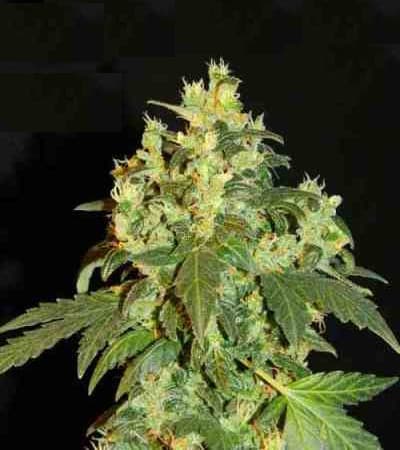
Here you can see how stunning this Auto Bubba’s Gift looks during flowering in a cylindrical vertical grow system. That’s why this strain is highly recommended for this type of cultivation.
2. Managing Light Intensity and Distance
In a vertical grow setup, the distance between LEDs and plant tops is often smaller than in a traditional single-layer tent. Pay attention to:
- using dimmable drivers to fine-tune intensity,
- adapting light levels per tier,
- checking plants frequently for signs of stress, bleaching, or light burn.
Lower levels can often run at slightly lower intensity, while upper tiers — where heat tends to accumulate — require particularly careful adjustment. Start with conservative light levels and increase gradually.
3. Nutrient Management in Vertical Systems
Whether you use soil, coco, or a hydroponic vertical cannabis setup, nutrient management is especially important in vertical cannabis farming, because mistakes can affect multiple tiers at once. Best practices:
- use a nutrient line with clear, easy-to-follow dosing guidelines,
- monitor EC and pH regularly, especially in recirculating systems,
- document your adjustments so you can quickly identify and correct issues.
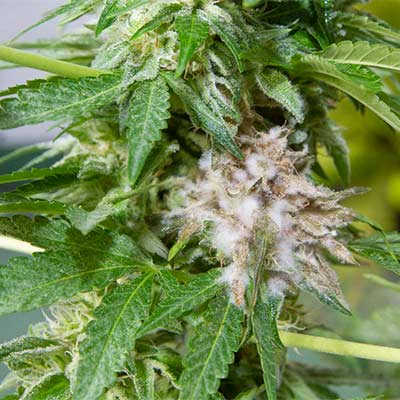
4. Preventing Mold and Pests in Dense Vertical Grows
The denser the cannabis vertical cultivation layout, the higher the risk of mold and pests. Especially critical:
- high humidity during lights-off periods,
- stagnant air around dense buds or corners,
- hard-to-reach spots that rarely get inspected.
Countermeasures:
- provide sufficient air circulation on every level,
- thin out foliage strategically to improve airflow,
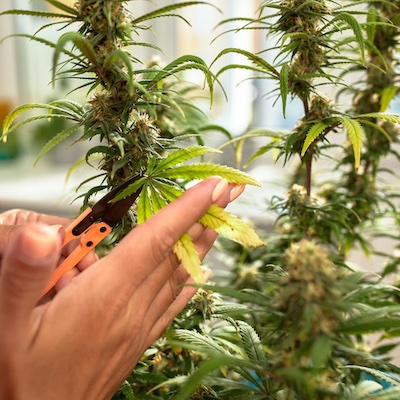
- inspect leaves and buds regularly with a handheld loupe or macro lens,
- use beneficial insects preventively early in the cycle if pest pressure is expected.
Challenges & Pitfalls in Vertical Cannabis Growing
A cannabis vertical grow system comes with clear advantages — but also specific challenges. For homegrowers, it’s crucial to evaluate these realistically before committing to a full vertical cannabis farming layout.
1. Higher Initial Investment
A multi-layer cannabis grow system requires more gear than a simple single-level tent. You’ll typically need:
- stable shelving or professional indoor cannabis vertical racks,
- multiple small LED panels instead of one large fixture,
- additional air circulation fans for each tier,
- a more sophisticated watering setup.
The initial cost is usually higher than a classic beginner grow. But over time, the increased efficiency and ability to maximize grow space can easily compensate for this — especially if you grow regularly or want to achieve indoor yield optimization.
2. Technical Complexity & Planning Requirements
Compared to a simple grow tent with one light, a vertical grow setup requires more detailed planning:
- Electrical circuits need to be safely distributed.
- Cable management must be clean (no cable bundles near water lines).
- The irrigation system must be leak-proof and reliable.
- Climate and airflow must work consistently across multiple tiers.
All of this is absolutely achievable — but you should give yourself enough time to understand your system before running a full grow cycle in a cannabis vertical cultivation layout.
3. Safety Considerations for Homegrowers
Safety becomes even more important in a vertical cannabis farming system:
- Use circuit breakers (RCD/GFCI) and properly rated cables.
- Keep all electrical connections clearly separated from water or nutrient lines.
- Anchor shelves or racks to the wall to prevent tipping — especially in apartments.
- Ensure access to all levels for emergency intervention.
In densely populated regions or smaller apartments, ensuring your vertical grow setup is safe and stable protects not only your plants but also your home and the people around you.
Who Should Consider Vertical Cannabis Farming?
A cannabis vertical grow system is not automatically the best option for everyone. It’s worth taking an honest look at your space, skills, and goals.
1. Homegrowers With Limited Floor Space
If you:
- only have a small room, closet, or storage area available,
- want to harvest regularly without expanding your footprint,
- and are willing to invest some time into planning and setup,
…then growing cannabis indoors vertical farming may be the ideal solution. Especially if you have good ceiling height (e.g., 2.4 m or more), you can turn unused vertical volume into productive grow area.
2. Semi-Professional Growers & Highly Ambitious Hobbyists
If you already have multiple successful grows under your belt, understand EC/pH management, and want to push your efficiency further, a vertical cannabis farming method can take your production to the next level:
- higher yields per cycle,
- more professional workflows,
- transferring commercial techniques into a homegrow environment.
In some legal contexts, a homegrower can build a compact but extremely efficient system using indoor cannabis vertical racks, LED grow lights vertical setups, and precise climate control.
3. Not Ideal for Complete Beginners
If you are just starting out, a vertical grow setup is usually *not* the best first step. You must manage many variables at once — lighting, airflow, irrigation, height control, and nutrient balancing.
Beginners are usually better off starting with:
- a single-layer tent with one LED,
- simple soil or coco grows,
- learning the fundamentals of watering, nutrition, and climate.
After gaining confidence, stepping up to a multi-layer cannabis grow system becomes much easier and much more rewarding.
HowTo – Step-by-Step Guide to Setting Up a Vertical Cannabis Grow
If you’ve decided to implement a vertical cannabis farming system, this step-by-step guide will help you build it successfully.
Step 1: Analyze Your Space & Height
Measure the exact width, depth, and height of your room or grow tent. Determine how many tiers can realistically fit without having the plants or LED panels too close together. Also consider space for air intake, exhaust, and access to each tier.
Step 2: Plan the Shelving or Rack System
Choose a stable heavy-duty shelf or specialized vertical racks for cannabis. Set each tier height so there is enough room for root containers, plant height, and LED clearance. Anchor racks to the wall for safety.
Step 3: Configure the LED Setup
Install dedicated LED grow lights vertical panels or bars for each tier. Use dimmable drivers to adjust intensity per layer. Ensure all cables are routed safely and protected from moisture.
Step 4: Set Up Irrigation & Nutrients
Choose your medium — soil, coco, or a hydroponic vertical cannabis method. Create separate feed lines and drainage for each tier to prevent dripping onto lower levels. Have your nutrient solution ready and monitor EC/pH consistently.
Step 5: Optimize Climate & Airflow
Install exhaust, intake, and oscillating fans for each tier. Test the environment without plants first and measure temperature and humidity at every level. Adjust fan positions until all tiers stay within similar ranges. This is key for grow room optimization.
Step 6: Choose Compact Strains & Place Plants Strategically
Select compact, easily managed genetics suitable for vertical cannabis farming. Place stronger, light-hungry strains on the upper tiers and more sensitive plants on the lower tiers where intensity is lower. This strategic placement helps maximize grow space and ensures balanced development.
Step 7: Test Run & Fine-Tuning
Start your first cycle in your vertical grow setup with conservative plant numbers and moderate light levels. Document any adjustments in lighting, airflow, nutrients, or irrigation. Use this data to continually refine your cannabis vertical cultivation system with each run.
Conclusion: Is Vertical Cannabis Farming Worth It?
Vertical cannabis farming is more than a trend — it’s one of the most effective ways for homegrowers with limited floor space to increase production. A well-designed cannabis vertical grow system can dramatically boost your usable canopy area and allow you to produce more cannabis without needing a larger room.
Key takeaways:
- Main benefits: better spatial efficiency, higher output per square foot, excellent synergy with LED grow lights vertical.
- Main requirements: careful planning, strong environmental control, and a safe irrigation and electrical layout.
- Ideal for: ambitious homegrowers and semi-professional cultivators seeking indoor yield optimization.
Whether or not a multi-layer cannabis grow system is right for you depends on your ceiling height, budget, and skill level. If you’re prepared to invest time in planning and precision, growing cannabis indoors vertical farming can take your production to a significantly higher level.
Linda Seeds offers a wide catalog of compact strains, nutrients, and equipment ideal for vertical growing — from autoflowering varieties to photoperiod indica-dominant strains that thrive in indoor cannabis vertical racks.
Vertical cultivation is more complex and less forgiving than a traditional single-layer grow. But if you enjoy technical optimization and want to maximize grow space without expanding your footprint, experimenting with a vertical grow setup can provide substantial long-term benefits.
FAQ – Frequently Asked Questions About Vertical Cannabis Farming
What is vertical cannabis farming?
Vertical cannabis farming means using not only your floor area but also the height of your room by stacking multiple grow tiers. Instead of one canopy under one light, you grow on shelves or racks across two or more layers. This method increases total canopy area without expanding your room footprint.
What are the advantages of a cannabis vertical grow system?
A cannabis vertical grow system improves efficiency by multiplying usable space, enabling higher yields per square foot. LED technology reduces heat and makes multi-layer setups feasible. Additionally, the structured design often leads to better overall grow room optimization.
Is vertical cannabis cultivation suitable for homegrowers?
Yes — if you have limited floor space but sufficient ceiling height, and you’re willing to plan carefully. For complete beginners, a single-layer grow is usually easier, but intermediate and advanced growers benefit greatly from vertical cannabis farming.
Which strains are best for multi-layer systems?
Compact indica-dominant or balanced hybrids perform best in a multi-layer cannabis grow system. Autoflowering cultivars also work well because of their predictable height and structure.
What equipment do I need for a vertical grow setup?
You’ll need sturdy racks, multiple LED grow lights vertical fixtures, a well-planned irrigation system, strong airflow management, and basic measurement tools for pH/EC. A safe and organized electrical layout is essential, especially when stacking tiers.

Autoflowering Cannabis Seeds: The Ultimate Guide to Fast, High-Yield Grows
Many indoor and outdoor growers rely on autoflowering cannabis seeds these days because they grow fast, flower reliably and deliver stable yields even in small indoor setups or on balconies. In this article, you'll not only learn how to maximize your yield, but also which autoflower strains perform particularly well and what to look for when choosing your seeds.
Modern autoflowering cannabis seeds offer fast cycles (8–12 weeks from germination), a solid yield per plant of 40–300 g and are perfect for small indoor grows and discrete outdoor spots. With the right genetics, strong lighting and a good substrate, you can achieve very consistent cannabis yields for personal use with autoflowers.
- Typical life cycle: 60–90 days from seed to harvest
- Yield indoors: 200–600 g/m² (more in optimized setups)
- Yield per plant: 40–200 g, up to 300 g or more if everything goes right
- Ideal for: beginners, balconies, small tents, multiple harvests per year
- What exactly are autoflowering cannabis seeds?
- Pros and cons of autoflowering cannabis seeds
- Growing autoflowering cannabis seeds indoors
- Autoflowering cannabis seeds outdoors
- Buying autoflowering cannabis seeds
- How to choose the best autoflower strains
- Typical mistakes with autoflowers
- Conclusion
- FAQ – Frequently asked questions
- HowTo – Autoflower Grow Step-by-Step
Autoflowering cannabis seeds have changed homegrowing across Europe and especially in German-speaking countries. In the past, you needed long flowering times, sensitive light schedules and a lot of planning; Today, autoflower seeds allow for fast, simple grows with very decent yields – even in limited space. No surprise that search terms like “buy autoflowering cannabis seeds” , “autoflower indoor grow” or “autoflower outdoor yield” are among the most common queries for homegrowers.
This guide gives you a complete overview of autoflowering cannabis seeds : how they work, their main advantages and limitations, how to maximize your cannabis yield with autos and which strains are especially suitable for big harvests, high THC or discreet balcony grows. The goal is that, by the end of this article, you know exactly which autoflowering cannabis seeds fit your situation – and how to get the most out of them in your setup.
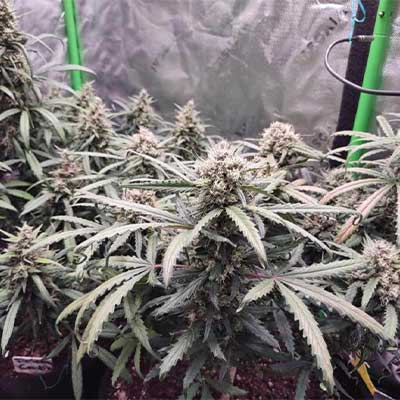
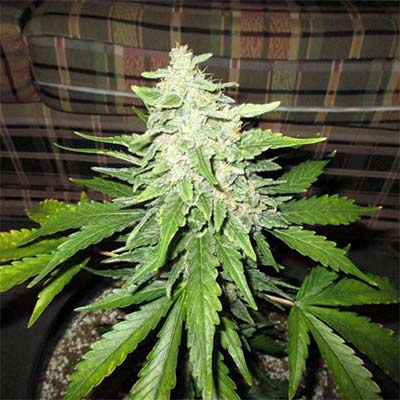
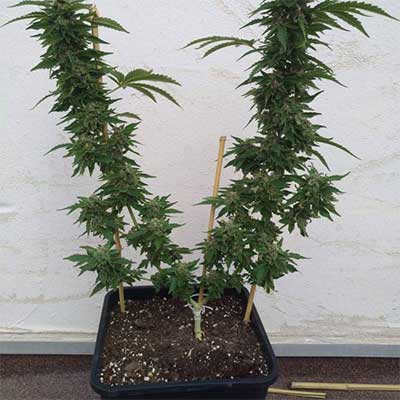
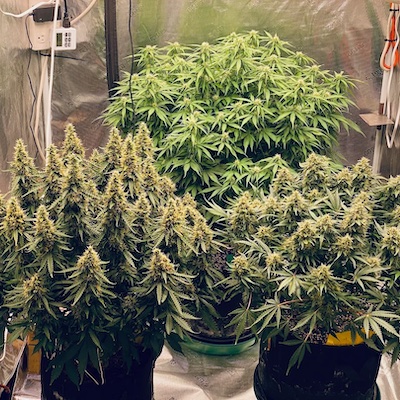
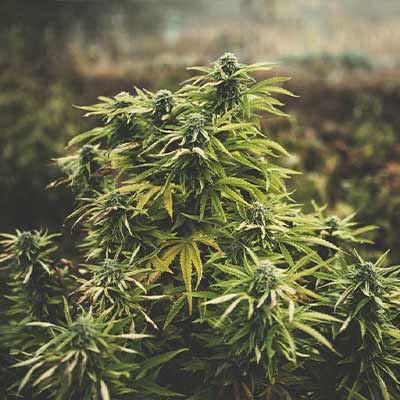
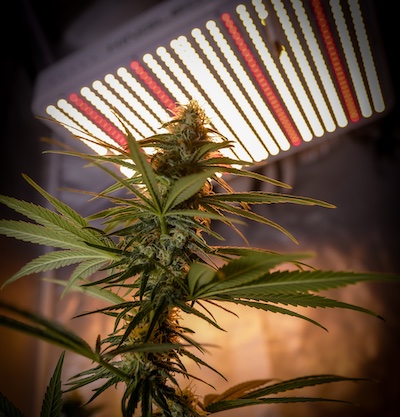
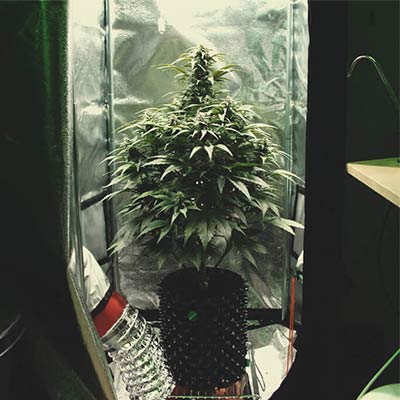
You can grow it indoors or outdoors. Here you can see a plant in the middle of its flowering phase in an indoor setup.
What exactly are autoflowering cannabis seeds?
Classic photoperiod cannabis strains only start flowering once the light cycle changes – typically to 12/12 hours of light and darkness. Autoflowering cannabis seeds are based on genetics with a share of Cannabis ruderalis. These plants start flowering automatically, regardless of the light schedule, once they reach a certain age. They have been developed over the last 15–20 years through targeted breeding.
For you as a grower, this means:
- No need to switch to 12/12 – the plants flower by themselves.
- Shorter total life cycle – usually 8–12 weeks from germination to harvest.
- Multiple harvests per year in the same grow space are possible.
- Ideal for small tents, stealth grows and spontaneous projects.
Modern autoflower strains have very little in common with the weak, early ruderalis lines of the past. Thanks to intensive breeding work, high-quality autoflowering cannabis seeds now reach THC levels of 20 % and more, come with strong terpene profiles and – if grown correctly – can deliver very impressive yields per plant.
Pros and cons of autoflowering cannabis seeds
Main advantages
- Short cycles: often only 60–90 days from germination to harvest. Ideal if you want to refill your jars quickly.
- Flexible lighting: autoflowers can grow and flower under 18/6 or even 20/4, which is perfect for indoor autoflower grows.
- Discreet plants: compact growth, well suited for balconies, small gardens or terraces.
- Beginner-friendly: no need to switch the light cycle, less stress with timing.
- Several outdoor runs per season: in temperate climates, 2–3 autoflower outdoor runs per year are realistic.
Possible downsides
- No real “reset”: since flowering is age-dependent, you cannot simply correct growth mistakes by extending veg.
- Limited plant size: many autos stay deliberately small – great for stealth, but limiting yield per plant.
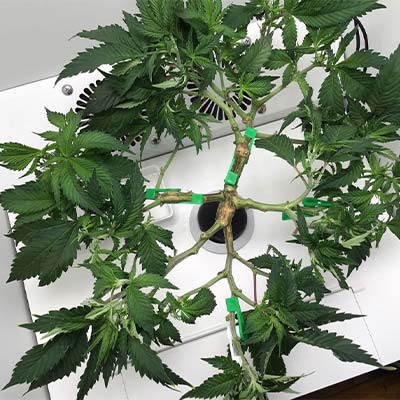
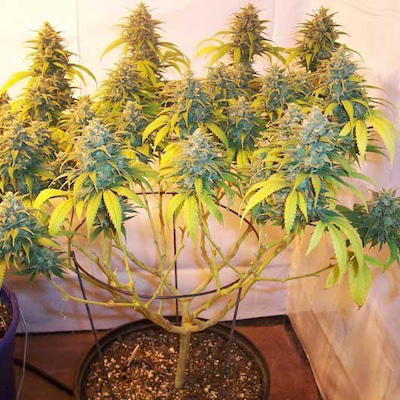
- Training only in moderation: heavy topping or aggressive high-stress training is often risky due to the short life cycle. Low-Stress Training (LST) or SCROG works much better.
If you keep these points in mind, autoflowering cannabis seeds become a very powerful tool to maximise your cannabis yield – even in small, low-profile setups.
Growing autoflowering cannabis seeds indoors: optimising yield per m²
For many growers in Europe, indoor growing with autoflowers is the first choice. The goal: to get as many grams per m² and per watt out of the tent as possible – without blowing up the budget.
Light and photoperiod
Autoflowers do not depend on the light cycle, so you can keep them under 18/6 or 20/4 from start to finish. Common schedules are:
- 18/6: a very good balance between growth, flowering and power costs.
- 20/4: slightly more growth/yield at the cost of a bit more electricity.
More important than the exact number of hours is the light intensity (PPFD) and an even distribution. For indoor autoflowers, 600–800 µmol/m²/s in flower is a very good target range; high-quality LED grow lights make it easy to reach this efficiently.
Pot size and layout
Typical pot sizes for autoflowers in a tent:
- 7–9 L for dense grows with many plants.
- 11–15 L for fewer, larger plants with higher yield per plant.
For a 1 m² grow, for example:
- 9–12 plants in 7 L pots (focus on yield per m²).
- 4–6 plants in 11–15 L pots (focus on big single plants).
| Criteria | Autoflower | Photoperiod |
|---|---|---|
| Both types can deliver great yields – autoflowers shine with speed and simplicity. | ||
| Life cycle | ~60–90 days (seed → harvest) | ~70–140 days (including veg and flower) |
| Yield per m² | 300–600 g/m² (more in optimised setups) | 400–700 g/m² (even more in pro setups) |
| Control | No light switch needed | Veg/flower via 18/6 → 12/12 |
| Forgiving mistakes | Less time to correct issues | Veg phase can be extended |
Recommended autoflowering strains (short list)
For growers who want to achieve high yields quickly and efficiently, the following autoflowering cannabis seeds are especially interesting:
| Strain | Yield | Life cycle |
|---|---|---|
| Auto Gorilla Glue #4 |
Very high 200–300 g/plant |
60–75 days |
| Auto Wedding Cake |
High 120–250 g/plant |
60–75 days |
| Auto Amnesia Haze |
High 100–250 g/plant |
70–85 days |
| Auto Critical |
Stable & high 90–320 g/plant |
60–70 days |
Nutrients and watering
Autoflowers generally like similar conditions to photoperiod plants, but they are often a bit more sensitive to overfeeding – especially in the first weeks. Some practical tips:
- Start with 50–70 % of the manufacturer’s recommended dose and increase slowly.
- Use a well-draining medium (soil/coco with perlite).
- Avoid waterlogging – better moderate, regular watering.
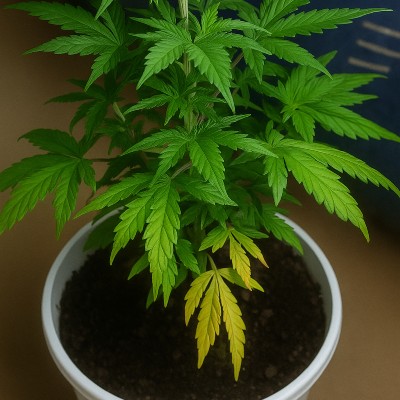
- Watch leaf colour: very dark = too much N; very pale = potential deficiency.
Autoflowering cannabis seeds outdoors: multiple harvests per season in temperate climates
Thanks to their short life cycle, autoflowering cannabis seeds are perfect for discreet outdoor grows, balcony projects and guerrilla spots. Especially in temperate climates in Central Europe or many parts of the US, it can be very rewarding to plan several runs per season.
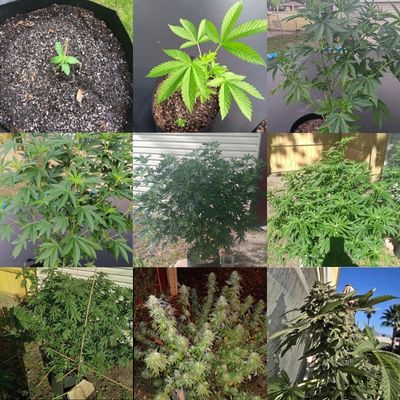
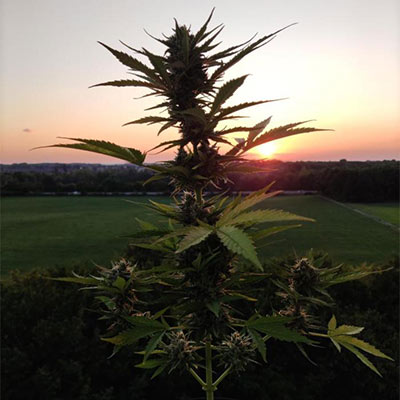
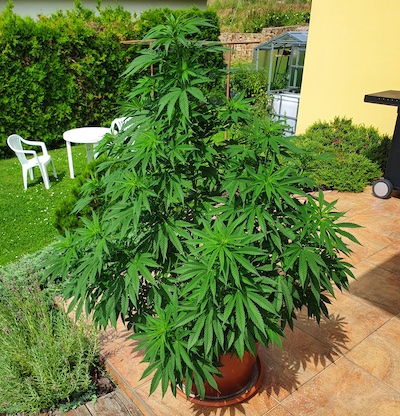
Outdoor autoflowering plants can become enormous. If you plant in March, April, or May, the yield can be XXL.
Timing and season planning (temperate climates)
In many temperate regions (for example Central Europe or large parts of the northern US), the following rough windows can work:
- Early run: sow in April/May → harvest in June/July (only where late frosts are unlikely or with protection).
- Main season: sow in May/June → harvest in July/August (peak sun intensity).
- Late run: sow in July/August → harvest in September/October (watch for autumn rain and mould risk).
For high outdoor yields with autoflowers, the main season and – in favourable spots – a late run are usually the most interesting. Strong summer light is the key driver for cannabis yield in temperate climates.
Location and stealth
Autoflowers are ideal for:
- Balcony and terrace grows (compact plants, often 60–100 cm).
- Small, sunny backyard or garden spots.
- Hidden guerrilla spots with good access to sunlight.
Outdoors, pay attention to:
- At least 5–6 hours of direct sun per day – more is better.
- Good airflow to prevent mould and bud rot.
- Pots large enough (10–20 L) to increase yield per plant.
Buying autoflowering cannabis seeds – selection and recommendations
Looking for fast, high-yielding autoflowers for your next indoor or outdoor grow? In this category you’ll find a wide range of modern autoflowering cannabis seeds – from compact stealth strains to XXL autos with impressive yields.
How to choose the best autoflower strains
The market for autoflowering cannabis seeds is huge. To find the best autoflower strains for your grow, it helps to ask yourself a few key questions:
1) What is your main goal?
- Maximum yield: choose high-yielding autoflowers with XXL / High-Yield specs.
- High THC: go for THC-rich autoflower strains (20 %+ THC according to the breeder).
- Stealth and balcony grow: compact, low-growing strains with a more discreet aroma.
- Flavour and terpenes: terpene profiles that suit your taste – fruity, gassy, kush, haze, dessert-style, etc.
2) Indoor or outdoor?
Many modern autoflower seeds work well both indoors and outdoors, but some strains have very clear strengths:
- Indoor-focused: very compact structure, short life cycle (e.g. 65–75 days), ideal for SOG/SCROG.
- Outdoor-focused: more robust plants, better resistance to mould, more tolerant of temperature swings.
3) Your experience level
Beginners should start with robust hybrids among the autoflowering cannabis seeds that forgive smaller mistakes and don’t take excessively long. Advanced growers can experiment with very potent or ultra-productive autoflower strains.
Typical mistakes with autoflowers – and how to avoid them
- Too much stress early on: transplant shock, heavy topping or radical pruning in the first 3–4 weeks can drastically reduce autoflower yield.
- Overfeeding: high EC too early slows growth; it’s better to start low and increase as needed.
- Pots that are too small: limit root development and therefore potential yield per plant.
- Incorrect lighting setup: too little light leads to airy buds; too much intensity or lights too close burn leaves and flowers.
If you avoid these mistakes and instead focus on strong lighting, a suitable substrate, reasonable pot sizes and steady, stress-free growth, you can achieve very consistent cannabis yields with autoflowering cannabis seeds.
Conclusion: autoflowering cannabis seeds – the fast track to stable yields
Autoflowering cannabis seeds are no longer just a niche product for impatient growers. They are a fully-fledged tool for ambitious homegrowers who want strong results with a manageable amount of work, limited space and clear planning.
Whether you want to run an indoor autoflower grow in a 60×60 cm tent or plan several fast outdoor harvests on a balcony or terrace – with the right genetics, good lighting, clean nutrient management and a bit of experience, autos can deliver very impressive cannabis yields.
If you want to get started right away, you’ll find a large selection of autoflowering cannabis seeds for indoor and outdoor grows at Linda Seeds:
- Top 10 autoflowering cannabis seeds
- THC-max autos for maximum potency
- Affordable but high-quality autoflowering strains from Linda Seeds
FAQ – Frequently asked questions about autoflowering cannabis seeds
How much does a single autoflower plant yield?
This depends heavily on genetics, pot size, light and experience. Realistic values are 40–150 g per plant; under optimal conditions and with XXL genetics, ~200–300 g are possible. For planning, yield per m² is often a more useful metric than grams per plant.
How many grams per m² are realistic with autoflowers?
Beginners typically achieve 250–400 g/m²; more experienced growers with strong LEDs, suitable genetics and plant training reach 400–600 g/m². Highly optimised setups can go beyond that.
How long does a full autoflower grow take?
Most autoflowering cannabis seeds take around 70–90 days from germination to harvest. Some very fast strains finish in about 65 days, while very potent varieties may need a bit longer.
Are autoflowers less potent than photoperiod strains?
In the past, yes – but not anymore. Modern autoflower seeds can reach THC levels of 20 % and more. Potency depends mainly on genetics and grow quality, not simply on whether the plant is automatic or photoperiod.
Are autoflowers good for beginners?
Yes. Because you don’t need to change the light cycle and the life span is limited, autoflowers are perfect for first grows, small projects and anyone who wants fast results. The key factors are good lighting, a simple feeding schedule and patience during the first weeks.
Can I grow autoflowers and photoperiod strains together?
Yes – if you run, for example, 18/6 or 20/4, the photoperiod plants will stay in veg while the autoflowers are already blooming. Once you want to flower the photoperiods, you either need a separate 12/12 space or you plan the switch so that the autos are harvested by then.
What is the optimal pot size for autoflowers?
Indoors, 7–11 L per plant works very well. Smaller pots keep plants compact (good for stealth); larger pots allow more root mass and potentially higher yields. Outdoors, 15–20 L per plant can be a good reference.
How can I increase the yield of my autoflowers?
Invest in efficient LED lighting, an airy medium, proper pH/EC management and gentle training (LST). Avoid stress in the first weeks, keep the climate stable and choose genetics described as high-yielding autoflowers.
HowTo — Autoflower Grow Step-by-Step (Indoor)
A practical checklist for planning a stable, high-yield grow using autoflower cannabis seeds in an indoor setup.
Required Supplies
- LED grow light ≥2.3 µmol/J (200–300 W for 2×2 ft / 3×3 ft tents)
- Grow tent with exhaust fan + carbon filter
- pH and EC meters
- Aerated substrate (soil or coco with perlite)
- Base nutrients for veg & bloom
- Autoflower cannabis seeds
Tools
- Sharp, clean trimming scissors
- Thermo-hygrometer
- Timer (18/6 or 20/4 schedule)
- Prepare the grow space: Clean the tent, adjust light height, ensure proper airflow. Ideal temps: 75–79 °F (24–26 °C) during lights-on, 65–72 °F (18–22 °C) at night.
- Germination: Plant directly into the final pot (2–3 gal / 7–11 L) to avoid transplant shock.
- Early vegetative stage: Moderate light intensity, light feeding (50% strength), no topping at this stage.
- Light training: Once the plant shows 4–5 nodes, begin LST (bending branches gently to widen the canopy).
- Adjusting nutrients: Increase PK at early bloom, monitor pH/EC, watch leaf color for signs of excess or deficiency.
- Stable climate: Reduce humidity to 40–50% during flowering, maintain good airflow to prevent mold.
- Check maturity: Harvest when most trichomes turn milky.
- Dry & cure : Slow dry for 10–14 days, then cure for 2–4 weeks in glass jars to maximize flavor and potency.

Cannabis viruses (HLVd, TMV & more) – How to detect, test & prevent viruses in cannabis plants
Viruses in cannabis plants – invisible, persistent and often hard to spot at first: in this guide you’ll learn how to identify viral infections early, which pathogens are really dangerous and how to reliably protect your plants.
- Robust genetics for stable growth & stress-tolerant plants
- High germination rate & clean marijuana seed quality – less pathogen risk
- Fast shipping, wide selection, fair prices
- What are viruses in cannabis plants?
- Which cannabis viruses and viroids exist – and which are widespread?
- What symptoms do cannabis viruses cause?
- Identifying cannabis viruses – how can you really be sure?
- How are viruses transmitted?
- What to do against viruses in cannabis plants?
- Can purchased seeds already be infected?
- How does Linda Seeds make sure our marijuana seeds are virus-free?
- Preventing cannabis viruses – practical hygiene tips for your grow room
- Homegrow vs. commercial cultivation
- FAQ
Viruses in cannabis plants: how to detect, manage & safely avoid them
Viruses are one of the invisible but most dangerous threats in cannabis cultivation. Unlike visible pests such as thrips or spider mites, they often cause slow, confusing symptoms. Growth stalls, leaves look oddly deformed, cuttings suddenly show classic “dudding” – and before you know it, half your grow room is affected.
This guide sheds light on the topic: you’ll learn which cannabis viruses really matter, how to spot the most typical signs, which tests work and – even more important – how to actively prevent infections. Because once viruses are inside your system, they can spread rapidly through cuttings, tools, roots or even pests.
What are viruses in cannabis plants?
Viruses are tiny genetic particles that can’t survive on their own. They need living plant cells to multiply – and that’s exactly what makes them so dangerous. Unlike fungi or bacteria, there is no direct treatment: neither a spray nor a nutrient can “cure” a virus. The only real solution is to regenerate plants via meristem or tissue culture in a specialised lab. There are already a few mobile lab kits for home use, but they’re expensive and in practice not worth it for the average homegrower.
What makes viruses particularly sneaky:
- They remain undetected for a long time, especially viroids such as HLVd (“Dudding Disease”).
- They are highly infectious – often one tool or a single clone is enough.
- There are hardly any strong resistances to specific viruses in cannabis.
- No plant protection product can eliminate viruses once they’re inside the plant.
This means your key levers are prevention, identification and clean genetics. Especially in homegrows, many cultivators underestimate the risk – until the first batch of cuttings just won’t grow properly.
Which cannabis viruses & viroids exist – and which are widespread?
There are many different plant viruses – but for cannabis a few are particularly relevant. In recent years, viroids such as Hop Latent Viroid (HLVd) have caused major problems, first in the USA and increasingly in Europe as well.
The most important virus & viroid pathogens at a glance
Below is an overview of the main pathogens and their key characteristics:
- Hop Latent Viroid (HLVd): the most notorious viroid, responsible for “Dudding Disease”: massive yield loss, thin stems, very low resin production.
- Tobacco Mosaic Virus (TMV): causes mosaic-like leaf patterns; very stable in the environment, therefore potentially dangerous.
- Tomato Mosaic Virus (ToMV): similar to TMV, and can also infect cannabis.
- Cucumber Mosaic Virus (CMV): leads to leaf deformities and unnatural patterns.
- Alfalfa Mosaic Virus (AMV): less common, but can slow down growth.
- Arabidopsis Latent Virus: very rare, but documented.
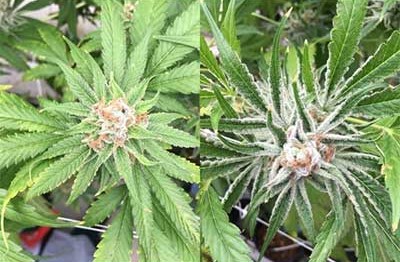
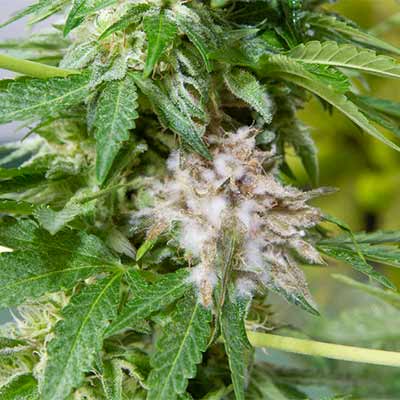
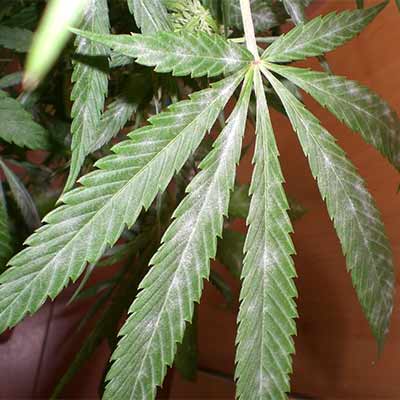
Healthy cannabis plant vs. HLVd-infected cannabis plant.
Not all of these viruses are equally dangerous. Some are more “cosmetic”, while HLVd is a real economic problem – especially in commercial facilities, where thousands of cuttings can become infected within weeks.
What symptoms do cannabis viruses cause?
Symptoms are often subtle, especially in the beginning. Many growers mistake virus signs for nutrient issues or environmental stress. That’s exactly what makes viral infections so treacherous.
Typical symptoms of viral infection
- Dwarfing / stunted growth: plants lag behind their normal development.
- “Dudding”: very low bud density, hardly any trichomes – typical of HLVd.
- Mosaic patterns: irregular light-and-dark areas on leaves.
- Leaf deformities: twisted, curled or clearly asymmetrical leaves.
- Thin stems: weak structure and little mechanical strength.
- Reduced yield: sometimes 50–70% losses or more.
One important clue: viruses do not cause single “bite marks” like pests do. The damage is systemic – the whole plant just looks “off” and unhealthy.
Identifying cannabis viruses – how can you really be sure?
Because viruses are invisible, visual diagnosis alone is rarely 100% reliable. Visual signs help, but they’re not definitive. For clear results there are two realistic options today:
1. Rapid test at home (e.g. Altus Plant Molecular Test Kit)
These kits work similarly to Covid rapid tests – just for plants. The Altus Plant Molecular Test Kit is one of the best-known tools for HLVd. It detects viroid material directly in plant tissue.
Advantages:
- Results in less than an hour
- Ideal for homegrowers who want to check new clones before they enter the room
- Helps prevent accidentally bringing infected plants into an otherwise healthy setup
Important: these tests give a very good indication – but for 100% certainty a professional lab test is still the most reliable option.
2. Professional lab analysis
Labs use PCR-like techniques to detect even extremely small amounts of viroids. This is especially important in large-scale operations, where one mistake can quickly cost tens of thousands of euros.
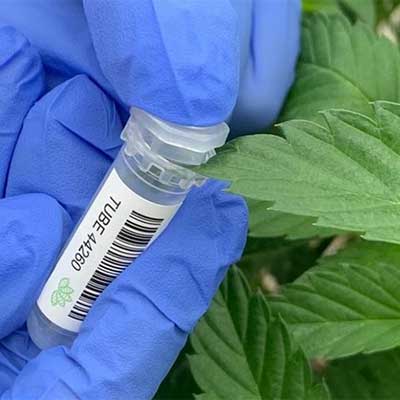
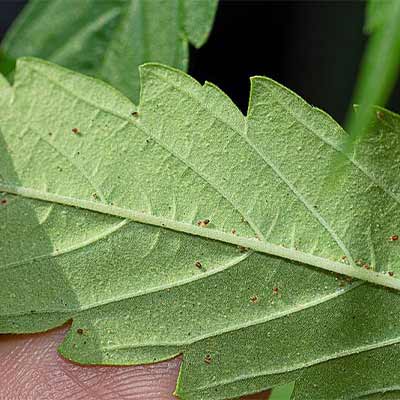
Virus test on a cannabis leaf.
How are viruses transmitted in cannabis plants?
The unpleasant truth: viruses & viroids often spread faster than you think. While pests like spider mites or fungus gnats are immediately visible, viruses usually enter your grow room silently – most often via clones or contaminated tools. Because cannabis is propagated vegetatively (via cuttings) in many setups, viruses pose a particular risk.
Most common transmission routes
- Cuttings / clones: the number-one infection factor. One infected clone can “dud” an entire grow.
- Contaminated tools: scissors, blades, nets, tweezers and even bamboo stakes.
- Pests: thrips, aphids and fungus gnats can carry viroids mechanically from plant to plant.
- Direct plant contact: through growing shoots, trellis systems or wounds from handling and transport.
- Root systems: shared drain lines or “root pressure” in the same substrate can favour transmission.
- Hands & clothing: growers often don’t realise how quickly they themselves become carriers.
One unsterile work session can be enough to spread the virus from plant to plant. Especially when pruning, topping or defoliating, disinfection is absolutely essential.
What to do against viruses in cannabis plants?
The most important rule when dealing with cannabis viruses is simple: you cannot cure viruses – but you can stop them from spreading. Once a plant shows clear symptoms or tests positive, you should act decisively to protect the rest of your grow.
1) Immediately isolate or remove infected plants
Even if it hurts: a plant with strong virus suspicion is a risk for the whole grow. The earlier you isolate it, the better your chances of containing the spread. With HLVd, removing infected plants is often the only sensible option.
2) Sterilise tools & hands
Use isopropyl alcohol (70–99%), hydrogen peroxide or chlorine cleaners. This is especially important after each cut, transplant or LST / SCROG session. One “bad minute” with a dirty tool can start a full infection chain. The goal is to internalise clean workflows, work “sterile by default” and turn hygiene into a habit.
3) Structure your workflow
A common pro trick: always work from the healthiest plants to the questionable ones – never the other way around. This minimises mechanical spread of pathogens. If you think a plant might be infected, work on it last, after you’ve finished pruning and training all other plants.
4) ALWAYS quarantine clones & external genetics
Many modern growers use test kits such as the Altus Plant Molecular Test Kit as a routine tool for new cuttings. These tests help prevent invisible viroids from entering an otherwise healthy ecosystem. Many traded clones come with viruses – or at least with pests.
For maximum security, a professional lab test is still the gold standard, especially for large rooms or mother plants that will produce many clones. For a typical homegrower, however, this isn’t strictly necessary.
5) Minimise stress
Stress does not cause viruses, but it can weaken infected plants even further. Stable temperatures, moderate light intensity and healthy roots support the plant’s natural defences.
Robust, resilient strains for stress & virus pressure
Genetics can’t magically block viruses from entering – but some strains are generally more resilient, forgive stress more easily and stay stable under less-than-perfect conditions. Here are eight particularly robust strains from the Linda Seeds range:
Can marijuana seeds transmit viruses – or be delivered already infected?
Short answer: no – in real-world growing, marijuana seeds practically do not transmit viruses. Most plant viruses need active plant tissue to multiply. A dry, fully mature seed doesn’t provide the moisture or living structures they require. In everyday grow practice, this means seeds play virtually no role in virus transmission – the real risk almost always comes from cuttings and contaminated tools.
In scientific literature there are theoretical cases from other crops where viruses can be present in seeds, but these involve agricultural species with completely different biological conditions. For cannabis, up to now virus transmission via seed has practically never been confirmed in real grow situations.
Well-known cannabis viruses such as HLVd, TMV or CMV need fresh plant tissue. A seed survives drying and storage precisely because it is not growing actively – meaning viruses cannot keep multiplying inside it.
- Infected clones
- Contaminated tools
- Sap-sucking insects such as thrips or aphids
- Dirty large-scale grow equipment
For seed buyers this means: the risk of introducing a virus into your grow by simply buying marijuana seeds is close to zero. The crucial factor is how professional the seed producer works – and this is exactly where Linda Seeds maintains very high standards.
How does Linda Seeds make sure our marijuana seeds are virus-free?
At Linda Seeds we follow clear, professional routines to ensure that our mother plants and the seeds produced from them remain free from viruses and other pathogens. Our internal workflows are based on modern processes from professional plant breeding. If you want to start with fully tested genetics, you’ll find our selection of robust, virus-tested marijuana seeds here .
1. Quarantine for new genetics
Every new strain we add to our programme is first placed into a separate quarantine zone. There we closely monitor all plants and test them before they’re allowed into production.
2. Regular virus tests on all mother plants
We use rapid tests such as the Altus Plant Molecular Test Kit, which also allows homegrowers to get reliable first results. In addition, we carry out professional lab analyses at regular intervals to make sure all plants stay virus-free.
3. Hygienic work processes
Tools are disinfected before every use, work surfaces are cleaned and rooms are run under controlled conditions. This prevents mechanical transmission – the most common infection route for plant viruses.
4. Immediate action in case of suspicion
If a plant shows abnormalities or a test comes back positive, it is isolated immediately. Only after repeated testing do we decide whether it will be removed. This reliably prevents further spread.
Result: Linda Seeds customers receive healthy, tested, high-quality seeds – free from the currently known cannabis viruses and ideal for a safe, successful grow.
| Strain | Type | THC level | Key traits |
|---|---|---|---|
|
Sativa dominant White Truffle |
Sativa | Very high | Very stable genetics, high stress tolerance, copes well with climate and light fluctuations. |
|
Hybrid Gorilla Glue #4 |
Hybrid | Very high | Extremely robust, very forgiving under stress, strong resin production even in less-than-perfect conditions. |
|
Sativa classic Amnesia Haze |
Sativa | High | Time-tested, very stable, handles climate fluctuations well, low sensitivity to typical grow stress factors. |
|
Indica power Critical 2.0 |
Indica | Medium–high | Very easy to grow, forgiving, stable structure – perfect for homegrows and challenging environments. |
|
Autoflower hybrid Auto Gelato #33 |
Autoflower hybrid | Very high | Almost unshakeable, stays stable despite stress, ideal for fast runs and changing climate conditions. |
|
Autoflower hybrid Auto Apple Fritter |
Autoflower hybrid | Very high | Tough, strong and reliable – one of the most robust autoflowers. Great choice for unstable climate & light situations. |
|
Aromatic auto hybrid Auto Cherry Kush Coke |
Autoflower hybrid | Very high | Very stable, tolerates higher humidity, compact, dense buds, strong and flavourful. |
|
Autoflower sativa Auto Amnesia Haze |
Autoflower sativa | Very high | Stable sativa auto, rarely causes problems, robust genetics – an excellent choice when virus pressure or stress is a concern. |
Why robust strains help under virus pressure
Of course no genetics are truly “virus-resistant”. But robust strains forgive more mistakes, cope better with slightly suboptimal conditions and cushion stress that would otherwise make plants more susceptible. Especially for homegrowers, that’s a huge advantage.
Preventing cannabis viruses – practical hygiene tips for your grow room
The best weapon against viruses is not treatment, but prevention. Growers who consistently follow their hygiene routines almost never have problems with HLVd, TMV or other pathogens. Even at home you can reach a surprisingly professional level with simple measures.
The most important hygiene rules
- Never bring untested clones into your setup – always test or keep them in quarantine for at least 14 days.
- ALWAYS keep tools sterile – disinfect scissors, scalpels, nets and training tools after use.
- Wash hands & use gloves – especially when doing any cutting.
- Disinfect work surfaces – especially when transplanting, taking cuttings or trimming.
- Keep drain systems clean – standing water promotes disease transmission.
- Control pests consistently – they often act as mechanical carriers.
Additional pro tips
Many professional facilities work with routines that also make sense in homegrows:
- “Clean start” routines – every new run begins in a freshly cleaned tent or room.
- Disposable blades or separate tools for mother plants and cuttings.
- Colour-coded tools (e.g. red = possible infected area, green = healthy plants).
- No sharing of clones with friends – this is by far the biggest infection factor.
Homegrow vs. commercial cultivation
Virus management looks very different depending on grow size. Homegrowers usually work with only a few plants, while commercial operations may handle thousands of cuttings every day. This intensity of handling makes commercial setups particularly vulnerable.
Homegrow: advantages & risks
Homegrowers have the advantage of full control over their setup. With only a few plants it’s much easier to implement strict hygiene. At the same time, the biggest risk is often introducing a virus via external clones.
- Advantages: few vectors, easy monitoring, cheap tests.
- Risks: clones from friends, lack of tool hygiene.
Commercial cultivation: advantages & risks
Large operations have clearly defined workflows and hygiene plans – but also far more plant movement. One infected mother plant can cause severe economic damage.
- Advantages: well-organised processes, access to professional testing.
- Risks: many employees, constant plant movement, high clone demand.
This is why many commercial facilities already work with a combination of regular HLVd testing, quarantine & PCR lab analysis.
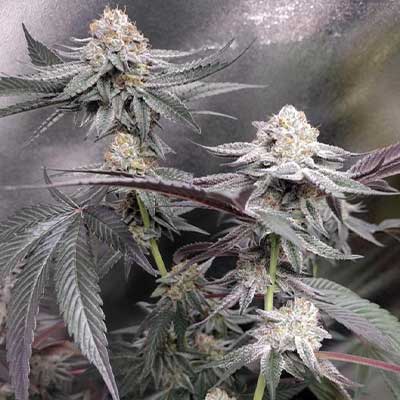
Healthy Oreoz plant in homegrow, with resinous buds and good color.
FAQ – Frequently asked questions about viruses in cannabis plants
What are viruses and viroids in cannabis plants?
Viruses and viroids are tiny pathogens that disrupt the metabolism and growth of cannabis plants. They don’t create classic fungal spots, but typically cause stunted growth, leaf abnormalities and yield loss.
How can I tell if my cannabis plants have a virus?
Typical signs are asymmetrical or “crinkled” leaves, slowed growth, weak side branches, small buds and plants that overall look weak or “dudded”. Only specific rapid or lab tests can give you a reliable diagnosis.
Can marijuana seeds transmit viruses or arrive already infected?
In practice this plays almost no role. Most cannabis viruses need living plant tissue. Dry, mature seeds hardly provide a basis for this, so the risk of virus transmission through marijuana seeds is considered extremely low.
How are viruses mainly spread in a grow room?
In real grow situations, virus infections almost always come from infected cuttings, contaminated tools, pests or poor hygiene routines. That’s why hygiene, quarantine and regular checks are more important than fear of “infected seeds”.
What should I do if I suspect a virus in my grow?
Isolate suspicious plants immediately, thoroughly disinfect tools and hands, and run tests (rapid or lab). If the infection is confirmed, remove affected plants and clean the area before bringing in new material.
How can I prevent viruses in a homegrow?
Don’t accept untested clones, keep new genetics in quarantine, disinfect tools and surfaces regularly, control pests and always work from healthy to suspicious plants. This dramatically reduces the risk of virus spread.
Are commercial grows more affected by viruses than homegrows?
Yes. Because of the large number of plants, constant clone production and frequent genetic exchange, virus pressure is much higher in commercial grows. There, testing programmes, quarantine zones and strict hygiene protocols are essential.
How does Linda Seeds ensure that its seeds are virus-free?
Linda Seeds works with quarantine for new genetics, regular virus testing of mother plants (for example with Altus Plant Molecular Test Kits and lab analyses) and strict hygiene in seed production. Only healthy, tested plants are used for seed production.

How your growing style affects THC levels – and how to increase them
Boosting your THC level – your grow style decides how much potency actually ends up in your buds. Here you’ll learn which factors really matter and how to get the maximum THC level out of your plants.
- High-THC strains for maximum potency
- Indoor, outdoor & autoflower genetics for every grow style
- Tested quality, fast shipping & fair prices
- What does THC level mean – and where is the limit?
- Genetics & strains – which ones hit the highest THC levels?
- Grow styles compared: indoor, outdoor, greenhouse, autoflower
- The most important factors that influence your THC level
- Practical workflow: from setup to potent harvest
- 7 levers for higher THC levels
- Four especially high-THC strains in detail
- Grow style comparison for maximum THC level
- Mistakes that cost you THC
- Workflow: 9 steps to more THC in the jar
- Further internal links
- FAQ
Sometimes it all starts with a simple thought: “How do I actually get more THC from my plants?” You’ve got the right genetics, your tent is running, the plants look healthy – and yet you keep wondering if there shouldn’t be a lot more potency in there. That’s exactly where your grow style comes in. Light, climate, training, nutrients, harvest timing, drying – all of that decides whether your buds end up somewhere in the middle of the field or turn into real power bombs with a very high THC level.
This guide gives you a practical look at how much THC a plant can realistically produce, which strains can reach especially high THC levels, and which screws you need to turn in your grow to boost the THC level in a targeted way. No myths, no marketing fairy tales – just honest tips from real grow practice and experience.
What does THC level mean – and where is the maximum?
The THC level describes the percentage of tetrahydrocannabinol in your dried buds, usually given as a percentage of dry weight. Many modern strains today are in the range of 18–25% THC, while genetics with a high THC level can reach 30% THC or more under optimal conditions.
It’s important to distinguish between:
- Genetic potential – the upper limit that can be reached under lab conditions
- Real-world home grow results – what you actually harvest in your tent or garden
In practice, many grows end up 5–15 percentage points below the theoretical maximum. That means: if a strain hits 28% THC in the lab, then 13–23% THC at home is absolutely realistic – assuming your grow style is on point.
Your job as a grower is not to beat the genetics but to make sure the plant grows as close as possible to its genetic THC ceiling. That’s what the rest of this guide is all about.
Genetics & strains – which ones hit the highest THC levels?
Before we talk about light, VPD and training, one thing has to be clear: without strong high-THC genetics, there will be no high-THC harvest. You can have the best grow style in the world – but you’ll never turn a CBD-dominant or mild strain into a 30%-THC monster.
High-THC strains are characterized by:
- a very strong resin production (dense trichome layer)
- dense, compact buds (mostly with indica strains; sativas can also produce airier buds with very high THC levels)
- often an intense, complex terpene profile
Typical examples of strains with a very high THC level are:
- Gorilla Glue #4 – famous for extremely sticky buds and a heavy-hitting effect
- Bruce Banner – a powerful hybrid, leaning towards a sativa-style high with a very high THC potential
- Lemon Cherry Gelato – a modern “candy strain” with a strong THC level
- Apple Fritter – a US strain with an uplifting effect and very high THC level
- Permanent Marker – a Cali strain with serious THC power and a slight “marker pen” note in the aroma
If your goal is maximum potency, you should use our Seedfinder and filter specifically for terms like “extrem hoher THC-Gehalt” or “starke THC-Sorten” (very high THC level / high-THC strains). In the category feminized cannabis seeds with a very high THC level you’ll find suitable genetics to build your grow style around.
Grow styles compared: indoor, outdoor, greenhouse, autoflower
Your grow style has a direct impact on your THC level. Not because one style magically produces more THC, but because each of them offers a different level of control over light, climate and stress.
Indoor grow: You have maximum control over light intensity, spectrum, temperature, humidity and CO₂. That makes indoor the grow style with which you can most reliably achieve a consistently high THC level – provided your setup is planned properly.
Outdoor grow: The sun is unbeatable when it comes to spectrum and light quantity. In good locations you can pull off extremely potent harvests. At the same time, you’re dependent on weather, seasons, pests and mold pressure – so your handling and timing have to be on point.
Greenhouse grow: A middle ground – you use natural daylight but can still control climate, irrigation and sometimes even light supplementation. With additional LEDs, a greenhouse can quickly turn into a high-THC powerhouse.
Autoflower grow: Autoflower strains have massively improved compared to the early days. Many modern autoflowers now deliver solid to very high THC levels. They’re perfect for quick runs, balconies or small setups – and they’re great for fine-tuning your grow style.
The most important factors that influence your THC level
No matter if you grow indoor, outdoor or autoflower – the same core factors always determine your final THC level:
Light quality, PPFD & spectrum
Light is the biggest lever in your grow. The more usable light (PPFD) your plants receive, the more energy they have available for trichome production and cannabinoid synthesis.
- In flower, 800–1,000 µmol/m²/s PPFD has proven to be a sweet spot for many setups. You’ll find the relevant data in your LED manufacturer’s specs.
- High-quality full-spectrum LEDs with a balanced red/blue ratio deliver consistent results.
- A nice bonus can be UV-B light, which acts as a mild stressor and may boost resin production. The approach is somewhat controversial and more experimental, so it’s not a must.
Caution: More light only makes sense if your climate and nutrients are dialed in as well. Excessive light intensity without enough CO₂ or with a poorly tuned VPD will quickly lead to light stress – exactly the opposite of what you want. So always keep a close eye on your plants.
Temperature, humidity & VPD
A stable VPD (vapor pressure deficit) ensures that your plants can take up water and nutrients efficiently without transpiring too much or “sweating” excessively.
- Flowering temperature: 22–27 °C (71–81 °F)
- Night drop: around 2–4 °C (3–7 °F) lower
- Relative humidity in mid flower: 40–50%
Strong swings between day and night, heat spikes above 30 °C (86 °F) or constantly high humidity will cause stress, increase mold risk and lead to less-than-optimal THC development.
Nutrients & medium
Too many nutrients – especially nitrogen during flower – can lower your THC level. Instead, you should work with a clean, predictable feeding schedule:
- In veg, nitrogen can be higher – the plant is building structure and biomass.
- From about week 3 of flower onward, the rule is: nitrogen down, phosphorus and potassium up. But in moderation! Too much PK can have the opposite effect.
- Make sure you provide enough calcium and magnesium, especially with soft water and LED setups.
- Silicon is a bit of a secret weapon – many nutrient brands offer it. You should use it if you want to squeeze out the maximum performance.
- An airy, well-draining medium (e.g. soil with perlite or coco) promotes root health – the foundation for high performance.
Good stress vs. bad stress
Plants react to environmental stimuli. Part of trichome production is actually a defense response against UV, pests and environmental stress. You can use that to your advantage – but only in a controlled, moderate way. You’ll dial this in over time.
Good stress (controlled, moderate):
- targeted UV-B exposure in the last weeks of flower
- mild dry-back phases between waterings
- gentle low stress training (LST)
Bad stress (uncontrolled, long-term):
- heat spikes above 30 °C (86 °F) or cold, drafty air
- severe overfeeding (high EC, burned leaf tips)
- root problems due to waterlogging or lack of oxygen
- light stress from lamps being too close to the canopy
Harvest timing, drying & curing
Even the best grow can lose 10–30% of perceived potency if you make mistakes at the very end. The crucial points are:
- Watching the trichomes: clear = unripe, cloudy = peak THC level, amber = more CBN and a more sedating effect.
- For maximum THC level, many growers harvest at around 80% cloudy and 20% clear trichomes.
- Drying: 10–14 days at around 15–20 °C (59–68 °F) and 50–60% humidity, in the dark and without direct airflow on the buds.
- Curing: 3–8 weeks in airtight jars, with regular “burping” for gas exchange.
In this phase the THC level stabilizes while the terpene profile refines – the difference is clearly noticeable in flavor and effect.
Practical workflow: from setup to potent harvest
Let’s look at a typical indoor grow aimed at a very high THC level, step by step – from seedling to curing jar.
1. Planning & setup: Before you pop the first seed, you decide:
- Which high-THC strain you want to grow
- Pot size (e.g. 9–12 liter / 2–3 gal pots for indoor)
- Lighting system (LED with enough output for your grow area)
- Exhaust, circulation fans, filter and climate control
2. Germination & early veg: Germinate your seeds in a gently moist medium (e.g. jiffy plugs or lightly pre-moistened soil). In the first few days, moderate light intensity is enough. Important:
- Temperature around 24–25 °C (75–77 °F)
- Light breeze so the stems grow strong
- No heavy feeding in the seedling phase
3. Veg phase & training: After 10–14 days, the phase begins where you actively shape your grow style:
- Gradually increase light intensity
- Use gentle LST to create a flat, even canopy
- Optional topping or FIM, as long as the plants are still in veg
4. Switching to flower: With photoperiod feminized strains you flip to 12/12 once the plants have reached your desired pre-flower size. Now, what counts is:
- Keeping VPD stable
- A clean feeding schedule tailored to flower
- Bringing PPFD into the ideal range
5. Flowering & fine-tuning: In weeks 4–7 of flower it’s decided how much THC really ends up in your buds. Here you can:
- Lightly defoliate the lower area to improve airflow
- Experiment with UV-B phases (e.g. 2–4 hours per day)
- Adjust nutrients based on how your plants are actually responding
6. Late flower, flush & harvest: Towards the end of flower, you further lower nitrogen, keep a close eye on the trichomes and plan the harvest so you hit the THC peak. After that, drying and curing follow.
More THC with a system – 7 effective levers
- Dial in your light: Enough PPFD (800–1,000 µmol/m²/s) in flower, no hotspots, even coverage.
- Keep VPD & climate steady: Consistency wins – better a stable 24–26 °C (75–79 °F) than big temperature swings between day and night.
- Feed precisely: “Less is more” – no constant overfeeding, increase EC slowly, and pay close attention to N, P, K and Ca/Mg, especially in flower.
- Train in veg, keep it calm in flower: Use LST, scrog or light topping in veg – and only gentle interventions once plants are in flower.
- Targeted stress, not constant stress: UV-B, moderate dry-backs, slight variations in temperature or light – but no chaotic extremes.
- Harvest based on trichomes, not on calendar dates: Use a loupe or microscope to catch the perfect THC window.
- Take drying & curing seriously: Slow drying, controlled curing – this is where you either gain or lose potency and flavor.
Four especially strong cannabis strains – and where they shine
Gorilla Glue #4
- Extremely resinous buds, very high THC level
- Forgives minor mistakes – ideal for ambitious beginners
- Loves evenly lit indoor setups and scrog
Bruce Banner
- Hybrid with massive potency potential and high THC levels
- Responds very well to LST and high light intensity
- Perfect for growers who are chasing maximum effect
Lemon Cherry Gelato
- Modern “candy strain” with a high THC level
- Benefits from a very clean climate and smart defoliation
- Strong, fruity and creamy terpene profile
Permanent Marker
- Cali hybrid with a clear, strong effect
- Very easygoing. Grows medium tall and produces rock-hard buds
- Ideal for growers who love strong, high-THC highs
Grow style comparison for maximum THC level
| Factor | Indoor grow for a high THC level | Outdoor grow for a high THC level | Greenhouse grow for a high THC level | Autoflower grow for a high THC level |
|---|---|---|---|---|
| Control & predictability | Very high – light, climate & CO₂ are fully controllable | Limited – depends on weather, season and location | High – mix of natural light & climate control | High – short cycles, little photoperiod stress |
| Potential for maximum THC levels | Very high – ideal for near-lab setups | Very high – with optimal climate & location | Very high – especially with supplemental lighting | Medium to high – modern autos are catching up |
| Fluctuations / risk | Low, if the setup runs stable | Higher – weather, pests, mold | Medium – somewhat protected, but still weather-dependent | Low to medium – short cycles, but little time to correct mistakes |
| Effort & barrier to entry | Higher initial setup effort, then highly controllable | Lower technical effort, but location choice is critical | Medium effort, ideal for ambitious growers | Beginner-friendly, ideal for first experiences with high-THC strains |
| Typical goal | Maximum potency + repeatability | Big plants, natural feel, strong buds | Balance of yield, potency and protection | Fast runs, compact setups, discreet growing |
Mistakes that cost you THC – and how to avoid them
Too much nitrogen in flower: Dark green, overfed plants produce more biomass than potency – reduce N clearly from about week 3 of flower on.
Unstable climate: Strong temperature swings and high humidity cause stress and mold – keep VPD stable, ensure enough air exchange.
Light stress: “Eagle claws”, bleached tops or extreme stretching are warning signs – adjust lamp height, dimming and PPFD.
Wrong harvest timing: Too early – lower THC level, more racy head high. Too late – more CBN, more couch-lock. Always keep a close eye on the trichomes.
Impatience during drying: Cranking the heater, fan on full blast, buds spread out in direct airflow – that’s how you lose terpenes and potency. “Slow & low” is the motto.
Workflow: 9 steps for more THC in the jar
- Choose genetics with a very high THC level (for example from the category extremely high THC level).
- Plan your setup: define the right LED, exhaust system, circulation fans, pot size and medium.
- Germination & early veg: moderate light, stable 24–25 °C (75–77 °F), only light feeding.
- Optimize veg: use LST / scrog for an even canopy, slowly increase PPFD.
- Flip to flower: switch to 12/12, adjust your flower feeding schedule and keep the VPD range on point.
- Mid flower: lower N, fine-tune P/K, optionally integrate UV-B phases.
- Late flower: let nutrients run out cleanly, closely monitor trichomes.
- Harvest & drying: cut at the THC peak, then dry slowly over 10–14 days.
- Curing: fill jars, burp regularly, cure for 3–8 weeks – then enjoy.
Internal recommendations & further links
- Extremely high THC level cannabis seeds – go to category
- Indoor grow guide – basics & practical tips
- Curing & storage – how to preserve THC level & terpenes
- Strain examples: Gorilla Glue #4 · Bruce Banner · Lemon Cherry Gelato · Apple Fritter · Permanent Marker
FAQ – frequently asked questions about THC level in cannabis growing
1) How much THC can a plant produce at most?
That depends on the genetics. Many modern strains with a high THC level reach 25–30% THC in lab tests. In a home grow, 18–25% THC is realistic if your grow style, climate and harvest timing are well dialed in.
2) Which grow style delivers the highest THC level – indoor or outdoor?
Indoors you have the best control and can achieve very consistently high THC levels. Outdoors you can also pull extremely potent harvests with lots of sun and a good climate – but you’re much more dependent on location and weather.
3) Do light type and PPFD really make that big of a difference?
Yes. Without enough light intensity and a good spectrum, you’re leaving THC level on the table. Modern full-spectrum LEDs with well-distributed PPFD are the best base if you want to maximize your THC level.
4) How important is feeding for the THC level?
A balanced nutrient schedule that’s adapted to each phase is crucial. Too much nitrogen in flower, big EC spikes or long-term deficiencies will cost you potency. Clean, slightly conservative feeding almost always pays off when you’re chasing a high THC level.
5) Can I always push my THC level higher with UV-B?
UV-B can stimulate resin production, but it’s not a magic button. It has to be dosed carefully and only works as an extra if the rest of your setup (light, climate, nutrients) is already on point.
6) Why is the harvest timing so important for THC level?
Trichomes go through a maturity curve: clear → cloudy → amber. At the cloudy stage, the THC level is at its peak. If you harvest too early or too late, you noticeably change both the effect and perceived potency.
7) How much do drying and curing influence potency?
A lot. Drying too fast, rooms that are too warm or skipping the curing phase can significantly reduce aroma and the perceived THC level. Slow drying and patient curing are essential if you want a harvest with a strong THC level and full flavor.

Cannabis Yield: How to Get the Most from Every Plant
Here you can find out what really makes your cannabis plants productive. First, a brief overview, followed by a detailed explanation in the text below. So that your grow is successful and yields a lot of weed.
Indoors, 500–700 g/m² is realistic; very dialed-in setups with training/CO₂ can reach ~900 g/m². Yield per plant varies widely by type: autoflower 40–200 g, photoperiod indoors often 300–600 g, outdoors under ideal conditions up to >1 kg.
- Flower PPFD: 600–900 μmol m⁻² s⁻¹ (DLI ~30–45 mol)
- Grams per watt benchmarks: 1.0–1.8 (pro-level setups up to ~2.0)
- Key drivers: genetics, light density, climate, pH/EC, training
How much yield can a cannabis plant really produce? That question matters to everyone—from first-time growers to seasoned cultivators. Cannabis yield depends on many factors: strain, lighting, climate, nutrients, training, and of course experience. With the right strategy, you can achieve impressive results in small spaces—indoors and outdoors. This guide shows how to increase cannabis yield, which factors move the needle, which strains deliver the highest yields, and how to avoid common mistakes.
How much yield per plant is realistic?
Yield per plant varies a lot—from 20 g on a small autoflower to 800 g in optimal outdoor conditions. Realistic reference ranges:
- Indoor grow: 300–600 g/m² with 6–16 plants
- Outdoor: 200–800 g per plant (more on large specimens)
- Autoflower: 40–300 g per plant (pot size, light & care are decisive)
Cannabis yield is measured in g/m² or g/plant
For indoor grows, focus less on absolute per-plant numbers and more on yield per m² and yield per watt. With quality LED fixtures (e.g., 300–600 W), 1.0–1.8 g/W is realistic. Outdoors, autoflowers benefit from peak summer light—very early or very late starts usually mean noticeably less.
| Setup | Typical yields | Notes |
|---|---|---|
| Benchmarks are guidelines and depend on genetics, light density, pH/EC, training & grower experience. | ||
| Indoor | 300–700 g/m² (beginner–intermediate), advanced up to ~900 g/m² | Strong LED coverage (PPFD), stable climate, training (LST/SCROG) |
| Outdoor | 200–800 g per plant; top cases >1 kg | Site choice, season length, soil biology and nutrient program are key |
| Autoflower | 40–300 g per plant | Container volume, summer window, and water/nutrient management |
Which factors influence cannabis yield?
1) Light intensity and spectrum
The more usable light a plant gets in veg and flower, the more energy it can convert into buds. Modern full-spectrum LEDs deliver top results. Rule of thumb: 300–600 W LED for 1 m². What matters most is uniform coverage, not just wattage. A high-efficiency LED (≥2.3 μmol/J) pays for itself quickly.
Light affects the yield of your cannabis grow
2) Nutrient management
Too much nitrogen in flower suppresses bud building; too little potassium/phosphorus directly limits cannabis yield. Clean pH/EC management is a must. See also: Using nutrients correctly.
3) Climate and airflow
Ideal is 22–28 °C (72–82 °F) by day, 18–22 °C (64–72 °F) at night. RH 60–70% in veg, 40–50% in flower. Regular fresh air and internal circulation reduce mold risk and stabilize your harvest size.
4) Pot size and substrate
More root room = more potential. Indoors, 7–11 L per plant is common (autoflowers often 9–15 L); outdoors 30–50 L+. Soil–coco mixes with perlite improve air/water balance. More here: Soil or coco?
5) Strain and genetics
Genetics are the foundation. Indica-leaning hybrids often stack compact, heavy buds; sativas tend to form airier, larger inflorescences. Browse high-yield feminized strains or high-yield autoflowers.
• Premium seeds from Linda Seeds
• Growshop: LEDs, pH/EC, enzymes & accessories
• SCROG guide & LST guide
Tips & tricks to boost cannabis yield
1) Plant training (LST, HST, SCROG, topping)
Use LST for a flatter, more even canopy; SCROG maximizes yield per m²; apply topping/HST deliberately (in veg).
Targeted training increases yield
2) Optimal fertilization & boosters
Root and bloom stimulators like Root Juice, Bud Booster or Organic PK Booster complement your base feed. Important: manage pH/EC precisely, ramp dosage gradually, check runoff regularly.
3) CO₂ as a multiplier
Indoors, moderate CO₂ enrichment (up to ~1,200 ppm) with strong LEDs can add 10–20% yield—only for advanced setups with full climate control.
4) Strengthen roots
Healthy roots = better nutrient efficiency. Clean substrate (enzymes), adequate root volume, and stable moisture increase your harvest size.
A strong root system helps achieve better yields
5) Harvest timing
Watch trichomes: milky = potency peak; amber = more body. Harvesting too early costs weight; too late costs quality (THC degradation).
6) Indoor vs. outdoor—where is yield higher?
Outdoor vs. indoor yield: Outdoor often produces larger single-plant harvests but is weather- and site-dependent. Indoor delivers predictable consistency (typically 400–700 g/m²). Choose based on your goal (consistency vs. maximum weight).
How many grams per m² are realistic indoors?
- Beginner: 200–450 g/m²
- Intermediate: 500–700 g/m²
- Pro setups (training + CO₂ + high-end LED): up to ~900 g/m²
Outdoors, we seldom measure in g/m² because plants grow freely. Under good conditions, 600–1,500 g per plant is possible.
Which cannabis strains have the highest yield?
Strong genetics are half the battle. Examples from the Linda Seeds catalog:
1) Critical 2.0 Feminized
Up to ~900 g/m² indoors or >1 kg outdoors. Dense, fast, reliable—great balance of mass & quality.
Choose strains like Critical 2.0 for maximum yield
2) Gorilla Glue Auto
Autoflower with 40–200 g per plant (top cases ~300 g), robust performance, intense flavor, high potency.
3) Amnesia XXL
Sativa-leaning classic with explosive growth; 600–700 g/m² is achievable, more in top-tier setups.
The strain name can indicate good yield potential
4) Big Bud
Robust, easy to manage, a yield staple for years—even stays consistent under less-than-perfect conditions.
5) Wedding Cake & Auto Wedding Cake
Modern hybrids with strong potency (~25% THC), high yields, and dense buds—especially popular with indoor growers.
Auto Wedding Cake is a new classic—high-yielding with lots of THC
More options: high-yield feminized strains & high-yield autoflowers.
How can training or feeding increase yield?
- Training: Topping + LST to create a flat, wide architecture (more tops in optimal light)
- Feeding: Balanced NPK; boosters/stims can help, but never neglect pH/EC
- Flushing: Final 7–10 days with plain water—improves aroma & smoke quality
Conclusion: More yield through know-how and the right strains
A high cannabis yield is rarely an accident—it comes from planning, discipline, and experience. When you understand which factors drive output and document consistently, you’ll see measurable gains. Invest in efficient LEDs, clean climate & nutrient management, and above all solid genetics. With high-yield autoflowers or high-yield feminized strains, you can achieve strong results even without a pro setup.
FAQ – Common questions about cannabis yield
How much does a cannabis plant yield?
Indoors, average values are 400–600 g/m² (depending on setup & experience); outdoors up to ~800 g per plant is possible. Autoflowers usually reach 40–200 g per plant.
How many grams per m² are realistic indoors?
With modern LEDs, stable climate, and precise nutrient management, 500–700 g/m² is realistic; top-tier setups achieve up to ~900 g/m².
Which factors influence cannabis yield the most?
Light density, temperature, humidity/airflow, genetics, pH/EC, pot size/medium, and training techniques.
How can I increase indoor yield?
Uniform PPFD, LST/SCROG/topping, clean pH/EC, managed airflow, optional CO₂ with strong LEDs.
Which cannabis strains have the highest yield?
Classics like Critical, Big Bud, Amnesia and modern hybrids (Wedding Cake, Gorilla Glue Auto). Overview: high-yield strains.
What’s a good yield per plant?
Autoflowers: 80–150 g is very achievable; photoperiod indoors: 300–600 g; outdoors, peak values over 1 kg per plant are possible.
How does outdoor yield differ from indoor?
Outdoor harvests can be larger per plant but are weather-dependent. Indoor provides predictable consistency and repeatable quality.
HowTo – Increase cannabis yield: step-by-step
Practical indoor guide optimized for more grams per m²—quick to implement.
Materials needed
- LED grow light (≥2.3 μmol/J efficiency), or HPS ≥250 W
- Exhaust with carbon filter & quiet circulation fans
- pH/EC meter (calibrate regularly)
- Substrate (soil/coco) + base nutrients; optional enzymes, silica, CalMag
- SCROG net, soft plant ties (LST)
Tools
- Sharp, sanitized pruning shears
- Thermo/hygrometer (ideally with data logging)
- Timer/controller for lights & exhaust
- Prep space & climate: 24–26 °C (75–79 °F) lights-on, 18–22 °C (64–72 °F) lights-off; RH 60–70% in veg, 40–50% in flower. Check tent/reflectivity.
- Genetics & pot strategy: Choose high-yield feminized hybrids or autoflowers; match pot volume and plant count to your target yield per m².
- Optimize light density: 600–900 μmol/m²/s PPFD in flower; ensure uniform coverage to the corners.
- Nutrient management: Start at 60–80% base feed; soil pH 6.0–7.0 / coco 5.5–6.2; raise EC moderately; check runoff.
- Plant training: Begin LST early, top 1–2× in veg; use SCROG to create a flat, high-light canopy.
- Watering & runoff: Water by pot weight; monitor 10–20% runoff (avoid salt buildup).
- Dial in flower: Weeks 3–6: maintain canopy uniformity & airflow; stack PK moderately, taper toward the end (aroma & mold prevention).
- Harvest & curing: Harvest at milky→amber trichomes; dry slow (18–20 °C / 64–68 °F, 50–55% RH), cure 2–4 weeks.

Cold-Resistant Cannabis Strains for Northern Climates
For growers in cooler regions, cultivating cannabis can be challenging. Short summers, long nights, and unpredictable frosts all test a plant’s resilience. Yet, some varieties have evolved or been bred to thrive where others fail. These cold-resistant cannabis strains bring together hardy genetics, quick flowering, and impressive resilience against mold and low temperatures. Whether you grow outdoors in northern Europe or high in the mountains, choosing the right strain can mean the difference between a successful harvest and total loss.
In this guide, we’ll explore the best cannabis strains for northern climates, discuss what makes a plant truly cold-resistant, and share practical growing strategies to help you optimize yield and flavor despite chilly conditions. From early-flowering cannabis varieties to autoflowering genetics, you’ll learn how to build your grow around the environment — not against it.
1. Understanding Cold Resistance in Cannabis
Cold resistance in cannabis refers to a plant’s ability to survive and perform under lower-than-ideal temperatures, typically below 15°C (59°F). Most cannabis plants prefer warmth — day temperatures between 22°C and 28°C (72–82°F). But some genetics have adapted to cooler climates, maintaining photosynthesis, resin production, and flowering even when nights are cold.
There are three key traits that define cold-tolerant cannabis strains:
- Fast flowering: Short life cycles help plants finish before autumn frosts.
- Compact structure: Smaller, denser plants handle wind and rain better.
- Mold resistance: Tight buds can suffer from botrytis (bud rot) in humid, cold weather, so strains with natural resistance are essential.
Genetically, these traits are often inherited from landraces native to cold regions — for example, Ruderalis varieties from Siberia and northern Russia, or certain Afghan strains adapted to mountain climates. Breeders have used these genetics to create modern cold-climate cannabis strains that deliver both resilience and potency.
2. Challenges of Growing Cannabis in Northern Regions
Northern climates (latitude 45°N and above) come with a unique mix of challenges:
- Short growing season: Fewer frost-free days limit vegetative growth time.
- Cool nights: Temperatures below 10°C (50°F) slow root activity and nutrient uptake.
- High humidity: Creates perfect conditions for mold and mildew.
- Low light intensity: Especially in autumn, reducing photosynthesis and yield.
Despite this, many growers in northern Europe, Canada, and parts of the U.S. successfully produce top-quality buds. The key lies in strain selection, location choice, and small adjustments to your growing technique — all covered below.
3. Traits of the Best Cold-Resistant Cannabis Strains
What makes a cannabis strain ideal for northern climates? It’s a combination of genetics and adaptability. Look for the following traits when selecting seeds:
- Autoflowering genetics: Derived from Cannabis ruderalis, autoflowers don’t depend on light cycles and mature in 8–10 weeks, perfect for short summers.
- Early-flowering photoperiod strains: Some indica-dominant hybrids like Hindu Kush and Afghan finish quickly and tolerate cooler conditions.
- Dense but open buds: Tight buds can trap moisture; slightly airier buds prevent rot in humid climates.
- Strong stems: Wind and cold can cause stress fractures — robust stems are crucial.
- Resilient root systems: Strains with vigorous roots bounce back faster after cold nights.
Combining these traits creates plants capable of surviving sudden weather shifts and still producing dense, resin-rich flowers.
4. Top 10 Cold-Resistant Cannabis Strains
Below are ten outstanding cold-resistant cannabis strains ideal for northern or high-altitude environments. All are available from reputable seed banks and have proven themselves in challenging outdoor conditions.
1. Northern Lights
Type: Indica dominant • Flowering: 6–8 weeks • Resilience: Excellent cold and mold tolerance.
Northern Lights, this indica strain, adapts easily to cold climates.
One of the most legendary strains, Northern Lights thrives in cooler climates and delivers dense, resin-coated buds. Its compact size and quick flowering make it a favorite among northern outdoor growers. Expect a sweet, earthy flavor and a deeply relaxing high.
2. Early Skunk
Type: Indica/Sativa hybrid • Flowering: 7–9 weeks • Resilience: Exceptional mold resistance.
A hybrid that is both robust and fast, while still offering good yields.
Early Skunk combines Skunk #1 with Early Pearl, resulting in a plant that handles temperature drops like a pro. It’s one of the best cold-hardy cannabis strains for outdoor growing in northern Europe.
3. Frisian Dew
Type: Sativa dominant • Flowering: 8 weeks • Resilience: Highly resistant to mold and wind.
Northern climates don’t affect this sativa-dominant strain.
Bred by Dutch Passion, Frisian Dew was designed for northern latitudes. Its purple hues develop naturally in cooler nights, and its citrus-pine aroma remains strong even after a wet season.
4. Critical Mass
Type: Indica • Flowering: 6–7 weeks • Resilience: Handles cool and damp conditions well.
This fast-flowering indica is easy to manage in cold conditions.
Known for its huge yields, Critical Mass also stands up to cool weather surprisingly well. Its compact structure and short flowering cycle make it one of the best early-flowering cannabis varieties for challenging climates.
5. Himalayan Gold
Type: Indica/Sativa hybrid • Flowering: 9 weeks • Resilience: Excellent in mountain climates.
Himalayan green gold grows well indoors or in its natural environment.
Originating from Nepalese highlands, Himalayan Gold thrives in cold nights and thin air. Its genetics naturally resist fungal infections, making it ideal for growers in northern altitudes or coastal regions.
6. White Widow
Type: Hybrid • Flowering: 8 weeks • Resilience: Moderate cold resistance, high mold tolerance.
A versatile strain that loves the sun but isn't afraid of the cold.
White Widow, famous for its resinous buds, also performs well in moderate cold when grown outdoors. It prefers sunny spots but won’t collapse under cooler temperatures at the end of the season.
7. Early Maroc
Type: Pure Sativa (Maroc landrace) • Flowering: 7–8 weeks • Resilience: Very high; ideal for northern outdoor grows.
This Moroccan strain handles altitude and its harsh climate very well.
This Moroccan strain has natural cold tolerance and finishes early. Early Maroc is an ideal choice for growers above 50°N latitude who want a quick, spicy, resinous harvest before autumn rains.
8. Auto Mazar
Type: Autoflowering Indica • Cycle: 10 weeks from seed to harvest.
Auto Mazar is one of the autoflower strains that adapts best to cold climates.
Auto Mazar combines autoflowering convenience with high yield and resilience. It continues to develop even in temperatures as low as 12°C (54°F). Perfect for short, cool summers or balcony grows in northern climates.
9. Pineapple Express Auto
Type: Autoflowering hybrid • Cycle: 9–10 weeks.
A fast tropical strain that won’t be softened by the wind.
A reliable autoflower that loves sunlight but doesn’t fear a chill. It finishes fast and produces tropical aromas even in cool weather — a cheerful contrast to gray northern skies.
10. Swiss Dream
Type: Hybrid (CBD-rich) • Flowering: 8–9 weeks.
The best CBD for the cool, humid Alpine climate.
Developed in Switzerland, this strain was bred for mountain environments. Swiss Dream is a balanced CBD-rich variety that tolerates cold and humidity without sacrificing quality.
5. How to Grow Cannabis in Cold Climates Successfully
Selecting the right genetics is just the beginning. Even cold-resistant cannabis needs support to thrive. Follow these techniques to ensure healthy growth and full terpene expression:
- Start indoors early: Germinate seeds in late spring indoors to give plants a head start before transplanting outside.
- Use greenhouses or cold frames: Even a simple plastic cover traps heat and prevents frost damage.
- Choose sunny microclimates: South-facing slopes or sheltered gardens stay warmer and receive more light.
- Mulch and insulate roots: Organic mulch keeps soil warmer at night and conserves moisture.
- Feed lightly: Cold slows nutrient uptake — too much fertilizer can cause salt buildup.
- Prune carefully: Remove large leaves to improve airflow, preventing mold in damp weather.
In extremely cold regions, consider cultivating in pots so plants can be moved indoors overnight or during unexpected frosts. Pairing the right strain with simple environmental control is the best formula for success.
6. Indoor and Greenhouse Solutions
If outdoor growing isn’t feasible, automated indoor grow systems or small greenhouses allow precise control of climate. Automated fans, heaters, and smart grow lights ensure plants stay in the ideal temperature range. Compact autoflowers and early-flowering hybrids perform beautifully under LED setups, offering full harvests even when it’s freezing outside.
For greenhouse grows, use thermal mass (like water barrels) to store daytime heat for the night. Ventilation remains critical: even in cold climates, excess humidity can cause mold outbreaks.
7. Why Autoflowering Strains Excel in Cold Conditions
Autoflowering strains are naturally adapted to survive short, cool seasons. Derived from Ruderalis genetics, they don’t rely on light schedules and finish rapidly — ideal for regions with early frost. Most cold-resistant autoflowering cannabis strains also exhibit strong disease resistance and compact size, making them easy to protect if temperatures drop suddenly.
Examples like Auto Northern Lights and Auto Mazar can complete their cycle even when night temperatures fall below 10°C. Their resilience and speed make them indispensable tools for growers in northern Europe, Canada, or high-altitude regions.
8. Final Thoughts
Growing cannabis in cold climates requires planning, but it’s entirely possible to achieve abundant, flavorful harvests. The key is combining cold-resistant cannabis strains with smart techniques: early germination, soil insulation, and good airflow. Modern genetics offer powerful options — from quick autoflowering cannabis varieties to early-flowering photoperiod strains bred for resilience and yield.
By choosing the right strain and adapting your strategy, you can turn even a short northern summer into a successful growing season. Cold weather may test your patience — but the reward of harvesting frosty, aromatic buds under a crisp autumn sky is worth every effort.
Recommended Resources
- Avoiding Mistakes when Growing Outdoors
- Outdoor Cannabis Seeds
- Autoflowering Cannabis Seeds
- Cannabis Fast Flowering Strains
FAQ – Frequently Asked Questions about Growing Cannabis in Cold Climates
When should I germinate cannabis in cold regions?
Start seeds indoors in March or April and transplant outdoors once night temperatures stay above 8–10 °C (46–50 °F). This gives plants a few weeks of extra growth before autumn frosts.
What is the lowest temperature cannabis can tolerate?
Growth slows below 10 °C (50 °F). Cold-resistant cannabis strains can survive short dips to 5–6 °C (41–43 °F) if daytime temperatures remain mild and sunny.
Are autoflowering strains better for northern climates?
Yes. Autoflowering cannabis finishes its full cycle in 9–10 weeks and doesn’t depend on light schedules. Perfect for short summers and unpredictable weather.
What soil mix works best in cold conditions?
Use a light, well-draining mix such as quality soil blended with perlite or coco coir. Add compost and worm castings for nutrition. Avoid compact, waterlogged soil that cools quickly.
How should I water plants in cold weather?
Water less frequently and use lukewarm water (18–20 °C / 64–68 °F). Check moisture before each watering; overwatering with cold water can slow root activity and stunt growth.
How can I prevent bud rot (botrytis)?
Space plants adequately, thin out foliage slightly for airflow, and ensure steady ventilation. Choose cold-resistant cannabis strains with natural mold resistance such as Early Skunk or Frisian Dew.
Is it better to grow in pots or directly in the ground?
In cold regions, pots are advantageous: you can move plants indoors during frosty nights. Insulate containers from cold ground and use mulch to stabilize root temperature.
Which strains perform best in cold weather?
Northern Lights, Critical Mass, Auto Mazar, Early Maroc, and Auto Northern Lights are reliable, fast, and highly resilient cannabis strains for northern climates.
Does a small greenhouse or tunnel help?
Yes. Even a simple plastic tunnel can extend the season, raise night temperatures, and protect against rain. Ventilate during sunny hours to prevent excessive humidity.
When is the right time to harvest before frost?
Watch forecasts carefully: if nights are consistently below 7 °C (45 °F), harvest immediately. Most early-flowering strains finish by late September in northern regions.
Where can I find reliable cold-resistant seeds?
Check trusted catalogs with climate filters, such as Outdoor Cannabis Seeds and Autoflowering Cannabis Seeds proven for northern climates.

Root and Flower Stimulators: How to Boost Cannabis Growth Effectively
In cannabis growing, every detail matters. Lights, climate, genetics, and nutrients form the foundation, but cultivators who want to push their harvests to the next level rely on cannabis growth stimulators. Root stimulators accelerate rooting, improve nutrient efficiency, and make seedlings or clones more resilient. Flower stimulators (PK boosters, ripening enhancers) help drive bud formation, density, and terpene expression during bloom. This guide explains how to choose, dose, and combine boosters correctly – without overfeeding, nutrient lockouts, or loss of quality. You’ll also find practical references to products like Root Juice (BioBizz), Radical Root (Trabe), Root-C (Atami B’cuzz), Root Booster (Terra Aquatica), Power Feeding Booster (Greenhouse Fertilizer), Bud Booster (Green Planet Nutrients), and Organic PK Booster (BAC).
What Are Root and Flower Stimulants?
A cannabis root stimulator is designed to encourage the development of a more extensive and branched root system. With more fine root hairs, plants can absorb water and nutrients more efficiently, leading to faster growth and stronger resistance against stress. Most formulas include kelp extracts, humic and fulvic acids, amino acids, or beneficial microbes. Flower stimulants, often marketed as PK boosters, are applied during bloom. They focus on providing phosphorus (P) and potassium (K), the key macronutrients that drive flower formation, carbohydrate accumulation, resin production, and terpene biosynthesis. Phosphorus fuels energy transfer and flower initiation, while potassium supports enzyme activity, osmoregulation, and bud swelling. One essential principle: without a strong root base, no flower booster will work to its full potential. Healthy roots are the hidden engine of the grow. Investing in root development during the early phase pays back with denser, tastier buds later on.
Among plant stimulators, PK boosters and root stimulators are some of the most useful products.
Why Use Boosters? Main Benefits
The main benefit of growth stimulators is precision. Base nutrients deliver balanced NPK, but they don’t always cover specific peak demands. A root stimulator for cannabis ensures seedlings and transplants establish quickly. Later, a flower booster ensures that plants produce denser buds with a stronger terpene profile. Other practical advantages include:
- Reduced transplant and environmental stress.
- Improved nutrient uptake and water use efficiency.
- Prevention of deficiencies during critical growth phases.
- Increased bud weight, density, and resin content.
- Greater resistance to pests and diseases.
- Smoother smoke and better-tasting harvests.
In short, stimulators are precision tools to fine-tune performance. They don’t replace the fundamentals of good cultivation – they elevate them.
Substrate Matters: Soil, Coco, Hydro
How boosters perform depends greatly on the substrate. In soil, organic stimulators (kelp, humic acids, beneficial fungi) synergize with the natural microbiome, enhancing long-term stability. In coco, growers see rapid results from root stimulators: reduced transplant shock, more vigorous root balls, and accelerated vegetative growth. In hydroponics, responses are nearly immediate, but so are mistakes. Overdosing can lock out phosphorus or potassium in hours, stunting growth.
Soil is forgiving; coco demands tighter pH and EC control; hydro rewards precision but punishes carelessness. Always start with half the manufacturer’s dose and observe how plants react before stepping up.
The effectiveness of stimulators also depends on the substrate used: soil, coco, or hydroponics.
Highlighted Root Stimulators
- Root Juice (BioBizz): organic formula with kelp and humic acids. Promotes strong microbial activity and dense root hairs. Best for soil and coco.
- Radical Root (Trabe): bio-based stimulator focused on reducing stress and promoting root branching. Ideal after transplants.
- Root-C (Atami B’cuzz): designed for coco and hydro, known for boosting root mass and nutrient absorption under intense lighting.
- Root Booster (Terra Aquatica): versatile product for seedlings and early veg, effective across all substrates.
Tip: Alternate between nutrient feedings and plain water with stimulators mixed in. This helps prevent salt build-up while keeping roots oxygenated and active.
Key Flower Stimulants
Once flowering starts, cannabis plants shift their priorities. Nitrogen becomes less important, while phosphorus and potassium dominate. The following products stand out:
- Power Feeding Booster (Greenhouse Fertilizer): completes the Power Feeding line with a targeted PK push. Use from week 2–3 of bloom, peaking around weeks 4–6.
- Bud Booster (Green Planet Nutrients): improves bud set, density, and weight. Particularly effective in LED setups with high PPFD.
- Organic PK Booster (BAC): organic PK stimulator that enhances taste and aroma without harsh residues. A favorite in living soil grows.
Watch leaf tips carefully. A faint burn on the edges means you’re at the maximum the plant can handle. That’s the sweet spot – beyond that, quality starts to decline.
The flowering phase is the crucial moment when the stimulator applies its full precision.
Special Notes for Autoflower Strains
Autoflowers grow on a strict internal clock. They don’t give you the luxury of long veg times, so root stimulators in the first 3–4 weeks are absolutely critical. Apply them consistently but gently to maximize early growth. Once buds begin forming, switch quickly to PK boosters, but in lower doses than with photoperiod plants. Too much phosphorus or potassium can overwhelm small autoflowers and reduce bud quality. The key is moderation and timing – autoflowers reward precision.
Compatibility and Combinations
Boosters can be combined with CalMag, enzymes, silicon, or carbohydrate supplements, but introduce them gradually. In hydro and coco, monitor pH and EC daily; in soil, 1–2 times per week is usually enough. Most “booster doesn’t work” complaints are actually pH-related nutrient lockouts, not product issues. A common beginner mistake is piling on too many additives. Less is often more. A solid base nutrient plus one or two carefully chosen stimulators gives better results than a dozen conflicting products.
The Role of Beneficial Microbes
Many modern stimulators include microbial inoculants like Trichoderma, mycorrhizal fungi, or rhizobacteria. These organisms colonize the rhizosphere, protecting roots against pathogens and improving nutrient availability. When combined with root stimulators, they create a synergistic effect: more root surface area, stronger immunity, and better nutrient cycling.
Pro tip: avoid combining microbial products with chemical fungicides or strong hydrogen peroxide cleansers. These will kill the very organisms you want to encourage.
Advanced Dosing Strategies
Experienced growers often adapt booster schedules to the specific genetics and lighting setup:
- High-PPFD LED setups: plants under intense light metabolize faster, requiring stronger PK doses during mid-flower.
- Long-flowering sativas: respond well to prolonged but mild PK feeding, rather than a short, intense push.
- Indica-dominant hybrids: handle moderate PK boosts but are prone to nutrient burn if pushed too far.
Always adjust based on observation, not just manufacturer schedules. Healthy leaves, consistent growth, and strong aroma are better guides than a chart.
Special Situations
Clones: Keep EC low (0.3–0.6) and apply mild root stimulators for 10–14 days.
Transplants: Apply 1–2 doses of root stimulator plus enzymes to heal root damage.
Stress events: After heatwaves or drought, stabilize pH/EC first, then add a light dose of root stimulator with silicon for recovery.
These cases highlight that stimulators are not just yield enhancers but also recovery tools that save time and prevent setbacks.
Common Mistakes
- Using boosters to mask nutrient problems instead of correcting pH/EC first.
- Adding multiple new products at once without observing plant response.
- Overloading EC in coco/hydro, leading to salt stress.
- Pushing PK hard in the final weeks, which causes harsh smoke and risk of bud rot.
Remember: boosters are multipliers. They magnify good conditions, but they can’t fix poor ones.
Practical Feeding Plans
Soil: weeks 1–3 with root stimulators (Root Juice, Radical Root, Root-C, Root Booster). From week 3–4 introduce Organic PK Booster mildly. Coco: root stimulators 2–3 times weekly; from week 3 gradually introduce Power Feeding Booster or Bud Booster. Hydro: very low but regular doses of root stimulators; PK boosters in small steps, always monitoring system hygiene and pH.
Pro tip: keep a grow log – whether in a notebook or app. Record each feeding, EC/pH readings, and plant responses. Over time, you’ll refine your system and anticipate plant needs.
Conclusion
Cannabis stimulators are not magic bullets, but when applied correctly, they elevate any grow. Root stimulators set the foundation; flower boosters maximize potential. Together, they improve vigor, bud quality, and final yield. Success comes from moderation, observation, and timing.
Stimulants alone do not ensure a good harvest—they must be used alongside proper growing techniques.
Think of them as the conductor of an orchestra: they don’t play the instruments themselves, but they bring harmony and intensity to the entire performance.
FAQ – Cannabis Growth Stimulants
When should I start using a root stimulator?
From germination or clone rooting until week 3–4 of veg, and again after every transplant.
What’s the difference between organic and mineral PK boosters?
Mineral formulas act fast and strong; organic boosters enhance aroma and flavor. Many growers combine both.
What happens if I overdose a booster?
Burnt tips, dark leaves, high EC in runoff. Flush lightly and resume at lower doses.
Do boosters work under weak lighting?
The effect is limited. They multiply good conditions, so strong LEDs or optimized climate maximize results.
Which stimulators are best for organic soil?
Root Juice (BioBizz) and Organic PK Booster (BAC) – they support soil life and improve terpene expression.
Can stimulators be combined with enzymes and carbs?
Yes, but in moderate doses. Carbs feed microbes, while enzymes keep the root zone clean – both pair well with boosters.
Are boosters useful for autoflowers?
Yes, but doses must be lower and timing sharper. Root stimulators in weeks 1–3 are essential; PK boosters should be introduced early and gently.
Can microbes replace stimulators?
No – they work together. Microbes improve nutrient cycling, while stimulators supply direct energy for growth and flowering.

Balcony Cannabis Growing in Containers – Complete Guide for High Yields in Small Spaces
Cannabis cultivation is no longer limited to large indoor tents or spacious outdoor gardens. More and more hobby growers are discovering the advantages of growing on balconies or in containers. Anyone who wants to grow cannabis on a balcony often faces limited space, but with the right planning, strong harvests and aromatic buds are still possible. This guide explains how to design your balcony grow setup, what mistakes to avoid, and which strains perform best in small spaces.
Why Balcony and Container Grows Are Becoming Popular
Urban cannabis cultivation has become increasingly important in recent years. Rising rents, limited living space, and the desire for discreet home growing are major reasons. For many growers, the balcony is the only option to produce fresh weed at home. Growing cannabis in containers also offers flexibility: containers can be moved, hidden, or brought inside when the weather changes. Another advantage is control. Unlike planting directly in garden soil, container growing allows you to manage the substrate entirely and spot pests or diseases quickly. Anyone who wants to grow weed in containers creates a controlled yet natural environment where plants can thrive.
Choosing the Right Balcony Location
Location is critical for success. Cannabis plants need at least 6 hours of direct sunlight daily. South- or southwest-facing balconies are ideal. A balcony grow setup on a north-facing balcony will only work with additional lighting.
With a good placement, balcony-grown cannabis benefits from strong light.
Wind is another factor. While it improves air circulation, strong gusts can dry out or damage plants. Wind and privacy screens, such as bamboo mats or trellises, protect plants and add stealth. Many underestimate this: a single storm can break branches or tear leaves.
The Best Containers for Cannabis Growing
For balcony cannabis growing in containers, different types are suitable. Plastic containers are cheap and light but offer less oxygen to roots. Fabric containers (Smart Pots) enhance aeration and prevent overwatering. Decorative planters can blend in with other balcony plants. Wooden boxes or DIY raised beds also work, as long as drainage is sufficient.
Recommended container sizes:
- Small plants (up to 80 cm): 7–10 liters
- Medium plants (up to 120 cm): 10–20 liters
- Large plants (over 150 cm): 40 liters or more.
Larger containers lead to stronger plants and bigger yields, but weight matters on balconies. Containers of 7–10 liters are often the most practical choice. Always use saucers to collect runoff and avoid water dripping to neighbors below.
Substrate and Nutrients for Balcony Cannabis
Substrate is the foundation. Many growers use pre-fertilized soil designed for cannabis. Others prefer a mix of coco, perlite, and soil. Coco is excellent at holding water and oxygen, making it perfect for urban cannabis cultivation in containers. Organic growers add compost or worm humus to activate soil biology. Avoid regular garden-center soil; it often lacks nutrients and aeration, reducing yield potential.
Just like indoor grows, choosing the right nutrients and substrate is crucial for terrace cultivation.
When fertilizing, less is more. Overfeeding causes stress. Use balanced nutrient lines made for cannabis and adjust them to the growth phase (veg or bloom). Don’t forget the final flush: only then will your buds deliver their best aroma and flavor.
Watering and Climate Management
A common mistake in balcony grows is watering too much. Cannabis prefers roots that dry slightly before receiving more water. Overwatering leads to root rot. On balconies, evaporation is higher, so in summer, daily watering may be necessary. Drip irrigation or automated systems can save time and ensure consistency. Balcony temperatures fluctuate more than in indoor tents. Watch out for heatwaves: above 30°C growth slows down. Shade nets or sails can help. Sudden cold spells in spring or fall also threaten plants, but containers make it easy to move them indoors for protection. In urban environments, walls and railings often create microclimates. Use them to your advantage by shielding from strong winds but making sure hot air doesn’t get trapped during summer.
Stealth Growing on the Balcony
Anyone who grows cannabis on a balcony usually wants discretion. Choose inconspicuous containers and surround them with tomatoes, sunflowers, or peppers. These companion plants hide your weed and boost biodiversity. Aromatic herbs like basil, mint, or rosemary mask the smell of marijuana, while also providing fresh ingredients for your kitchen. Smell can still be an issue during bloom. Pick less pungent or fruity strains (e.g., Auto Northern Lights, Amnesia Haze). Don’t let plants grow above the railing, as this is a dead giveaway. Training techniques like LST or SCROG are better than topping autoflowers, which don’t recover well from heavy pruning. Some growers even install vertical trellises with climbing beans or cucumbers to disguise their marijuana plants completely.
Recommended Strains for Balconies and Containers
Not all strains fit small spaces. Autoflowers are perfect since they stay compact, bloom quickly, and don’t depend on light cycles. Photoperiod strains also work if trained or flowered early.
Choose small to medium-sized strains for balcony growing.
Best strains for small spaces:
- Autoflowers: White Widow Auto, Gorilla Glue Auto, Northern Lights Auto, Auto Fat Blueberry
- Photoperiod: Critical 2.0, Amnesia Haze, Northern Lights, GMO.
These strains are compact, mold-resistant, and deliver top-quality buds, ideal for balconies with changing weather. Many growers also prefer genetics known for high resilience against pests, since balcony setups expose plants to outdoor conditions that fluctuate more than indoors.
Training Techniques for Small Spaces
To maximize yield per plant, many growers use LST (Low Stress Training) or topping. These techniques make plants bushier and improve light distribution. In small balconies, they ensure dense buds not only on the main cola but also on side branches. SCROG nets further optimize space and limit vertical growth. A smart balcony grow setup uses space efficiently without attracting attention. Beginners should not hesitate to try simple training methods like gentle bending; weed often responds with denser growth and bigger harvests. Experienced growers sometimes combine LST with defoliation to open up canopies and reduce humidity in tight urban spaces.
Pest and Disease Prevention Outdoors
On balconies, cannabis plants face pests like aphids, spider mites, and thrips. Prevention is the best defense: use sticky traps, release ladybugs or predatory mites, and ensure airflow. Companion plants such as lavender, marigolds, or nasturtiums attract beneficial insects and deter pests naturally. Fungal issues like powdery mildew or botrytis are common with high humidity. Remove excess leaves to improve airflow and avoid watering late in the evening. Organic sprays like neem oil or potassium soap are effective and safe. They can be combined with beneficial insects if timed correctly. An overlooked tip: never let water stagnate in saucers, as it attracts fungus gnats and promotes root problems. Here you can find more information about pests.
Harvest, Curing, and Post-Care
When trichomes turn milky to amber, it’s time to harvest. Cut branches into manageable pieces and dry them in a dark, ventilated room. Drying on the balcony is risky due to weather, pests, and exposure to neighbors. Always keep it discreet and indoors if possible. After drying, curing makes a huge difference. Store buds in airtight glass containers with humidity packs. Open the containers daily for the first weeks (“burping”) to prevent mold and allow excess moisture to escape. This step enhances flavor, aroma, and smoothness. Proper curing can double the perceived quality of your harvest. After harvest, clean containers thoroughly and replace the substrate to avoid problems in the next cycle. Many balcony growers use this downtime to deep-clean their growing space and prepare for the next season. A tidy balcony reduces risks and makes each new cycle easier.
Conclusion: Successful Cannabis Growing in Small Spaces
Anyone wanting to grow cannabis on a balcony or in containers needs planning, observation, and patience. With compact strains, suitable containers, and careful climate and pest management, excellent results are achievable even in limited spaces.
Growing cannabis on a balcony is the best alternative for people with limited space.
Urban cannabis cultivation is an attractive option for those without gardens but who still want their own weed. With a clean setup and a little creativity, your balcony can become a green, productive oasis that delivers multiple harvests per year.
FAQ – Cannabis on Balconies and in Containers
What container size is best for balcony cannabis?
Medium plants do best in 20–30 liter containers: enough space for roots while still manageable.
How can I hide the smell from neighbors?
Choose low-odor strains or camouflage with strong-smelling plants like basil, lavender, or tomatoes.
Can autoflowers be grown on balconies?
Yes, they are perfect for it: compact, fast, and easy to handle.
How often should I water in hot weather?
In peak summer, daily watering may be required. Check soil: if dry, water again.
What is the biggest advantage of container growing?
Flexibility. You can move plants, protect them from weather, and control the substrate.
Which companion plants work best?
Tomatoes, peppers, sunflowers, basil, mint, or rosemary. They camouflage your plants, improve microclimate, and mask odors.
Which strains are most mold-resistant?
Northern Lights, Amnesia Haze, and Kush varieties are robust and ideal for exposed balconies.

Preventive Pest Control in Cannabis Growing – A Complete Strategy for Healthy Plants
Successful cannabis growing is not only about powerful lights, carefully chosen genetics, and balanced nutrients. Long before harvest, growers must think about one of the most important aspects: preventive pest control in cannabis. This proactive approach combines hygiene, monitoring, beneficial insects, and organic products to create a stable, resilient cultivation system. Instead of reacting once infestations appear, prevention ensures plants stay vigorous, flavors remain pure, and yields reach their full potential.
Why Prevention Matters in Cannabis Growing
Many new growers underestimate the importance of prevention. They set up lights and fans, water their plants, and expect everything to go smoothly. But the truth is: pests and diseases thrive in the same warm, humid conditions where cannabis grows best. Once spider mites, thrips, or powdery mildew establish themselves, fighting them can feel like a never-ending battle. Worse, late interventions often damage flowers or leave residues. By focusing on natural pest prevention for cannabis from day one, you not only avoid infestations but also create a healthier environment where plants can reach their genetic potential without interruptions. Think of prevention as insurance: a small investment of time and resources that protects months of work. It doesn’t mean spraying chemicals weekly, but instead setting up a system of hygiene, observation, biological allies, and gentle plant care that keeps everything in balance.
Early Detection and Hygiene – The First Line of Defense
Prevention starts with vigilance. A daily plant check, even just five minutes, allows you to catch early signs before a population explodes. Insects like spider mites or aphids don’t appear overnight – they build up quietly until visible damage emerges. With routine observation, you can stop problems early, often with minimal effort. Good hygiene complements daily checks. Treat your grow area like a laboratory: change clothes before entering, disinfect tools regularly, and never introduce outside plants without a quarantine period of 7–10 days. Dead leaves or old soil on the floor are invitations for pests. Keeping the environment clean and stable is one of the simplest yet most powerful forms of cannabis pest prevention.
Daily Inspection Checklist
- Leaf undersides: look for tiny dots, shed skins, or small black droppings.
- Sticky traps: yellow traps for fungus gnats and whiteflies, blue traps for thrips.
- Leaf shape and color: curling edges, silver streaks, or pale patches indicate stress.
- Smell and humidity: musty odors or damp conditions often signal fungal risk.
Common Cannabis Pests and How to Prevent Them
Every grower eventually encounters pests, but knowing how they behave makes prevention much easier. Let’s explore the most common threats and how to stop them before they spread.
Spider Mites
Spider mites are among the most feared cannabis pests. These tiny arachnids multiply quickly in hot, dry conditions, sucking sap from leaves and leaving pale speckles. As colonies grow, they spin fine webs that suffocate buds. Once webs are visible, the infestation is advanced. Prevention means keeping relative humidity balanced (not desert-dry), avoiding dusty leaves, and introducing predatory mites early in the grow. Many growers notice that plants grown in slightly more humid, well-ventilated environments are far less prone to spider mite outbreaks.
Moderate relative humidity helps prevent microscopic mites known as spider mites.
Thrips
Thrips are slender, fast-moving insects that scrape leaf surfaces, leaving shiny silver streaks and tiny black fecal spots. Because they hide in leaf folds, they often go unnoticed until populations surge. Blue sticky traps and biological control with Amblyseius cucumeris or swirskii are highly effective. Indoor growers often underestimate thrips, but in large numbers, they can reduce plant vigor and lower yields. Prevention is far easier than trying to fight a full infestation.
The spread of these tiny insects can be stopped with proper ventilation.
Aphids
Aphids gather on tender shoots and excrete honeydew, which encourages mold and attracts ants that “farm” them. Outdoors, ladybugs and lacewings quickly reduce populations. Indoors, parasitoid wasps like Aphidius colemani are the most reliable allies. One overlooked fact: aphids often arrive on clones or garden plants brought indoors. This makes strict quarantine essential for cannabis pest prevention.
The presence of ladybugs helps reduce aphids.
Whiteflies
Whiteflies are easy to recognize: when disturbed, they rise in a small cloud of dust-like insects. Their larvae stick to the underside of leaves, draining sap. Prevention includes yellow sticky traps, Encarsia formosa, and ensuring airflow penetrates the canopy. Growers who let their plants form dense, jungle-like foliage often struggle with whiteflies, while those who prune regularly rarely face severe outbreaks.
Using yellow sticky traps helps counter whiteflies.
Fungus Gnats
Fungus gnats may seem harmless when flying around, but their larvae damage roots and slow plant growth. They thrive in constantly wet soil. The solution is simple: let substrates dry between irrigations, cover soil with sand or perlite, and apply beneficial nematodes every 4 weeks. In hydro or coco grows, they are less common but can still appear if organic matter builds up in the system.
Controlled watering helps limit fungus gnat larvae that damage roots.
Fungal Diseases: Botrytis and Powdery Mildew
Fungi are silent killers. Botrytis (bud rot) destroys dense flowers from the inside, often discovered only at harvest. Powdery mildew covers leaves with white dust, weakening photosynthesis. Prevention depends on airflow, humidity management, and pruning inner leaves. Outdoors, growers must account for dew and rainfall; indoors, consistent climate control is key. Once fungi establish, they are almost impossible to remove without harming quality – prevention is non-negotiable.
Lower humidity and good airflow prevent fungi that harm the leaves.
Beneficial Insects – Nature’s Pest Control
Beneficial insects for cannabis pest prevention are the backbone of sustainable growing. They patrol plants continuously, keeping pest populations in check before they explode. Unlike chemical sprays, they don’t leave residues, don’t stress the plants, and pests cannot build resistance. The key is planning: knowing which species to use, how often to release them, and under what climate conditions they thrive.
Predatory Mites
Phytoseiulus persimilis is a spider mite specialist, while Amblyseius cucumeris and swirskii control thrips and whiteflies. Sachets containing colonies can be hung on plants, providing slow, steady releases for weeks. Renew every 3–4 weeks to ensure coverage. Predatory mites are most effective in moderate humidity; too dry and they slow down, too wet and they drown.
Parasitoid Wasps
These tiny wasps are harmless to humans but deadly to pests. Encarsia formosa parasitizes whitefly larvae, while Aphidius colemani mummifies aphids. Regular releases every two weeks are usually enough to keep populations suppressed. They are particularly powerful in greenhouses, where conditions are stable and closed.
Lacewings and Ladybugs
Lacewing larvae are nicknamed “aphid lions” for their appetite. Ladybugs, both as larvae and adults, devour aphids, mites, and soft-bodied insects. Outdoors, they are excellent allies, though indoors they may wander off without companion plants. Planting dill or fennel encourages them to stay longer and improve their effectiveness.
Nematodes
Beneficial nematodes like Steinernema feltiae are microscopic worms that seek out fungus gnat larvae in soil. Applied in irrigation water every 4 weeks, they provide invisible but reliable protection. Because they are harmless to plants, animals, and humans, nematodes are one of the safest biological tools available.
Organic and Natural Pest Control Options
Not all growers want to rely solely on beneficial insects. For them, organic sprays and natural remedies provide another preventive layer. When used wisely, they complement biological control and strengthen the overall system.
Oils and Soaps
- Potassium soap: dissolves the protective wax of soft-bodied insects like aphids and whiteflies.
- Neem oil: disrupts feeding and molting cycles. Apply preventively in veg; avoid late flowering due to aroma risk.
Microbial Solutions
- Bacillus thuringiensis: effective against certain caterpillar larvae.
- Beauveria bassiana: an entomopathogenic fungus that infects insects directly.
- Trichoderma: a root protector that boosts plant resilience against soil pathogens.
Homemade Remedies
- Nettle tea: strengthens plants and deters some insects.
- Garlic/onion extract: rich in sulfur compounds, repelling many soft-bodied pests.
- Chili spray: capsaicin works as a natural repellent. Always test on a few leaves first to avoid unintended damage.
Spotlight: CannaCure, Athena IPW, and Biobizz Leaf·Coat
Some growers prefer ready-to-use products designed specifically for cannabis. Three popular options stand out for preventive care.
CannaCure
CannaCure forms a breathable film on leaf surfaces that makes it difficult for pests to attach or feed. It is best applied preventively once per week during veg and early bloom. Growers appreciate that it not only protects against insects but also leaves plants looking vibrant and glossy. The main rule: spray thoroughly on both leaf sides, but avoid using it in late bloom to prevent residues on buds.
Athena IPW
Athena IPW is a broad-spectrum spray made from natural ingredients. It is effective against sucking insects like thrips, aphids, and mites, and also reduces fungal spores. Many indoor growers use it preventively once every 1–2 weeks. The spray works well under controlled climates but should not be combined with recent beneficial insect releases. Always reduce lighting after application to prevent leaf burn.
Biobizz Leaf·Coat
Leaf·Coat is unique: a natural latex-based coating that strengthens plants while providing a physical barrier against pests. It also reduces transpiration stress, making it valuable in dry grow rooms. Because it washes off naturally after a few days, it is safe and leaves no residues. Application: spray weekly, or twice per week if pest pressure is high. Like other sprays, avoid using it in the final flowering weeks.
Integrated Pest Management (IPM) in Cannabis - keep your marijuana clean
Integrated pest management in cannabis (IPM) is a holistic strategy that combines all preventive methods into one system: hygiene, climate control, beneficial insects, organic sprays, and constant observation. Instead of treating pests as isolated problems, IPM views the grow as an ecosystem where prevention, balance, and sustainability are key. Chemical pesticides are reserved for extreme cases only – and many growers never need them at all. The beauty of IPM is that it evolves with experience. Each grow teaches you something new: which pests are most common in your region, how your strains respond to certain conditions, and which preventive steps save the most effort. By documenting observations and sticking to routine, growers can maintain pest-free gardens harvest after harvest.
Practical Checklist for Growers
- Inspect plants daily with a loupe and sticky traps.
- Release predatory mites every 3–4 weeks as a preventive measure.
- Apply beneficial nematodes monthly in irrigation water.
- Use neem oil or potassium soap sprays during vegetative growth if needed.
- Apply Leaf·Coat or CannaCure weekly; use Athena IPW every 1–2 weeks if pressure is high.
- Maintain stable climate: 60–70% RH in veg, 40–50% in bloom.
- Quarantine all new plants for at least 7–10 days before introducing them.
Preventing pests is essential for healthy plants and a good harvest.
FAQ – Preventive Pest Control in Cannabis Growing
Is natural prevention enough?
Yes. When applied consistently, beneficial insects, good hygiene, and gentle sprays prevent most pest problems before they escalate.
How often should beneficial insects be released?
Predatory mites every 3–4 weeks, nematodes monthly, parasitoid wasps or lacewings every 1–2 weeks depending on infestation risk.
Can I combine CannaCure, Athena IPW, and Leaf·Coat?
Yes, but not at the same time. Leave 5–7 days between applications and avoid spraying immediately after releasing beneficial insects.
How do I prevent fungus gnats?
Allow soil to dry between irrigations, cover the substrate with sand or perlite, and add nematodes every 4 weeks in irrigation water.
Are homemade remedies effective?
They help reduce pest pressure but work best when combined with beneficial insects and organic sprays as part of an integrated system.
How can I avoid bud rot (Botrytis)?
Ensure strong airflow, prune dense canopies, and keep humidity under control. Always remove any infected material immediately to protect the rest of the crop.

Curing and Storing Cannabis Buds for Maximum Flavor and Potency
You’ve harvested beautiful buds. Now the final quality depends on what you do next. Properly curing cannabis buds transforms fresh flowers into smooth, aromatic, top-shelf medicine. Smart storing cannabis buds practices keep that quality intact for months—sometimes longer. In this detailed guide, you’ll learn how to cure cannabis properly, the science behind it, the tools that make it easy, and practical cannabis storage tips that protect flavor and potency.
Why Curing and Storage Matter as Much as Growing
Growing sets the potential. Post-harvest determines how much of that potential you actually taste and feel. Without curing, chlorophyll and residual moisture remain in the flowers. The smoke is harsher, the aroma is muted, and terpenes fade fast. With curing, enzymatic and slow oxidative processes reduce chlorophyll, mellow plant compounds, and preserve volatile terpenes. Storage then shields your work from oxygen, light, heat, and humidity swings. Think of it this way: cultivation creates value; curing and storage cannabis lock it in.
Drying vs. Curing: What’s the Difference?
Drying removes surface moisture until buds are smokable without mold risk. Curing continues after drying: moisture equalizes from the core outward while chlorophyll breaks down and terpenes stabilize. Drying is short and functional. Curing is slow and transformative. Both are essential.
There is indeed a difference between drying and curing—the first is the initial dehydration stage.
Section 1: What Is Curing and Why It Matters
Inside freshly dried cannabis, cells still hold water and active enzymes. During curing, those enzymes metabolize remaining sugars and break down chlorophyll. The result is smoother smoke, brighter aroma, and improved perception of potency—because terpene expression influences the overall effect. Proper curing helps preserve cannabis flavor potency by minimizing the rapid terpene loss that occurs when buds are kept too dry, too warm, or too exposed to air.
- Chlorophyll breakdown: reduces “green,” grassy notes and harshness.
- Moisture redistribution: interior humidity migrates outward, creating uniform dryness.
- Terpene preservation: cooler, stable conditions prevent volatilization and oxidation of aromatics.
- Cannabinoid stability: limiting heat, light, and oxygen slows THC degradation.
Well-cured buds feel slightly spongy, grind evenly, and burn clean. Aroma opens up immediately upon breaking a flower, and the taste lingers. That’s the goal.
Jar curing helps break down chlorophyll and preserve terpenes.
Section 2: Preparing Buds for Curing
Wet Trim vs. Dry Trim
Wet trimming means removing fan leaves and sugar leaves right after harvest, then drying loose buds on racks. It speeds drying in humid climates and keeps buds compact in jars later. Dry trimming means hanging full branches with leaves on, then trimming after drying. Leaves slow evaporation, helpful in arid climates and for preserving terpenes. Both methods work—choose based on your environment and workflow.
Ideal Drying Conditions Before Curing
- Temperature: 60–68 °F (15–20 °C). Cooler temps help retain terpenes.
- Relative humidity (RH): 55–60% in the drying space.
- Airflow: gentle, indirect. Oscillating fans in the room, not aimed at buds.
- Darkness: keep lights off; UV and visible light degrade THC and terpenes.
- Time: usually 7–14 days, depending on bud size and local humidity.
Dry readiness check: small stems should snap rather than bend, and buds should feel dry on the outside but not brittle. If the outside is crisp and the inside still has some give, you’re ready to cure.
Section 3: Step-by-Step Cannabis Curing Process
Tools You’ll Need
- Mason jars for curing (glass, airtight; wide-mouth for easy access)
- Hygrometer for curing jars (one mini unit per jar if possible)
- Humidity packs for cannabis (58–62% RH target)
- Clean trimming scissors, nitrile gloves, and labels
Filling the Jars Correctly
- Loosely load jars to about 70–75% full. Don’t pack tight; buds need air space.
- Place a small hygrometer inside each jar (or rotate one hygrometer among several jars daily).
- Seal the lid gently; you want airtight storage between “burps.”
Burping Jars During the First 2–3 Weeks
Burping jars cannabis means briefly opening lids to release built-up moisture and refresh air. Frequency depends on internal RH readings:
- Day 1–7: burp 1–2× daily for 10–15 minutes if RH inside jars is above 65%.
- Day 8–14: burp every 1–2 days. If RH stabilizes at 58–62%, reduce frequency.
- After Day 14: burp once every few days, or not at all if RH remains stable with a humidity pack.
Monitoring Target RH (58–62%)
Sweet spot: 58–62% RH in the jar. If RH reads higher than 65%, remove buds, spread on a tray for 1–2 hours, then return and reassess. If RH falls below 55%, add a fresh humidity pack to rehydrate gently. Avoid rapid rehydration with fruit peels—this can invite mold and off-odors.
How Long to Cure
- Minimum: 2 weeks for a noticeable improvement in smoothness and aroma.
- Optimal: 4–6 weeks for most strains; dense indica buds often benefit from the longer end.
- Extended: 8–12+ weeks can further refine top terpene strains, provided RH stays stable and cool.
During this time, taste and aroma “round out,” chlorophyll fades, and buds burn evenly. Patience is rewarded.
Section 4: Storage Techniques to Preserve Flavor and Potency
Glass Jars vs. Plastic Containers
Choose glass for long-term quality. Plastic can be permeable to oxygen, hold static that pulls trichomes off, and leach odors. Food-grade, opaque glass is ideal. If you must use plastic briefly (e.g., for transport), transfer to glass as soon as possible.
Vacuum Sealing for Long-Term Cannabis Storage
Vacuum sealing minimizes oxygen, but too much compression can crush trichomes. For long-term cannabis storage, many growers jar-cure first, then vacuum seal whole, pre-cured buds in mylar with a humidity pack. Store sealed packages cool and dark. Label with strain name, harvest date, and cure length.
Using Humidity Packs to Stabilize Conditions
Humidity packs regulate RH by either releasing or absorbing moisture. They’re simple insurance against swings. Use 58% for a slightly drier, “snappier” texture and 62% for a little more pliable, aromatic feel. Replace packs when they harden.
Keep Away from Light, Heat, and Oxygen
- Light: UV rapidly degrades THC and terpenes. Store in darkness.
- Heat: Aim for 60–68 °F (15–20 °C). Higher temps accelerate terpene loss and oxidation.
- Oxygen: Minimize headspace in jars once burping is complete.
Combine these safeguards and you’ll truly preserve cannabis flavor potency over time.
Light, heat, and oxygen are the enemies of proper curing.
Section 5: Common Mistakes to Avoid
- Over-drying before curing: If buds get brittle, curing is less effective. Target a stem “snap,” not a crunch.
- Skipping the cure: Fresh-dried buds often taste grassy and harsh. Even two weeks of curing makes a big difference.
- Plastic bag storage: Not airtight, static-prone, and odor-imprinting. Use glass whenever possible.
- Ignoring mold risks: RH above 65% in sealed jars invites mold. Monitor with hygrometers and adjust fast.
- Rehydrating with fruit peels: They introduce sugars and microbes. Use humidity packs instead.
- Storing in light or heat: Terpenes and THC degrade quickly; protect your investment.
Section 6: How Long Can Cured Cannabis Last?
Properly cured and stored cannabis can retain excellent aroma and potency for many months. Flavor is usually peak from month one through month six. With ideal conditions (cool, dark, stable 58–62% RH, minimal oxygen), quality can remain impressive past a year. Over very long periods, expect gradual terpene oxidation and THC conversion to CBN—meaning less vibrant aroma and a more sedative effect. That’s normal chemistry, not failure of technique. For long-term storage, rotate stock: label all jars with dates and consume older cures first. Keep a small “daily jar” for regular use so you don’t repeatedly open long-term containers and expose them to oxygen.
Section 7: Strains and Curing – Does Genetics Matter?
Absolutely. Terpene-rich cultivars respond dramatically to slow curing; the bouquet expands and nuances emerge. Dense indica buds often need longer drying and curing to ensure the core is properly stabilized. Airier sativa flowers dry faster and may be ready to jar sooner, but still benefit from patient curing. High-THC resin bombs can be volatile—cool temps and gentle handling protect trichomes. Want genetics worth curing to perfection? Explore Cannabis seeds across terpene-driven profiles, and check our High-THC strains if potency is your top priority. If you’re still learning post-harvest timing, don’t miss our hands-on Harvesting cannabis tips. For gear like jars, hygrometers, and humidity packs, browse Cannabis grow supplies.
Practical Step-by-Step: From Drying Room to Curing Jar
- Finish the dry: 60–68 °F (15–20 °C), 55–60% RH, dark room, gentle airflow. Wait for small stems to snap.
- Choose trim style: Wet trim in humid climates; dry trim in arid ones. Consistency matters more than the method.
- Stage for jarring: Calibrate hygrometers. Clean and label jars with strain and date.
- Jar the buds: Fill to 70–75% capacity. Insert mini hygrometers. Seal lids.
- Burp and monitor (Week 1): If RH > 65%, burp 1–2× daily; if 58–62%, burp once daily or use humidity packs.
- Refine (Week 2): RH steady at 58–62%? Reduce burps to every other day. If too dry (<55%), add a humidity pack.
- Stabilize (Week 3–4+): Burp only as needed. Store cool, dark, and airtight. Resist over-handling.
- Long-term storage: For months-long preservation, keep jars full (less headspace), cool, and away from light. Consider vacuum-sealing cured buds for deep storage.
Troubleshooting During the Cure
Jar RH Won’t Drop Below 65%
Spread buds on a clean tray for 1–3 hours, then return to jars. Repeat daily until RH stabilizes. Ensure jars aren’t overfilled and that room humidity isn’t too high.
Hay/Grassy Smell After a Week
That’s residual chlorophyll. Continue curing another 1–2 weeks, mind the 58–62% RH, and keep temps cool. The aroma should brighten as chlorophyll breaks down.
Over-Dry Buds
If RH sits at 50–55%, add a fresh 62% pack and give it a few days. Avoid quick fixes like citrus peels that can alter flavor and introduce microbes.
Spotting Mold
At the first sign of fuzzy growth or “ammonia” odor, remove affected buds immediately and inspect all jars. Mold thrives above 65% RH in sealed spaces. Lower RH and improve burping frequency.
Advanced Tips to Preserve Cannabis Flavor and Potency
- Cold curing: A slightly cooler cure (60–64 °F / 15–18 °C) can retain brighter terpenes—just keep RH controlled.
- Whole-flower curing: Curing small whole colas rather than heavily broken-up buds can protect trichomes.
- Minimal grind exposure: Grind only what you’ll use immediately; ground flower oxidizes quickly.
- Dedicated headspace control: As the stash shrinks, move buds into smaller jars to keep headspace minimal.
- Data logs: Track jar RH, temp, burp schedule, and tasting notes. It makes your next cure even better.
Conclusion
Post-harvest isn’t an afterthought—it’s the finishing craft. By curing cannabis buds slowly and carefully, you elevate aroma, smoothness, and perceived potency. By storing cannabis buds in stable, protected conditions, you keep that excellence intact. A little patience, a few jars, a couple of hygrometers, and consistent technique are all it takes to preserve cannabis flavor potency for the long haul. Ready to put your new skills to work? Start with premium genetics from our curated Cannabis seeds, learn more in our hands-on Harvesting cannabis tips, and stock up on jars, meters, and packs in Cannabis grow supplies. If you’re chasing raw strength, explore our High-THC strains—and cure them like they deserve.
Finishing the curing process is essential to bring out the original flavor and aroma of a cannabis strain.
FAQ – Curing and Storing Cannabis Buds
How long should I cure cannabis buds?
At least two weeks is recommended, but four to six weeks is ideal. This slow process helps preserve cannabis flavor potency and makes the smoke smoother.
Can I smoke buds without curing?
Yes, but fresh-dried buds often taste harsh and grassy. Properly curing cannabis buds enhances aroma, smoothness, and overall quality.
What’s the best way to store weed long-term?
Use airtight glass jars with humidity packs (58–62% RH), kept cool and dark. These cannabis storage tips keep buds fresh for months.
Are plastic bags good for storing marijuana?
No, plastic bags are not airtight and can strip trichomes. For storing cannabis buds, glass jars or vacuum-sealed mylar bags are much better.
How do I know if buds are too moist in the jar?
If relative humidity is above 65% or you smell ammonia, the buds are too wet. Burp jars daily or spread buds out briefly to avoid mold.
Can cannabis be frozen for storage?
Yes, but only after full curing. For long-term curing and storage cannabis, vacuum-sealed and frozen buds can keep potency stable.
How long will cured cannabis retain flavor and potency?
With proper storing cannabis buds, aroma and strength last 6–12 months, sometimes longer. After that, terpenes and THC slowly degrade.

The Role of Biofertilizers and Mycorrhiza in Cannabis Growing
Modern cannabis cultivation is evolving rapidly. Growers are seeking methods that maximize yields while maintaining plant health and sustainability. One of the most promising approaches involves using biofertilizers for cannabis and establishing strong symbiotic relationships between plants and mycorrhizal fungi cannabis. Together, these natural allies enhance nutrient uptake, protect roots, and contribute to more resilient and productive cannabis plants. In this article, we will explore what biofertilizers are, how mycorrhiza works, the benefits they bring to cannabis cultivation, and practical steps for integrating them into your grow setup.
What Are Biofertilizers?
Biofertilizers are natural products containing living microorganisms that improve soil fertility and plant growth. Instead of relying on chemical inputs, they use bacteria, fungi, and other beneficial organisms to enhance nutrient cycling. For cannabis growers, biofertilizers represent a sustainable solution that strengthens plants from the ground up. By providing organic cannabis nutrients, biofertilizers not only reduce dependence on synthetic fertilizers but also help build healthier soils over time.
What Is Mycorrhiza?
The term mycorrhiza refers to a symbiotic association between fungi and plant roots. In this partnership, the fungus colonizes the root system and extends its mycelium far into the soil or growing medium. These beneficial fungi in cannabis cultivation act like an extension of the root network, vastly increasing the surface area available for nutrient and water absorption. In return, the plant supplies the fungi with carbohydrates produced during photosynthesis. This relationship has evolved over millions of years and is essential for sustainable cannabis growing.
Mycorrhiza acts as an extension of the cannabis root to absorb more nutrients.
Types of Mycorrhizal Fungi in Cannabis
There are two main categories of mycorrhizal fungi relevant to cannabis:
- Endomycorrhiza (arbuscular mycorrhiza): These fungi penetrate root cells and are the most common type associated with cannabis. They are highly efficient in transferring phosphorus, nitrogen, and micronutrients.
- Ectomycorrhiza: These fungi surround the roots without penetrating the cells. While less common in cannabis, they still contribute to nutrient and water uptake in certain conditions.
Benefits of Biofertilizers and Mycorrhiza in Cannabis Growing
1. Improved Nutrient Uptake
Mycorrhizal fungi and biofertilizers enhance the absorption of key nutrients such as phosphorus, nitrogen, magnesium, and trace minerals. This leads to better use of available resources and minimizes the need for synthetic inputs. A nutrient-rich cannabis grow becomes more efficient when paired with microbial support.
2. Enhanced Cannabis Root Health
Strong root systems are the foundation of healthy plants. Mycorrhiza forms a protective network around roots, reducing susceptibility to root diseases. By reinforcing cannabis root health, growers can achieve stronger vegetative growth and improved flowering.
3. Greater Resistance to Stress
Cannabis plants treated with biofertilizers and mycorrhiza show better tolerance to drought, salinity, and environmental stress. Beneficial fungi create a buffer that stabilizes water and nutrient availability even under challenging conditions.
4. Increased Yields
By optimizing nutrient uptake and root development, biofertilizers directly contribute to higher cannabis hydroponics yields and soil-based harvests alike. Growers report denser buds, stronger terpene profiles, and improved cannabinoid production.
5. Sustainability
One of the most important aspects is sustainability. By reducing reliance on synthetic fertilizers and chemical pesticides, biofertilizers for cannabis support long-term soil fertility. This is crucial for organic cannabis seeds and sustainable cannabis growing practices.
How to Use Biofertilizers and Mycorrhiza in Cannabis Cultivation
Choosing the Right Product
Look for biofertilizers containing beneficial bacteria such as Azospirillum, Azotobacter, or Bacillus subtilis, as well as mycorrhizal fungi cannabis species like Glomus. Choose products specifically formulated for cannabis or general horticultural use with proven microbial strains.
Application Methods
- Seed treatment: Coat seeds with biofertilizers before germination to enhance early root colonization.
- Soil or substrate inoculation: Mix biofertilizers into soil and growing media before planting.
- Root drench: Apply a liquid solution directly to the base of young plants.
- Foliar sprays: Though less common, some biofertilizers can also be applied to leaves.
Timing of Application
Early application is key. Introduce mycorrhiza and biofertilizers at seedling or transplant stage to maximize colonization. While later applications still offer benefits, early root contact delivers the strongest results.
Biofertilizers and Mycorrhiza in Hydroponic and Soil-Based Cannabis Systems
Many growers assume that biofertilizers only work in soil. In fact, they are equally beneficial in coco, hydroponics, and hybrid systems when applied correctly. In soil, mycorrhiza expands natural microbial diversity. In hydroponics or coco, it helps stabilize nutrient uptake and enhances resilience, especially when paired with precise indoor grow setups.
Case Studies and Research Findings
Recent studies show that cannabis plants treated with mycorrhizal fungi exhibit:
- Increased phosphorus uptake by up to 70%
- Faster root establishment after transplantation
- Improved drought resistance and water efficiency
- Higher terpene concentrations, especially in aromatic strains
These findings underline the importance of beneficial fungi in cannabis cultivation for both yield and quality.
Practical Tips for Growers
- Always combine biofertilizers with good cultivation practices: proper lighting, airflow, and humidity management.
- Do not overuse chemical fungicides, as they can kill beneficial microbes.
- Maintain a stable pH around 6.0–6.5 in soil, 5.5–6.2 in hydroponics, to encourage microbial activity.
- When possible, pair biofertilizers with compost teas or other natural amendments to build a living soil ecosystem.
Using biofertilizers and mycorrhiza is a natural way to boost cannabis roots.
Conclusion
Biofertilizers and mycorrhiza in cannabis growing are essential tools for the future of sustainable cultivation. They enhance cannabis root health, increase yields, improve resilience, and reduce dependency on chemicals. Whether you are working with soil, coco, or hydroponic systems, integrating natural fertilizers for cannabis and mycorrhizal fungi cannabis is a smart investment. By focusing on microbial partnerships, growers create healthier plants, better flowers, and a truly sustainable cannabis growing system.
FAQ – Biofertilizers and Mycorrhiza in Cannabis
What are biofertilizers for cannabis?
They are natural products with living microorganisms that improve soil fertility, nutrient uptake, and overall cannabis plant health.
How does mycorrhiza help cannabis plants?
Mycorrhizal fungi extend the root system, improving nutrient and water absorption while enhancing cannabis root health.
Can I use biofertilizers in hydroponics?
Yes, biofertilizers and mycorrhiza work in coco, hydroponics, and soil if applied correctly.
Do biofertilizers replace synthetic nutrients?
No, but they reduce the need for them by improving efficiency and supporting organic cannabis nutrients.
When should I apply mycorrhiza to cannabis?
At the seedling or transplant stage for maximum root colonization and long-term benefits.
Are mycorrhizal fungi cannabis safe?
Yes, they are beneficial fungi in cannabis cultivation that naturally enhance plant growth and resilience.
What’s the difference between biofertilizers and compost?
Compost provides organic matter, while biofertilizers deliver live microbes that colonize roots directly.
Do biofertilizers improve cannabis yield?
Yes, growers report higher cannabis hydroponics yields and better terpene expression.
Can I use mycorrhiza with organic cannabis seeds?
Absolutely, they pair perfectly with organic seeds and sustainable cannabis growing methods.
How long do mycorrhizal fungi last?
Once established, they persist as long as the root system is alive, continuing to support the plant.

Low Stress Training (LST) for Cannabis: Complete Grow Guide
The LST technique (Low Stress Training) is one of the most effective and gentle methods to optimize cannabis cultivation. Unlike high-stress techniques such as topping, heavy pruning, or supercropping, LST does not damage the plant but carefully guides its growth. The result: compact plants, even bud development, and higher yields. Originally used in vineyards and orchards, LST has become a must for both indoor grow tents and outdoor cannabis gardens.
What is Low Stress Training (LST)?
LST stands for “Low Stress Training.” It involves bending and guiding stems horizontally instead of letting them grow vertically and naturally. This creates a wider, bushier structure with multiple tops at the same height. These tops receive light evenly, improving photosynthesis and stimulating more balanced bud production.
The science behind it is called phototropism—plants naturally orient themselves towards light. When a main stem is bent down, shaded areas produce more growth hormones (auxins), activating side shoots. The result: more vigorous branches and more flower sites.
Thanks to phototropism, LST allows the plant to receive light more evenly.
Why use LST in your cannabis grow?
- Higher yields: Instead of one large central cola, LST produces several equally strong tops that mature at the same time.
- Compact plants: Essential for indoor grows, where space is limited and plants must not reach the lights or windows.
- Lower risk of mold: An open structure with better airflow helps prevent botrytis and powdery mildew.
- Versatile technique: Works in indoor grow tents and outdoor grows, with soil, coco, or hydroponics.
- Perfect for autoflower strains: Since autos have little recovery time, LST is the best training method to boost yields without slowing growth.
When to start LST?
The best time to start is during the vegetative stage, once the plant has developed 4–6 nodes. At this point, stems are flexible and easy to bend. LST can also be applied during the early weeks of flowering (the stretch phase), though stems become stiffer and more fragile later on.
Essential tools for LST
- Soft garden ties or coated training wire.
- Thin but strong string.
- Plastic plant clips or hooks.
- Optional SCROG net for structured training.
- Wooden stakes for extra support.
- Plant tape to repair small splits.
There are several types of tools that can be used during LST.
LST step-by-step tutorial
1. Bend the main stem
Start by gently bending the main stem to the side and securing it to the rim of the pot. This breaks apical dominance and encourages side branches to grow stronger.
2. Train the side branches
As side shoots grow, bend them horizontally as well and spread them out like a fan. The goal is a flat, even canopy.
3. Make regular adjustments
Cannabis grows quickly, so check your ties every few days. Loosen or extend them to prevent stems from being strangled.
4. Maintain during flowering
During the stretch phase, adjust branches to maintain an even height. After week 3–4 of flowering, it’s best to stop bending and let the plant focus on bud development.
Advanced LST variations
- With SCROG nets: Perfect for indoor grows. Each branch is guided through the net holes, maximizing light efficiency.
- With weights: Small, lightweight objects are hung on branches to bend them gently. Popular outdoors, as branches can still move with the wind.
- Spiral training: Guide the plant around the pot in a circle to maximize space.
- Gentle supercropping: For advanced growers only—slightly “crimp” stems to make them bendable without breaking.
LST indoors vs. outdoors
In indoor grow tents, LST is vital for controlling plant height and optimizing lamp distance. A flat canopy ensures even PPFD distribution and prevents light burn.
In outdoor grows, LST helps keep plants discreet and more resistant to wind and humidity. It also lowers the risk of mold after rain by improving natural airflow.
Many training techniques work best when growing feminized strains.
LST in coco and hydroponics
In coco and hydro systems, where plants grow faster, LST is especially effective. A wider canopy means more light use and nutrient absorption, leading to denser buds. Adjust watering and nutrient solution to match the increased leaf mass.
LST not only improves productivity, it also helps keep plants short while maintaining high yields.
LST for autoflower strains
Autoflower strains go from seed to harvest in just a few weeks. High-stress methods can slow them down, but LST is perfect to boost their potential without stunting growth. Modern autoflowers respond very well, as long as training starts early and gently.
Here you can find autoflowering cannabis seeds suitable for both indoor and outdoor growing. Make sure not to choose autoflowering strains that stay too small.
Common LST mistakes
- Starting too late, when stems are already stiff.
- Bending too sharply, causing breaks.
- Using ties that cut into stems.
- Not checking and adjusting ties regularly.
- Allowing one top to grow taller than the rest, breaking canopy uniformity.
- Making too many adjustments at once instead of gradual training.
Yields, quality & terpenes
A flat, even canopy increases light efficiency and lets light penetrate deeper. This leads to bigger, more uniform buds, fewer popcorn flowers, and better airflow. Reduced moisture stress also boosts resin and terpene production, improving overall quality.
Practical checklist before flowering
- The canopy is even, with no dominant tops.
- No ties are cutting into stems.
- Good airflow under and through the canopy.
- Watering and nutrients adjusted for increased foliage.
- Final gentle adjustments made early in the stretch, then let buds bulk up.
Legal disclaimer
Always check the laws in your country or region. This article is for educational purposes only. Grow cannabis only where it is legally permitted.
LST also allows for larger and more uniform buds.
FAQ – Frequently asked questions about LST
Is LST suitable for beginners?
Yes. With patience and gentle movements, anyone can apply LST successfully.
How often should I adjust ties?
Every 2–4 days during veg. During the stretch, even daily. In late flowering, avoid further adjustments.
Can I combine LST with SCROG?
Absolutely. LST positions the branches, and the SCROG net maintains an even canopy for maximum efficiency.
Does LST work for both indica and sativa?
Yes. Indicas become wider, while sativas are kept under control in height. Both benefit from training.
What if a branch breaks?
Support it and tape the break. If not fully snapped, it usually recovers quickly.
Until when should I do LST?
Up until the early weeks of flowering. After that, let the plant focus on bud and resin production.

Best Plant Training Techniques for High-Quality Cannabis Harvests
Training your cannabis plants can dramatically improve the quality and quantity of your harvest. Through shaping and guiding plant growth, you increase light penetration, control height, and stimulate flower production. Whether you're new to growing or a seasoned cultivator, understanding cannabis plant training is key to unlocking your garden's full potential.
Why Plant Training is Essential for Cannabis Growth
Plant training helps manage the structure of your cannabis plants, ensuring all bud sites get sufficient light and airflow. Proper training reduces the risk of mold, improves overall plant health, and boosts yields significantly. With the right techniques, you can train your plants to grow more efficiently and produce higher-quality flowers.
How Training Improves Yield and Plant Health
Training allows you to open up the canopy, reduce shaded areas, and create more even bud development. A flatter canopy means more efficient light use, which directly increases flower size and potency. Additionally, trained plants are generally sturdier, with stronger branches that can support heavier buds.
When to Start Training Cannabis Plants
The best time to begin training is during the vegetative stage, when stems are still flexible. Starting too early can stress seedlings, while starting too late may cause unnecessary damage. Most cannabis training techniques work best once plants have developed 3–5 nodes.
Effective Plant Training Techniques
There are several cannabis training techniques used to optimize plant structure. The method you choose depends on your experience, goals, and the specific strain you’re growing.
Low-Stress Training (LST) for Better Canopy Control
LST involves gently bending and tying down branches to spread growth evenly. This technique doesn’t damage the plant and helps maintain a flat canopy. It's ideal for growers looking to increase yields without shocking the plant.
High-Stress Training (HST) for Maximum Yield
HST includes more aggressive methods like topping, fimming, and super cropping. These techniques involve cutting or pinching stems to trigger bushier growth. While more invasive, they often lead to higher yields and better bud distribution.
Topping and Fimming – Encouraging Bushier Growth
Topping cuts off the plant’s main stem above a node to create two new growth tips. Fimming is a partial cut that results in multiple tops. Both methods are effective for promoting fuller plants and enhancing overall structure.
Super Cropping – Strengthening Plant Structure
Super cropping is a form of controlled stress where branches are gently crushed and bent to redirect growth. This increases nutrient flow and encourages the plant to reinforce its structure. It’s useful for managing taller strains or increasing strength before flowering.
Supporting Cannabis Plants for Stronger Growth
Training isn't just about bending stems—supporting them is just as important. Without proper support, heavy buds can snap branches or reduce airflow, leading to lower-quality harvests.
Using Trellis and Stakes for Stability
Horizontal trellises and vertical stakes help hold branches in place as they grow heavier. They keep the plant upright, maintain shape, and make it easier to space out buds for maximum light exposure.
Managing Height and Light Exposure
Controlling vertical growth ensures that all parts of the plant receive adequate light. This is especially important for indoor growers working with limited height. Use training to prevent uneven development and burnt tops near grow lights.
Common Mistakes to Avoid in Cannabis Plant Training
While cannabis growing techniques like pruning and LST offer great benefits, poor timing or overtraining can have the opposite effect. Avoid these mistakes to protect your plants.
Overtraining and Plant Stress
Excessive bending or cutting can stress your plant and stunt growth. Always allow recovery time between training sessions, and monitor the plant for signs of wilting or slowed development.
Timing Mistakes That Reduce Yields
Training too early can damage young seedlings, while training during flowering can interrupt bud development. Stick to the vegetative phase for aggressive techniques and plan accordingly to avoid setbacks.
Conclusion: Optimizing Cannabis Harvests with Training
With the right cannabis training techniques, you can guide your plants to grow stronger, yield more, and produce higher-quality buds. From low-stress bending to advanced pruning strategies, each method offers unique advantages when timed correctly and applied consistently.
Best Practices for Healthier, High-Yielding Cannabis Plants
- Start training during the vegetative stage when stems are flexible.
- Choose techniques that match your skill level and plant type.
- Support heavy branches with stakes or trellis netting.
- Avoid overtraining and give plants time to recover.
- Use clean, sharp tools to prevent infections when pruning.
FAQ – Cannabis Plant Training
What is cannabis plant training?
It’s a group of techniques used to shape cannabis plants for better light use, stronger structure, and higher yields.
How to train cannabis plants effectively?
Start early in veg phase, use LST or HST, and adjust based on strain behavior and growth pattern.
What are the most common cannabis training techniques?
LST, topping, fimming, super cropping, and SCROG are popular methods used by growers for canopy control and yield improvement.
When should I stop training cannabis plants?
Training should stop by early flowering. Continuing after week 2–3 of bloom can harm bud development.
Can cannabis training techniques stress the plant?
Yes, especially HST methods like topping or super cropping. Always allow recovery time to avoid stunting growth.

When to Harvest Cannabis Strains for Best Results
Harvesting your cannabis at the right time is crucial for getting the best flavor, potency, and resin production. Each strain has its own timeline, and recognizing the signs of maturity can help you make the most of your grow. Whether you’re growing indoors or outdoors, proper timing makes all the difference.
Understanding Harvest Seasons
The harvest season for cannabis usually falls between September and October for outdoor plants. Indoor grows offer more control and flexibility, allowing for multiple harvests a year. However, visual and physical cues are more reliable than dates alone.
What is the Harvest Season for Different Plants?
Indica strains tend to mature faster and are often ready by late September. Sativas may need until late October or even November to fully ripen. Hybrid strains fall somewhere in between, depending on their genetic makeup.
When is Harvest Time for Weed?
The best time to harvest weed is when most of the pistils have darkened and curled inward, and the trichomes have turned from clear to milky with a few amber ones. This stage offers a balance of potency, flavor, and yield.
Indoor vs. Outdoor Harvest Timing
Outdoor cannabis is at the mercy of seasonal changes. Most photoperiod strains finish in late September to mid-October, but sudden weather changes can force earlier harvests. Indoor grows give you full control over lighting and can be harvested year-round — but even then, the plant’s maturity should guide your timing.
Genetics and Flowering Time
Each strain’s genetics determine its flowering duration. Indicas usually flower in 7–9 weeks, while sativas can take 10–14 weeks. Hybrid strains vary, depending on dominance. Always check the breeder's specs and confirm maturity visually for best results.
Common Mistakes When Timing the Harvest
Many growers rely too heavily on the calendar instead of visual signs. Others harvest too early out of impatience. A bud may look ready, but if trichomes are still clear and pistils mostly white, it’s not. Always use a magnifier to examine resin glands closely before cutting.
Determining the Right Time to Harvest
Trichomes and pistils are the most accurate indicators of maturity. Using a magnifying glass or jeweler’s loupe helps you observe them closely. Timing affects the effects—early harvests tend to be more uplifting, while late ones feel heavier and sedative.
When is Pot Ready to Harvest?
Pot is ready when 70–90% of the pistils have changed color and most trichomes are cloudy with some amber. For a more relaxing high, wait until more amber trichomes appear. For a more energetic buzz, harvest earlier.
Signs of Maturity for Different Strains
Indicas develop dense, firm buds and mature faster. Sativas are airier and take longer to finish. Hybrids may lean in either direction. Watch for color shifts in pistils and trichome cloudiness for all types.
Tips for Optimal Harvesting
Preparation, patience, and precision make for a smoother harvest. The right tools and conditions protect the quality of your buds during and after cutting.
Tools and Techniques for Efficient Harvesting
Use sharp scissors or trimming shears. Harvest during the dark cycle or early morning to preserve terpenes. Wear gloves to avoid contamination and trichome loss. Handle gently to prevent damage.
Preserving Quality During and After Harvest
Dry your buds slowly in a dark, well-ventilated room at 18–22 °C and 50–60% humidity. After drying, cure them in glass jars, opening daily for fresh air. This process enhances taste, aroma, and smoothness.
Conclusion
Knowing when to harvest cannabis is one of the most important skills for any grower. By learning how to read pistils and trichomes, you’ll get the timing right for your strain. Whether you prefer uplifting or relaxing effects, proper timing ensures top quality, potency, and yield.
FAQ – Harvesting Cannabis
When to harvest cannabis?
The best time is when trichomes are mostly cloudy with some amber, and most pistils have darkened and curled in. This ensures peak potency and flavor.
What are trichomes and why do they matter?
Trichomes are tiny resin glands that contain cannabinoids and terpenes. Their color changes show the maturity and effects of the plant.
Can I harvest cannabis too early?
Yes. Early harvest leads to lower THC and a more stimulating high, but also reduced yield and incomplete flavor development.
Is it possible to harvest too late?
Yes. Waiting too long can degrade THC into CBN, causing a more sedative effect and reduced psychoactivity.
What tools do I need for harvesting?
Use sharp scissors, gloves, a magnifying tool, and glass jars for curing. Good ventilation and darkness are also key.
How to tell if cannabis buds are immature?
Immature cannabis buds are often light, airy, and lack sticky resin. Trichomes are still clear, and pistils are mostly white or greenish rather than brown or orange.

Understanding Cannabis Nutrients for Better Yields
Healthy cannabis plants rely on more than genetics and lighting. The key to strong growth and high yields is providing the right nutrients at the right time. By learning how nutrients work, what types cannabis needs, and how to balance them, growers can ensure vigorous plants and abundant harvests.
Why Nutrients Are Essential for Cannabis Growth
Nutrients are the backbone of cannabis development. They support photosynthesis, root formation, and bud production. Without proper nutrition, plants become weak, less resistant to stress, and produce lower-quality flowers. Supplying the best nutrients for growing cannabis promotes resilience, potency, and flavor.
How Nutrients Affect Plant Health and Yield
The amount and type of cannabis grow nutrients directly impact plant health. Adequate feeding results in lush leaves, strong stems, and dense buds coated with trichomes. Poor nutrition, on the other hand, slows growth and reduces cannabinoid levels, lowering the final yield.
Common Signs of Nutrient Deficiencies in Cannabis
Recognizing deficiencies early helps save crops. Yellowing leaves often indicate nitrogen issues, while brown spots suggest calcium deficiency. Curled leaf edges, pale new growth, or slow development are other warning signs. Quick diagnosis and correction are essential to prevent damage.
Essential Nutrients for Cannabis Plants
Cannabis needs both macronutrients and micronutrients. Each element plays a specific role in growth and flowering.
Macronutrients: Nitrogen (N), Phosphorus (P), and Potassium (K)
These primary elements drive plant performance:
- Nitrogen (N): Crucial during vegetative growth, boosting leaf and stem formation.
- Phosphorus (P): Supports root development and energy transfer, vital for bud growth.
- Potassium (K): Enhances disease resistance, strengthens stems, and improves flower density.
Micronutrients: Calcium, Magnesium, Iron, and More
Even in small amounts, these nutrients are essential:
- Calcium: Builds cell walls and aids root expansion.
- Magnesium: Key for photosynthesis and chlorophyll creation.
- Iron: Assists with enzyme function and chlorophyll synthesis.
- Others: Zinc, manganese, boron, and copper also support healthy growth.
Organic vs. Synthetic Nutrients – What’s Best for Cannabis?
Growers often debate organic versus synthetic fertilizer. Organic options, like compost and worm castings, improve soil structure and feed beneficial microbes. Synthetic nutrients offer fast results and precise dosing but require careful monitoring. Many growers combine both to achieve balance.
How to Balance Nutrients for Optimal Cannabis Growth
Maintaining balance prevents deficiencies and toxicities. Overfeeding burns roots, while underfeeding starves plants. Correct balance ensures steady growth and optimal flower formation.
Understanding pH Levels and Nutrient Uptake
pH is critical for nutrient absorption. In soil, keep pH between 6.0 and 7.0. In hydroponics, aim for 5.5–6.5. Out-of-range pH causes nutrient lockout, where plants cannot access available elements despite proper feeding.
Feeding Schedules for Different Growth Stages (Vegetative & Flowering)
Cannabis needs change during its lifecycle. In the vegetative phase, high nitrogen levels encourage leafy growth. During flowering, reduce nitrogen and increase phosphorus and potassium to boost bud formation. Always follow feeding charts and adjust based on plant response.
Common Nutrient Problems and How to Fix Them
Even with care, nutrient issues can arise. Quick action minimizes damage and restores plant health.
Nutrient Lockout – Causes and Solutions
Lockout occurs when salts accumulate or pH is off, blocking nutrient uptake. The solution is to flush the medium with pH-corrected water and reset your feeding routine to restore absorption.
Overfeeding vs. Underfeeding – Finding the Right Balance
Overfeeding shows as burnt leaf tips and dark green foliage. Underfeeding leads to pale leaves and weak growth. The safest approach is to start with lower doses and gradually increase as plants mature.
Conclusion: Maximizing Cannabis Yields with Proper Nutrition
Correct nutrient management ensures vigorous growth, resistance to stress, and abundant, high-quality harvests. Whether you prefer organic compost or synthetic fertilizer, consistency and balance are key to success.
Best Practices for a Healthy and Productive Grow
- Check pH regularly to prevent lockout.
- Adjust feeding schedules to plant stages.
- Watch leaves for early deficiency signs.
- Experiment with nutrient brands to find your best fit.
With the right nutrient strategy, your cannabis plants will thrive and deliver top-tier yields.

Managing Humidity for Healthy Cannabis Growth
When growing cannabis, most people focus on light, nutrients, and temperature. But one thing often gets overlooked: humidity. The right balance of temperature and moisture is key to healthy plants and big harvests. This guide shows why cannabis humidity matters and how to control it — no matter where you grow.
Why Humidity Matters for Cannabis Plants
Cannabis plants breathe through tiny openings on their leaves. These help the plant take in CO₂ and release water vapor. If the air is too dry, the plant loses water too fast. If it’s too moist, mold and fungi can grow. The right humidity helps with photosynthesis and keeps your plants strong.
Effects of Humidity on Growth and Yield
Good humidity and airflow make a big difference. Your plants grow faster, roots get stronger, and buds become more potent. But too much moisture with bad ventilation can slow growth and cause disease. Even cannabis that can handle high humidity needs a stable environment to thrive.
Ideal Humidity Levels for Cannabis
The right humidity changes as your plants grow. Each stage needs different levels of moisture and temperature.
Humidity Needs at Different Growth Stages
- Germination: 70–80% humidity, 22–25°C
- Vegetative Stage: 50–70% humidity, 22–28°C
- Flowering Stage: 40–50% humidity, 20–26°C
- Late Flowering: 30–40% humidity to prevent mold
In early stages, more moisture helps roots grow. Later, you’ll need lower humidity to protect your buds. Many growers also adjust cannabis flowering temps to match the humidity for best results.
How to Control Humidity in Cannabis Cultivation
Whether you grow in a tent or greenhouse, you need tools to measure and adjust humidity. That’s the best way to stay in control.
Ventilation and Airflow Strategies
Airflow and ventilation help you keep humidity stable. Use these tools and tips:
- Humidifiers: Add moisture in dry rooms or winter
- Dehumidifiers: Lower humidity during flowering or in wet climates
- Fans: Circulate air and stop damp spots
- Exhaust systems: Remove stale, moist air
- Hygrometers: Track humidity levels at all times
Check your setup often. Keep your temperature and humidity in the right range. Your plants will reward you.
Common Issues with Humidity in Cannabis Growing
Even skilled growers run into problems. High moisture in closed rooms without airflow can ruin your crop fast.
Preventing Mold, Mildew, and Bud Rot
Too much humidity can cause condensation on walls, lights, and buds. This leads to mildew and bud rot, especially during flowering. Here's how to avoid it:
- Lower humidity in late flowering (last 2 weeks)
- Give your plants space and airflow
- Keep temperatures steady to avoid dew buildup
You can grow cannabis that can handle high humidity in wet regions. But even these plants need good airflow and smart climate control.
Conclusion: Best Practices for Humidity Management
Cannabis humidity is crucial. It affects how your plants grow, how much they yield, and how strong your buds are. Keep your temperature, moisture, and airflow in check. Adjust as your plants go through different stages. Whether indoor or outdoor, stable conditions bring the best results.
FAQ: Humidity and Cannabis Cultivation
What is the ideal humidity for cannabis plants?
It depends on the stage: 70–80% for germination, 50–70% for veg, 40–50% for flowering, and 30–40% at the end.
Why is humidity important in cannabis cultivation?
It affects water uptake, photosynthesis, and prevents mold. Balanced humidity keeps plants healthy.
How can I reduce humidity during cannabis flowering?
Use a dehumidifier, add airflow, and avoid watering at night. Keep temps stable to stop condensation.
Can cannabis grow in high humidity environments?
Yes, some strains do well. But you still need good airflow and proper care to avoid bud rot.

The perfect time for lollipopping: when, how and why to prune
Physiology and the energy flow of cannabis
The window of opportunity to synchronise pruning with the rhythm of the plant
Practical guide for precise and safe lollipopping
Postoperative care and additional considerations

How to grow autoflowers Part 2: Vegetative and flowering
Automatic cannabis strains in their growth stage
How to detect a blockage during the vegetative period
What to do if my autoflowering cannabis plant hasn’t grown enough
- Germinating the seeds when the good weather has not yet arrived.
- Not controlling the pH of the irrigation water.
- Watering too much and waterlogging the roots.
- Transplanting.
- Not providing an aerated substrate.
- Buying seeds from dubious sources rather than from quality seed banks.
How to cultivate auto seeds: growth and flowering
- Watch how "thirsty" your autoflowers are and adjust the quantity as they demand more. Cannabis plants require abundant watering in their adult stage, after which the soil must be allowed to dry. A good indicator that the time has come to water again is that the pot feels light when you pick it up. If the container is too large to lift, dip your finger in the ground about 3 centimetres to check for moisture. Wait until the substrate is dry, without reaching the point where your plants suffer from water stress (when the leaves are drooping, as if they’ve "collapsed" very quickly). Don’t obsess about this too much because by observing and practising you’ll definitely end up finding the right point.
- Increase the amount of nutrients progressively to cover the needs of both the vegetative period and the flowering phase.
Things you should NOT do when growing autoflowers

How to maximise the pigmentation of cannabis for an explosive colour
The key role of anthocyanins
Determining factors for colour enhancement
Temperature drop
pH optimisation
Specialised nutrition
Strategic manipulation of light
Other controlled stress techniques
Genetic colouration versus ripening-induced colouration
New chromatic gems in our Linda Seeds catalogue
- Runtz Muffin: With its mix of Zkittlez x Gelato x Orange Punch, this strain produces dense buds with purple hues and a sweet and fruity taste profile.
- Animal Mintz: The result of the cross between Fire OG x Animal Cookies x Thin Mint Cookies. This variety develops buds with dark green hues and purple touches, accompanied by a minty aroma.
- GMO: A strain derived from the cross of Chemdawg x Girl Scout Cookies that combines intense flavours with a colour range between dark green and deep purple.
- Sweet Cherry Pie: With genetics that include Granddaddy Purple x Durban Poison, this strain offers buds with purple hues and a sweet cherry flavour.

Inbreeding or Hybrids – Which Strategy Yields the Best Cannabis Strains?
Genetic Basics: Why the Reproduction Method Matters
Recurrent Selection: Step by Step Toward the Perfect Strain
Self-Pollination and Homozygosity: The Foundation of Stability
The Finishing Touch: Crossing, Preservation, and Quality Control
Conclusion: Inbred Lines, Hybrids, and Landraces – What Produces the Best Results?

The secret to growing giant autoflowers
A clock that doesn’t stop
Germination: the first battle against time
Final pot and oxygenated substrate
Irrigation or the art of provocation
Beyond the photoperiod
Nutrition: minimum doses, maximum results
Wind, stress, and sturdy stems
Optimal environmental conditions
And remember: precision, not haste

The cannabis photoperiod: What’s the best indoor lighting schedule?
What’s the photoperiod of cannabis?
Optimal lighting cycles for photo-dependent strains
Seedling stage
Vegetative phase
Flowering stage
Optimal lighting cycles for autoflowering strains
Mastering the art of the photoperiod

What are Fast cannabis strains?: growing faster without losing quality
What are Fast cannabis seeds?
Are Fast cannabis strains photo-dependent?
How are Fast strains created?
What are the advantages of Fast flowering cannabis seeds?
- Shorter grow cycle: Thanks to their short flowering period, Fast genetics avoid climate risks and maximise productivity in indoor grows (more crops can be grown per year thanks to their short life cycle).
- Greater control and yielding capacity: You can determine the size of your plants (by lengthening or shortening their growth period), and they offer a greater margin for error in the event of a mishap (the plants have enough time to recover in case of pests, fungi, etc.).
- You can perform pruning and training techniques: Unlike with autoflowerings, pruning and training techniques such as SCROG or LST can be applied to Fast strains. As these genetics are photo-dependent, there is enough time for the plant to recover and for the desired results to be obtained. This doesn’t happen with autos because their short growth period (of 4 or 5 weeks) makes this type of growing techniques irrelevant.
- They offer the same quality and production parameters: Fast seeds maintain the standards of their photo-dependent feminised parents (i.e., THC levels, yielding potential, terpene profile, etc.). Therefore, these varieties offer greater speed without compromising the quality of the crops.
Fast Flowering strains are perfect for you if…
Linda Seeds’ best Fast cannabis seeds
- Hollands Dope (F1 Fast): With a flowering time of just 6 - 7 weeks, this strain is ready for harvest by mid- to late September.
- Balkonien Glück (F1 Fast): Only 6 weeks of flowering, and highly resistant to mould and temperature fluctuations.
- Datscha Grün (F1 Fast): A fast-flowering and hardy sativa strain that has been optimised specifically for the climate of Central Europe.
- Gartenglück (F1 Fast): An ideal outdoor fast-flowering strain that is robust and high yielding.
FAQs about Fast Flowering cannabis strains
- Do Fast varieties lose potency?
- Are Fast genetics autoflowering?
- What is the flowering period of a Fast strain?
- Can Fast cannabis seeds be grown indoors?
- Do Fast cannabis strains have less flavour?

How to identify and solve the problems of newly born cannabis seedlings
1. Overwatering: the silent drowning
2. Deficit irrigation: the invisible thirst
3. Poor lighting: desperate stretching
4. Light burns: the solar fire
5. Extreme temperatures: thermal stress
6. Wrong substrate: root asphyxia
7. The nutritional deception: deficiencies and excesses
8. Pathogenic fungi: the invisible enemy
9. Transplant trauma: the shock of moving
The art of listening to your seedlings

Simple and eco-friendly cannabis growing practices to reduce your environmental impact
Optimisation of water consumption
- Environmental impact: Less wasted water and zero electric power for automated irrigation. And you’re also reusing materials.
- Top tip: If you grow indoors, use a 500 ml bottle with a single tiny hole to control the flow even better. Adjust according to your plant’s needs.
Energy efficiency in indoor grows
- Environmental impact: Less energy consumption and reuse of metal waste that often ends up in landfills.
- Top tip: Make sure the aluminium is well cleaned to avoid odours; and don’t use it with intense heat lamps (such as HPS), as it could melt.
Use of domestic microclimates
- Environmental impact: This lowers energy consumption by reducing reliance on air conditioning systems.
- Top tip: Place the black bottles on a reflective tray to maximise light and heat absorption; and check that they don’t obstruct the ventilation.
Composting and recycling of organic waste
- Environmental impact: You reduce organic waste by recycling it at home whilst eliminating the carbon footprint associated with the production and transport of commercial substrates.
- For indoors: Use a pot with a perforated base and a tray underneath to prevent the worms from escaping.
Natural control of pests and diseases
- Environmental impact: You avoid toxic chemicals that pollute the soil and water, as well as supporting local biodiversity with the ladybirds.
- Note: Indoors, use a yellow adhesive tape smeared with honey to catch small flies.
Beneficial companion planting
- Environmental impact: It reduces the use of chemical pesticides and improves soil health, preventing degradation due to monoculture.
- Top tip: If you use sunflowers as trap plants, position them about 30 cm away from cannabis so that aphids concentrate on them and are unable to jump to your plants.
Organic and sustainable fertilisation
- Environmental impact: This minimises dependence on synthetic fertilisers and makes great use of natural resources or organic waste.
- Top tip: For fruit tea, use apple or ripe banana leftovers (cannabis loves potassium), and shake the container every two days to avoid bad odours.
Small steps, big changes

The most common mistakes when starting an outdoor cannabis grow
1. Choosing the wrong location for your grow
- Solution: Ideally, you should choose a south-facing location that gets at least 6 - 8 hours of direct sunlight per day. Look for a discreet and protected area, for example near a wall or hedge that serves as a windbreak but doesn’t cast excessive shade. Accessibility also counts: a place near a water source will facilitate irrigation, and a space where you can work comfortably will help you to look after your plants on a regular basis.
2. Using the wrong substrate
- Solution: Invest in a good substrate for cannabis from the very beginning. This should be light and airy, with good drainage capacity and organic nutrient content; and with a loose structure that includes perlite, coco coir, or another aerating medium to ensure proper drainage. Adding worm castings or compost will help enrich the soil with beneficial microorganisms, which will in turn improve soil structure and fertility.
3. Not making the right decision between the ground or a pot
- Solution: If the garden soil is suitable, planting directly in the ground can be highly beneficial. Prepare the area in advance: Dig and aerate the soil, mix organic soil amendments (worm castings, mature compost, guano) and drainage material (sand, perlite) as needed. If you need mobility or the soil is poor, opt for pots. Use small pots for seedlings (0.5 – 1 L) during the first few weeks, and then transplant them to larger pots as the plants grow: (5 - 10 L) for the vegetative period, and finally a large pot (15 - 20+ L) for the flowering phase.
4. Germinating outdoors
- Solution: The best practice is to start germination in a controlled environment. You can germinate at home and let the plants grow for one or two weeks under soft lighting (a fluorescent tube, a simple LED lamp, or close to a sunny window). When your seedlings are 1 - 2 weeks old, you can move them outdoors; but do this gradually: Take them out for only a couple of hours at first, protect them from strong winds, and don’t leave them totally out in the open from the very beginning. Gradually increase the time they spend outside and the intensity of sunlight that they receive.
5. Over or under-watering
- Solution: Do not water out of habit – water only when needed, checking the moisture of the substrate before each watering session, and adjusting the frequency according to the climate. Water only when the substrate is dry at a depth of about 3 - 5 cm. In summer, it may be necessary to water daily; but in colder or more humid climates, watering should be less frequent.
6. Inappropriate exposure to sunlight or incorrect photoperiod
- Solution: In regions with short days at the beginning of spring, it is advisable to germinate indoors and wait until mid-season to take the plants outside, or until the days have more than 14 hours of natural light. If for some reason you need to start very early (i.e., in late winter), consider keeping the plants indoors with extra light until the length of the day increases, or opt for autoflowering strains.
7. Not selecting the strain according to climate and growing times
- Solution: Do some research into the most suitable varieties for your area. Photo-dependent strains should be planted in mid-spring so that they can grow sufficiently before flowering. Autoflowers can be sown in several batches throughout the summer.
8. Other common errors to avoid
- The grower should also be a meteorologist: Climate forecasting is always a plus. Anticipate the unexpected and use stakes or meshes to protect the branches from the wind; cover the plants with plastic or tarpaulins in case of heavy rains; and move the pots into the shade during extreme heat waves.
- Don’t move the plants around unnecessarily: A little controlled movement is fine (for example, rotating the pots so that the plants catch the sun more evenly). However, if you drastically change the plant environment too often, they can become stressed. Plants do appreciate a certain stability in their microclimate.
- You should keep a record and learn from past mistakes: Write down the time of germination, the time of fertilisation, and the times when problems emerged, and how you fixed them. Every mistake is a valuable lesson: Each grow will make you a better grower if you reflect on what happened.
- Don’t expect miracles without putting in the effort: Finally, a common mistake is to think that the plant will grow on its own without any care – a concept which usually ends badly. A successful grow involves dedicating some time to it every day or two, even if it’s just to keep an eye on it.

Tips for Growing Cannabis Indoors: Best Soil & Techniques | Linda Seeds
Tips for growing cannabis indoors
Why Grow Cannabis Indoors?
- Growing conditions. We can manage temperature, light level, humidity, watering, nutrients, soil quality, and planting density.
- No additional treatment is involved. Given the plant's non-exposure to parasites and pests, and its low exposure to contagious diseases, this method does not require any chemical or biological treatment applied on the marijuana plant. It is economically viable and more environmentally friendly.
- Can be grown in any season. There is no need to adjust to the seasons or the weather, so you can get multiple harvests.
Essential Tools and Equipment for Indoor Cannabis Growing
- Growing tent: The tent will help you create a separate area for plants where you can control all conditions: light, temperature, humidity. It will also help to prevent light scattering and evaporation or odors.
- Plastic tray: The tray and pots are obvious for easy placement of plants. This will help keep the growing area clean.
- Lights: Proper lighting helps the plant grow faster and be more productive. For the vegetative stage — when the plant sprout begins to grow leaves, stems, and roots — you will want a grow light of around 100 to 125 watts. After around two to four weeks of vegetation you should switch to a grow light of about 250 watts or above to trigger flowering.
- Fans: It is important to ensure the circulation of warm air and its constant replacement. This helps to grow cannabis faster and more efficiently under the right temperature conditions, as well as to avoid unpleasant odors.
- Filters for air purification to avoid odors, a thermometer, and a hygrometer are optional, but will help you better control the growing indoors.
Choosing the Best Place for Indoor Cannabis Growing
Preparing Your Indoor Grow Space
Choosing the Best Soil for Cannabis Indoor Growth
- Loamy soil is considered ideal for cannabis because of its balanced composition of sand, silt and clay. It supports healthy root development and is relatively easy to work with, making it the preferred choice for many cannabis growers.
- Sandy soil has coarse particles that provide excellent drainage and aeration. While it may not retain nutrients as effectively as loamy or clay soils, it can be useful for preventing overwatering and root rot. Incorporating organic matter and compost into sandy soil can improve its ability to hold nutrients, making it a viable option for growing cannabis in certain conditions.
- Coconut fiber, derived from coconut husks, is a popular medium for growing cannabis . It has a neutral pH and is reusable, making it an environmentally friendly option. When mixed with other soil components, coconut fiber can improve overall soil texture and fertility. Check out our coconut fiber products for cannabis plants.
- There are also numerous ready-mixed soils that are optimized for cannabis plants.

10 top tips for maximising the growth of cannabis in small spaces
1- Choose compact genetics
2- Don’t burn your plants with the lighting
3- Train your plants
4- Maintain proper air circulation
5- Choose space-saving pots
6- Select the ideal growing medium
7- Implement efficient nutrient management
8- Water little but often
9- Minimise the duration of the vegetative cycle
10- Expect realistic results

Guide to growing autoflowering cannabis seeds in Germany
What are autoflowering cannabis seeds?
Why are autoflowerings ideal for growing in Germany?
Benefits of autoflowering seeds for cultivation in Germany
- Short life cycle. Automatic varieties are perfect for regions with short summers, as you can germinate your seeds in mid-June and then harvest aromatic buds by the end of August. This avoids the bad autumn weather, which in some German areas usually arrives early and abruptly, ruining your precious flowers.
- Their speed reduces exposure to pests and fungi. Therefore, they’re ideal for rookie growers, or for growing on a large scale and minimising these potential setbacks that can reduce the yield.
- Contained size that’s ideal for discreet grows. This type of plant is very well suited to reduced spaces such as decent-sized windows, balconies, discreet gardens, or terraces. Therefore, they’re the preferred choice of urban growers, but also of dispensaries with commercial crops that need to take advantage of every inch of their facilities.
- Speed without compromising quality. It is true that the first autoflowerings that were launched onto the market didn’t meet the quality standards of feminised seeds. Nowadays, however, thanks to the great work of breeders and seed banks, these strains can offer premium levels in terms of flavour, yielding capacity, and terpene and cannabinoid content. So, if you’ve heard that the quality of their crops is not as high as that of other genetics, let us tell you that this myth has been well and truly busted.
- The solution for those who don’t want to wait: Autoflowerings allow you to harvest ultra-resinous buds in record time and with no complications, so they’re the best choice for those who want premium results without any hassle. This is an easy and rewarding option for rookies starting their growing venture under the cover of legality in Germany, and even for those who want to grow several harvests throughout the season.
- Adaptability: Summer in Germany is characterised by its climatic variability, with frequent intervals of full sun, winds, and summer rains. Autoflowering strains are versatile and highly adaptable – they’re all-terrain hybrids that can weather the highly variable German climate. In addition, they can be easily moved thanks to their compact size, so they can be better protected from rain and unexpected strong winds.
- Light pollution: As autoflowerings don’t depend on the photoperiod to start flowering, they aren’t affected by light pollution from lampposts, etc.
- Low maintenance: In indoor grows, they eliminate the need for light cycle adjustments, which makes them ideal for beginners and for growers with busy schedules.
Top tips to grow autoflowering cannabis in Germany
Choose the right autoflowering strain for the German climate
- Auto Do si Dos by Linda Seeds – a strain that delivers a high-flying effect combined with the best American flavour: a profile with notes of lemon tart that overlaps an earthy background. In a nutshell, a cold-resistant automatic plant that’s ideal for growing in Germany.
- Auto Northern Lights is a classic that offers out-of-this-world yields even in regions with northern climates. This is a potent strain by Linda Seeds that you’ll also find in bulk format for large-scale cultivation.
Most common mistakes when growing autoflowerings
- Use an aerated substrate: Autoflowering strains have a short and limited life cycle, so every day of the plant’s life counts. To speed up their metabolic processes and achieve the maximum yield, it is best to use a substrate that is slightly more airy than normal. A good option is to use a mixture of 3⁄4 of soil and 1⁄4 of coco coir, arlite, or another substrate that facilitates the aeration of the mix.
- Avoid overwatering during the first few weeks of life. Soil that is too wet for too long can block the growth of the plant. Water more often using smaller amounts during the first 3 - 4 weeks of life, making sure that the pot doesn’t become flooded so that the roots don’t get waterlogged.
- Avoid transplanting. Place your cannabis seedling in its final pot once the seed has germinated. Otherwise, your autoflowering plant could become stressed and stop growing.
- Avoid pruning or training methods. Autos don’t have a vegetative period long enough to recover, so these techniques won’t serve any purpose.
- Just like any other type of cannabis, autoflowers love the sun. When growing outdoors, place them in sunny spots where they can get the best of the German summer.
- If you’re going to grow autoflowering seeds indoors, make sure your plants get at least 18 hours of light and 6 hours of darkness throughout the entire growth cycle (some even prefer a 20/4 photoperiod). Since the cost of electricity in Germany isn’t the cheapest, buying an LED lighting system may be the best long-term option to avoid an excessive increase in your electricity bill.

How to choose the best cannabis seeds for cold climates
Growing cannabis outdoors can be a real challenge, especially in colder climates with short growing seasons. Choosing the right strain can significantly improve the chances of a successful harvest, even in regions where temperatures are low and weather conditions are harsh. There’s also a number of key factors that you must take into account when selecting the best cannabis varieties for this purpose.
Before we begin, let’s answer the big question: Can you grow cannabis in cold climates? The answer isn’t that simple and depends on several factors, such as the minimum temperatures in your region, the environment you’re in, the precautions you take, your growing skills, the choice of strain, and much more. Having said that, you can easily grow cannabis in cold regions if you play your cards right. It may not be the ideal environment for your plant, as cannabis loves warm climates that are blessed with abundant sunshine. And just as you perform best in an environment that is right for you, marijuana plants behave in exactly the same way. If cannabis is forced to live constantly in low temperatures, its development will gradually slow down. Once the thermometer drops below 15°C, its metabolism will gradually decrease; enzymatic and biochemical processes won’t be carried out; vegetative vigour may also fail; and its root system may not expand as it should, preventing it from absorbing as many nutrients as usual. The result is a weak plant that grows slowly and produces poor harvests. Additionally, cannabis plants don’t usually tolerate frost very well. Temperatures below 0°C can severely damage their structure, especially the youngest leaves and tissues, causing necrosis (cell death) and drastically reducing their ability to grow and flower. Therefore, to get the best results, especially in regions with freezing temperatures, it is advisable to grow cannabis indoors during the coldest months of the year. But in other warmer regions, you can easily manage using greenhouses, protective tunnels, or insulating mulch. You can even find growers growing autoflowering cannabis outdoors in Scandinavian areas, in even the coldest temperatures. Therefore, you must find out which method works best for you. And, to achieve this, you must start by choosing the best type of seed for your grow.
What type of strain should I choose for cold climates?
An obvious choice when selecting genetics that are resistant to adverse weather conditions are autoflowering strains, such as Auto Polar Gelato, Auto Tropicana Cookies, or Amnesia Auto. Thanks to their ruderalis lineage, which originates from regions like Siberia (where cannabis adapted to the adverse climate and different lengths of day and night), automatic plants are hardier and don’t depend on the photoperiod. In other words, they don’t have to wait for the days to become shorter to start flowering, so you can choose the 2 - 3 warmest months of the year for your grow: You can plant them in early summer and harvest them in early September, before it gets too cold and rainy, so you can harness the power of the sun in the months with the highest sunshine. The varieties known as ‘Fast’, ‘Early’, or ‘Fast Flowering’, with examples such as Early Top Skunk, Purple Punch Fast, or Critical Poison Fast, are also an innovative solution for growers looking to deal with low temperatures without sacrificing the quality of their crops. By crossing autoflowerings with photo-dependent plants, it was found that the new strains were still photo-dependent but with a faster flowering cycle of 6 - 7 weeks (i.e., 1 or 2 weeks faster than that of their conventional counterparts), which is a great advantage for cannabis growers in regions with short summers. You can also opt for feminised or regular strains, which are the ones that the majority of growers prefer because they produce a higher yield. Some of these varieties are highly resistant to cold and also have a fast flowering cycle, which can help reduce the risk of frost damage. If you don’t know the time of harvest outdoors, look to see how many weeks it takes for your plants to flower indoors: between 7 and 8 weeks is a good number, whereas 9 to 10, or more, means that the specific strain isn’t as suitable for harsh climates.
Other factors that influence the choice of seeds for cold climates
In addition to the type of seed and its flowering times, you also need to pay attention to other factors when looking for the best cannabis seeds for cold climates:
Genetics and adaptation
Always choose a genetic lineage that includes strains that evolved in harsher weather conditions, making them less susceptible to cold stress. For instance, Hindu Kush is native to the mountainous region between Pakistan and Afghanistan, an area known for its harsh climate. Some strains were also developed specifically for mountainous or northern regions, such as Nepal Gold or the Scandinavian genetics, which are better adapted to withstand low temperatures. Therefore, they are excellent for tolerating strong winds or severe thermal drops during the night.
Resistance to fungi and disease
Cold, when combined with frequent humidity, can increase the risk of diseases such as mould, botrytis (grey rot), or powdery mildew. It is crucial to choose varieties that have natural resistance to these diseases, such as Critical + 2.0 or Auto Fat Blueberry. It also helps to choose varieties with well-spaced, airy buds that can keep these annoying guests at bay in high humidity conditions.
Indica dominance
The compact and robust structure of indica strains is one of their main advantages for cold climates. These plants tend to grow shorter and with densely populated branches, which helps protect them from winds that could damage more slender varieties. And this dense foliage not only contributes to their leafy appearance, but also acts as a natural heat insulation layer.
Great resin production
The dense and resinous buds that some genetics produce not only contribute to their potency but also offer some protection against cold and humidity. Cannabis trichomes exist to protect the plant from environmental hazards such as cold, pests, or strong ultraviolet rays. Therefore, you can take advantage of the low temperatures to increase resin production using the plants’ reaction to stress. As a result, your harvest will be tastier, more potent, and of much higher quality.
Genetic stability
If you grow cannabis in an ideal environment, such as a controlled grow room, the strain’s phenotype will be fully expressed. But if you don’t have a stable variety, then it’s quite a different story. For example, genetics like Northern Lights, White Widow, or Afghan Skunk are known especially for their incredible yielding capacity even in cold temperatures. They derive from a robust genetic line that has been bred and refined over a long period, helping to ensure a consistent quality.
Purple strains
Another good reason to grow marijuana in cold climates is that you can get to witness the vibrant colours of the purple and blue varieties, such as Purple Kush or Gelato #33, which take on deeper tones when the cold is more intense. Exposure to low temperatures can induce oxidative stress in the plants, leading to an increase in the expression of genes associated with anthocyanin synthesis. This positive regulation results in a greater accumulation of these pigments, which work similarly to an antifreeze to safeguard cellular integrity, and which also cause an intensification in the colouring, with magnificent tones seen in the last weeks of flowering.
As you can see, growing cannabis in cold climates is not only possible, but can also be rewarding and even visually dazzling, provided you choose the right seeds and adopt the correct growing practices. Prioritise hardy and stable genetics that are adapted to cold temperatures and have a fast flowering cycle; and use a greenhouse, thermal covers, or mulching to optimise the growing conditions. With these strategies, you will maximise your chances of harvesting quality buds even in the most challenging situations. Good luck with your next grow and stay warm out there!

Feminised or Autoflowering seeds?
Feminised or autoflowering seeds: What’s the best option for you?
Although choosing your cannabis strains from the wide range of genetics available may seem extremely complicated, knowing what your needs are will help you make the right decision. And one of the first steps is choosing between feminised and autoflowering seeds. In this post, we explain the differences between them to help you see which one is best suited to your grow.
What are feminised seeds?
Feminised seeds are genetics designed to produce exclusively female cannabis plants. Before the arrival of feminised strains, growers used to use regular seeds – these are still used today for some purposes, but they’re not as efficient as feminised varieties when the ultimate goal is to harvest seedless buds. It’s just a question of functionality: using feminised cannabis plants means that growers no longer need to be careful to discard the males, which saves time and space. Feminised strains depend on the number of hours of light that they receive to start flowering. Both indoors and outdoors, these varieties will remain in their growing phase as long as they’re exposed to more hours of light than hours of darkness (for example 18/6). They will then begin to flower when the light cycle is changed to 12/12 indoors, or when the days start to get shorter outdoors.
Advantages of feminised cannabis seeds
- Control of plant size with the light cycle: As these strains are photo-dependent (they depend on the photoperiod to start flowering), you can easily control the size of your plants. If you grow indoors, just keep your lights on for 18 hours a day, followed by 6 hours of darkness. In outdoor grows, you can control the size of your plants by simply germinating your seeds earlier (April - May) or later (June - early July), weather permitting.
- Yielding capacity: Controlling the size of your cannabis plants will allow you to grow real trees in true American style (if that’s what you’re after) so your yield will be larger, providing you have enough space.
- You can implement pruning and training techniques like SCROG, LST, etc.
Disadvantages of feminised cannabis seeds
- The light cycle needs to be controlled: In indoor grows, it is essential to adjust the hours of light and darkness to promote the flowering. In outdoor grows, light pollution during the hours of darkness (lamp posts, neighbours’ lights, etc.), can disrupt the flowering.
- Longer growth cycle: Although they deliver a heavier yield, the life cycle of feminised seeds is longer than that of autoflowerings (especially outdoors), which can be an inconvenience for those looking for quick results.
What are autoflowering seeds?
Autoflowering seeds were developed from a ruderalis strain native to Siberia that adapted to the cold climate and short summers of the region. The main characteristic of autoflowering varieties is that they don’t depend on the amount of light that they receive to start flowering – they do so automatically around the fourth or fifth week of life. This type of genetics will be ideal for you if you’re looking to harvest in record time.
Advantages of autoflowering cannabis seeds
- Speed: Automatic strains are ideal for fast growth cycles, especially outdoors and in areas with cold climates and short summers.
- Ease of cultivation: The hours of light that the plants are exposed to don’t need to be controlled, so they’re a great choice for rookies.
- Discretion: Autoflowerings have a limited life span, so their vegetative period is reduced. Therefore, the final size of the plants is usually smaller than that of feminised seeds. This feature facilitates cultivation in reduced spaces, such as terraces and balconies.
- Life cycle: Autoflowers complete their life cycle (from germination to harvest) between approximately 8 and 11 weeks, depending on the variety. This gives you the possibility to grow several crops within the same season.
- Reduced risk of pests and fungi: As their life cycle is shorter, they are less likely to contract diseases, pests, or fungi.
Disadvantages of autoflowering cannabis seeds
- Lower yielding capacity: Generally speaking, autoflowering plants produce less buds than their feminised counterparts because their short life cycle doesn’t allow them to grow as much.
- Lower margin of error: Since they don’t depend on the light cycle to flower, any mistake in their growing process will be extremely costly. Unlike feminised strains, whose vegetative period can be as long as you like indoors (and also tends to be longer outdoors), autos have a limited lifetime from the moment they germinate. Therefore, this will make it harder for the plants to recover from any problems that may arise to successfully deliver a bountiful harvest.
- Pruning or training techniques aren’t recommended: These plants don’t have a vegetative period long enough for these practices to be effective.
There are a number of common mistakes that can be made when growing autoflowering seeds. Here are some top tips to avoid falling into them:
- Don’t do any transplanting: Plants could become stressed and stop growing. Place the seedlings in their final pots from the beginning.
- Don’t saturate the substrate with water: This mistake is quite common. Autoflowering strains are especially sensitive to overwatering since their roots may stop absorbing nutrients and their growth could be halted. Try to water less but more frequently, especially during the first 3 weeks of life.
- Use a more aerated substrate: than usual so that the plants can accelerate their metabolic processes and thereby make the most of every day of their short life.
Feminised or autoflowering: What type of seed is best for you?
The choice between autoflowering and feminised seeds depends on your objectives, experience, and growing conditions.
Autoflowering seeds are for you if…
- You need fast results.
- You live in a cold region with short summers, where the bad autumn weather arrives early.
- You want to reduce the risk of pests, fungi, and diseases.
- You only have a reduced growing area, such as a balcony, a terrace, or a generous sized window.
- You’re looking for discretion. Autoflowering strains are ideal for urban growers.
- You don’t want to be keeping an eye on the photoperiod indoors, or you’re unable to avoid light pollution outdoors.
- You want to have several growth cycles during the outdoor season.
Feminised seeds are for you if…
- You’re looking for a huge yield.
- You want greater control over the size of your plants.
- You’d like to apply pruning or training methods to maximise your yields.
- You’re going to grow indoors. Although autoflowering genetics can also be grown indoors, they require a cycle of 20 hours of light and 4 hours of darkness (throughout the whole cycle) for optimal results. Therefore, they might not be the most efficient choice when it comes to saving energy and money on the electricity bill.
- You’re an advanced grower and you want maximum control over the growth cycle – with feminised seeds, you can customise the growing process as you wish and take full advantage of the space and resources.
Conclusion
In the wide expanse of the cannabis universe, there isn’t any one format that’s better than the others – it’s just a matter of choosing those seeds that meet your needs and help maximise your growing experience. If you’re ready to start or want to explore your options, visit our Linda Seeds catalogue, and discover the perfect strain for your next grow.

Cannabis Seed Storage Guide: Preserve Your Precious Varieties
How to store your cannabis seeds efficiently?
Storing cannabis seeds is a crucial step for every grower, from novice to expert. To preserve the genetics and quality of your seeds, it's essential to know good storage practices. In this article, we'll explore in detail how to store your cannabis seeds effectively. Whether you're an enthusiastic amateur, an avid grower, or a discerning consumer, these tips will help you maintain the viability and quality of your seeds.
Why is storage essential?
The effective storage of cannabis seeds is a fundamental aspect of cannabis cultivation. It's based on sound scientific principles and biological knowledge. To understand why conservation is so essential, we need to delve into the mechanisms that govern seed viability.
Water dynamics
Cannabis seeds are living organisms, and their viability depends on a number of factors. One of the most important is water. Seeds contain a small amount of water, which is essential for triggering the germination process. However, prolonged exposure to humidity can lead to seed rot and loss of viability.
The impact of light and temperature
Light is another factor to consider. The UV rays contained in sunlight can damage seeds by altering their molecular structure. This is why we recommend storing seeds in opaque containers to protect them from light.
Temperature also plays a critical role. Temperatures that are too high can deactivate the enzymes needed for germination, while temperatures that are too low can slow down the seeds' metabolism, preventing them from germinating properly.
By understanding these principles, you can appreciate why effective seed storage is essential. It maintains a delicate balance between these factors to ensure that seeds remain in perfect condition until you're ready to grow them. The following section will provide you with details on how to apply this knowledge in the practical storage of your cannabis seeds.
Materials needed for storage
Effective cannabis seed storage requires the right equipment and an understanding of the scientific factors involved.
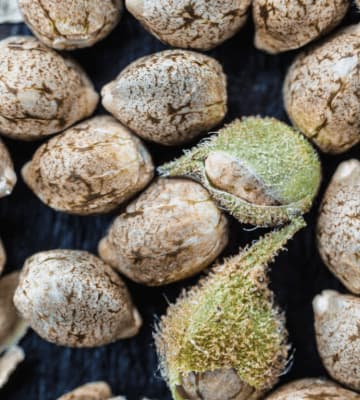
Airtight storage containers
The choice of storage containers is crucial. Opt for glass jars or airtight plastic boxes. These containers must be airtight to prevent moisture from penetrating. The presence of water can cause seeds to germinate prematurely or mould. Opaque containers offer additional protection against UV rays, which can damage seeds.
Labeling and management
Organized management is essential. Label each container with the variety name, storage date and other relevant information. This makes it easier to manage your collection and quickly locate the seeds you need for your crops. Clear marking is an essential habit for any serious grower.
The importance of a hygrometer
For accurate storage, a hygrometer is an essential tool. This instrument measures the relative humidity in your storage containers. It allows you to monitor and adjust humidity to maintain an optimal environment for your seeds. With a hygrometer, you can prevent mold and ensure the long-term viability of your seeds.
Steps to efficient seed storage
Effective cannabis seed storage is a delicate process that relies on a thorough understanding of seed biology. To ensure long-term viability, follow these essential steps.
Seed preparation
Before storing seeds, make sure they are completely dry. Residual moisture can cause mildew. To dry the seeds, place them on a paper towel tray in a cool, dry place. Once completely dry, transfer them to airtight containers.
Humidity and temperature management
Precise control of humidity and temperature is essential. Maintain a relative humidity of 5-10% to avoid premature germination. Temperature should be maintained between 5 and 7 degrees Celsius. Higher temperatures can deactivate the enzymes needed for germination, while lower temperatures slow down seed metabolism.
The importance of freezing
For long-term storage, freezing is an option. However, it must be done with care. Place seeds in an airtight container to prevent frost from forming. Make sure the temperature remains stable during freezing and thawing. We also strongly recommend vacuum-sealing the seeds if you want to freeze them long-term.
Monitor and adjust
Monitor your storage containers regularly. Use a hygrometer to measure relative humidity. If necessary, adjust humidity levels by adding or removing desiccants. Keep an eye on temperature to maintain a stable environment.
Long-term storage
For those looking to store their cannabis seeds over an extended period, freezing is an option to consider. However, this method requires a thorough understanding of seed biology and a precise procedure. In this case, it makes more than sense to vacuum pack the seeds to avoid any losses.
Controlled freezing
Freezing can maintain seed viability for many years, even decades, if carried out correctly. However, it is essential to control every aspect of this process. Place the seeds in an airtight container, distributing them evenly. Ensure that the temperature remains stable during freezing, around -20 degrees Celsius.
Avoid frost formation
Frost can irreversibly damage seeds. To avoid this, make sure the container is airtight and the seeds are completely dry before freezing. Vacuum packaging prevents the smallest traces of frost from setting in. When defrosting, avoid handling the seeds until they have reached room temperature.
Using liquid nitrogen
Some professional growers opt to use liquid nitrogen for long-term preservation. This method is reserved for experts, as it requires delicate handling of cryogenic substances.
Long-term preservation requires careful attention to detail to ensure that your seeds remain viable for many years to come. The following section will provide you with further tips on how to avoid common storage mistakes and maintain the quality of your seeds over the long term.
Tips and mistakes to avoid
Storing cannabis seeds can be tricky, and even small mistakes can have a significant impact on long-term viability. Here are some common tips and mistakes to consider.
Limit container opening
Every time you open a container, the seeds are exposed to air and moisture, which can dry out or contaminate them. Open containers only when you're ready to use the seeds. Avoid frequent inspection, as this increases the risk of contamination.
Use desiccants
To control humidity, you can add desiccants such as silica gel to storage containers. These agents absorb excess moisture, maintaining an optimal level for storage. Be sure to use desiccants designed for this purpose.
Avoid contamination
Contamination of seeds can lead to mold and mildew problems. When handling seeds, make sure your hands and the tools you use are clean. Avoid touching seeds with dirty fingers.
Label correctly
Incorrect labelling can lead to confusion or loss of track of your varieties. Use clear labels with the variety name, storage date and other relevant information. Make sure the label ink is water-resistant.
Seed cellar storage
For serious seed collectors, investing in a seed cellar may be an option. These controlled spaces offer optimal storage conditions in terms of humidity, temperature and protection from light. They are particularly useful for those with large collections of precious seeds.
In conclusion, the effective conservation of your cannabis seeds is a key element for any amateur, enthusiast or knowledgeable grower. Understanding the underlying scientific principles, choosing the right equipment, managing humidity and temperature, and avoiding common mistakes are all crucial steps in ensuring that your seeds remain viable and ready to germinate when you need them.
At Linda Seeds, we understand the importance of your precious seeds. That's why we're committed to providing high-quality varieties to enrich your collection. Our genetics experts work tirelessly to bring you the very best in cannabis genetic diversity. Please visit our online store to explore our selection of premium cannabis seeds.
Best wishes to you and your precious seeds, and see you soon at Linda Seeds!

SCROG Method: Maximize Your Cannabis Yield
Want to take your cannabis cultivation to the next level and get the highest yield? Enter the exciting world of Screen of Green and learn how to efficiently create your green paradise using the scrogging technique. Let's get the most out of your grow together!
What is scrogging and how does Screen of Green work?
You've probably heard of scrogging during your career as a cannabis enthusiast, right? If you're into cannabis cultivation, you'll come across the word "scrog" a lot. It stands for "Screen of Green", a particular technique of cultivation that involves using a so-called scrog net to extract a higher yield from your plants indoors.
A similar method is the Sea of Green technique. The goal is the same: to get a higher yield per square meter during your grow.
Who comes out on top in "sog vs. scrog" always depends on the grower's situation.
One thing is for sure: Both methods are not for beginners!
Here you will first learn the most important details about scrogging and how it can help you take your yield to the next level.
Scrogging, also known as Screen of Green, is often used synonymously and describes a method where a net or grid (called "SCROG net") is stretched between your cannabis plants and their light source. With this net you make sure that all shoots grow the same length. Furthermore, through the net, all your cuties will get an equal amount of light. Instead of a single main shoot, as in standard grow, scroggening creates a multitude of colas. Cola is a botanical term that defines the flowering site of a female cannabis plant.
This method is especially effective if you have a small number of plants, as you increase the chance of a high-yielding grow.
One of the key techniques in scrogging for cannabis is "topping". This is a kind of training for the plant, where you prune the main shoot of your cuties to encourage the formation of several side shoots. You can then topping the two new main shoots again to get four main shoots and so on.
This technique is so useful in combination with the ScrOG method because it helps to evenly distribute plant growth across the ScrOG network. Topping encourages the plant to produce more side shoots, which can then be passed through the ScrOG net, resulting in a more even distribution of light and thus more yield.
Be sure to do topping late in the growing season. This means less stress for your plants. Also, by then most of the shoots should have already grown through the net, so you won't have any problems with interlacing.
Another well-known method is the so-called "lollipopping". Here you remove all shoots and leaves below the net during the first weeks of flowering. This way, your sweethearts will fully concentrate on forming flowers and making the best use of the available light.
Although the scrog technique is mainly used for indoor growing, you can also use the method outdoors. However, with outdoor scrog, you'll have to take into account some additional factors, such as weather conditions and animal damage. Still, it can be an effective way to maximize the growth of your plants and increase your yield.
Of course, you're eager to know the approximate yield per plant indoors. It's hard to make that general statement. The final yield depends on a variety of factors, such as the quality of the seeds, the type of care and the environment.
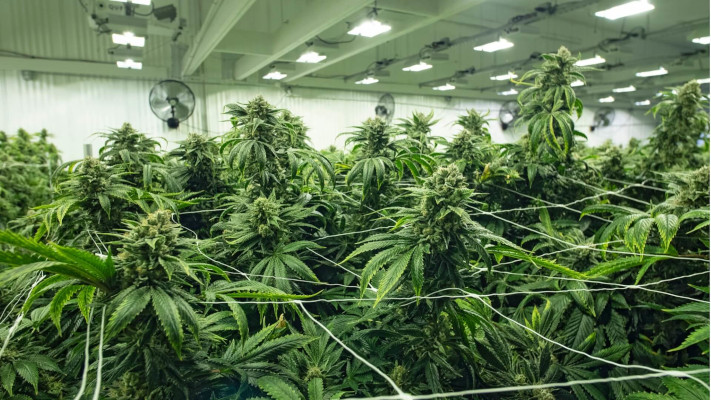
Advantages and disadvantages of the scrogging method
To give you a better overview, we have listed the advantages and disadvantages of the method.
Advantages of the scrogging method
- Optimal light distribution: The even height of the shoots in the SCROG method ensures that the light is optimally distributed. Thus, all your sweethearts have a chance to receive an even amount of light.
- Increased yield: Scrogging can increase the yield per plant. The even light distribution and the training of the plants by topping and lollipopping contribute significantly to this.
- Efficient use of space: SCROG netting allows you to use space efficiently by growing plants horizontally. This is especially useful in smaller growing spaces such as closets or storage rooms, with little floor space.
- Better control: Scroggen gives you better control over the development of your plants. You can actively intervene to control and optimize growth.
Disadvantages of the scrogging method
- Time investment: The SCROG method requires a lot of attention, patience and time investment. Weaving the shoots into the net and plant care during the growth process are activities that eat up a lot of time.
- Difficult to handle: Scrogging requires some skill and care. The process of weaving the shoots into the net can be difficult and tedious. Therefore, if you're a beginner, avoid the scrog method.
- Stress on the plants: The various techniques of scrogging, such as topping and lollipopping, can cause stress to the plants. So if you're not careful here, you can potentially hurt your loved ones.
- Only suitable for certain strains: Not all cannabis strains are suitable for scrogging. Photoperiod strains give much better results than autoflowering strains. Strains with strong stretch, i.e. strains that grow taller and more sparse, are better for scrogging.
Now you know the pros and cons of this method. But that's not quite enough for a successful scrog grow. So what about cannabis seeds for scrog growing? Which ones are eligible, and which ones are not?
Choosing the right seeds for scrogging
Choosing the right seeds is a critical factor in the success of your scrog grow. Generally, seeds from cannabis strains that have a pronounced side shoot formation and respond well to training are suitable.
Indica-dominant strains are often ideal for scrogging, as they usually grow bushy and produce a high number of side branches. Sativa-dominant strains can also be used, but often require more intensive training and management.
Note that autoflowering cannabis seeds tend to be less suitable for scrog cultivation due to their fast growth and short lifespan. Control is difficult and the plants do not like the net. Therefore, as a beginner, it makes more sense for you to start with photoperiod varieties.
Ultimately, the choice of scrog growing seeds depends on your individual preferences and goals. However, with the right scrog growing seeds and with careful care, you can reap the full benefits of scrogging.
Which cannabis strains are best?
Cultivating multiple seeds when growing scrog in the same scrog system allows for a variety of flowers. Choose strains with similar heights to minimize the effort.
We can recommend Green Gelato. It is known for its easy maintenance, dense flowering, and unique terpene profile. Her minimal leaf formation and dense flower clusters are perfect for the scrog method.
Otherwise, OG Kush would be a good choice. Her nodes have enough spacing, which makes her ideal for scrogging. Multiple toppings allow each location to reach its full potential and truly create an entire carpet of Kush. This strain produces uniformly large and dense buds, requires little maintenance, and delivers a high yield - perfect for scrogging!
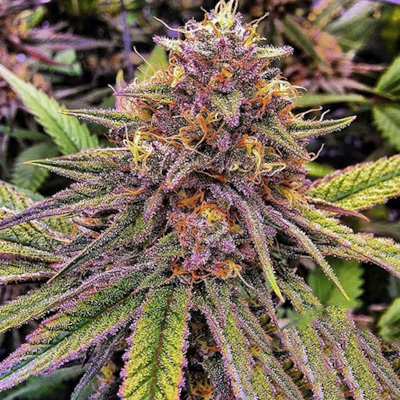
Green Gelato by Roayl Queen Seeds
Here is a useful Scrog guide
A scrog net is the linchpin of scrogging. It provides even exposure for plants, improves air circulation, and provides structure for branches.
How to use the scrog net properly
Be sure to stretch the grow net properly. Arrange the branches so that they can easily intertwine with neighboring plants.
Hang your light source at a height that is sufficient for the light to be evenly distributed over the net.
The distance between the net and the plant should be 20 cm starting from the base of your plants. Start scrogging as soon as your cuties come into contact with the net.
Weaving the shoots into the net is a method of low stress training (LST). You carefully weave the shoots into the net, ensuring horizontal growth.
Important: Remember to do the process gently so as not to injure the plant and avoid unnecessary stress!
On the subject of watering: it is advisable to install a drip irrigation system or use a watering wand, this makes watering much easier and is not as time-consuming as using a watering can.
Remember, however, that drip irrigation is unsuitable if you fertilize organically!
Watch the natural growth of the branches to force your loved ones in one direction as little as possible. Each square of netting should ideally accommodate a single branch. After scrogging, plants might appear stressed, but recover quickly with adequate light and water. Readjusting the net after 2-3 days will help ensure optimal results.
Note: It is critical that you switch to a 12/12 light cycle to send the plants into bloom. However, don't do this until your net or grid is almost completely filled!
Here's a list of paraphernalia to help you get the most out of your scrogg:
- Scrog net
- Scissors (preferably special harvesting scissors)
- Disposable gloves
- Plant binder
- Pots
If you need the right utensils for your next grow, feel free to stop by our grow store.
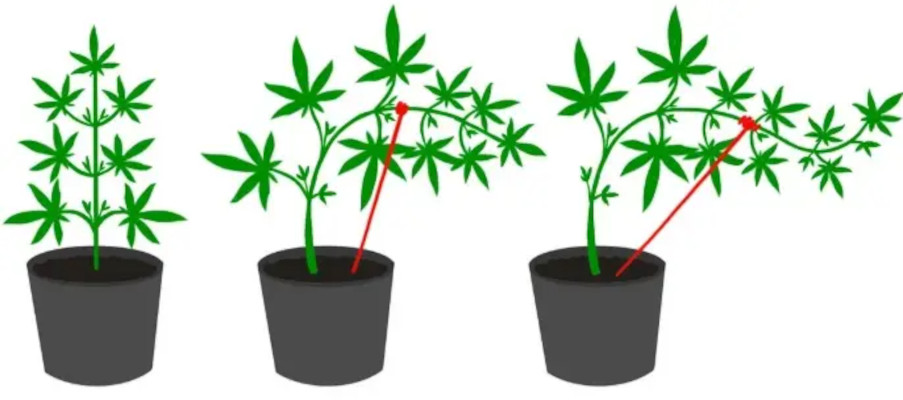
Low strees training (LTS) method

Germinate cannabis seeds: Comprehensive guide
In the beginning is the germination. For any cannabis cultivation, the cannabis seeds must be germinated at the beginning. There are different methods for this, each of which has advantages and disadvantages and is more or less suitable for beginners. In this text you will learn what you need to successfully germinate your weed seeds. The methods are presented one by one and described in detail. Also about said advantages and disadvantages you will learn everything worth knowing in this text.
It is important not to make any mistakes when germinating cannabis seeds, as this lays the foundation for the later development of the plant. Mistakes in germination can in the worst case negatively affect the size of the later plant or even ensure that your project fails right at the beginning, if the cannabis seeds do not germinate at all. In addition to the correct methodology, the most important thing is to create the ideal conditions for the germination of the seeds. These conditions are similar for all methods. For seeds need a humid, warm (but not too hot) and dark environment to start the germination process. Also, the quality of the seeds matters. You should always use high-quality seeds from established seed banks to increase your success rate. Ultimately, however, it is always possible that individual seeds will not germinate, regardless of the conditions and your abilities. Don't let this discourage you, because it's natural - after all, this is organic material you're working with. However, don't worry too much about the quality. The seeds from the growers available in our store always have a germination rate between 90 and 100%.
These are the methods to germinate cannabis seeds
Before covering the methods in detail, here's an overview of the existing methods. Cannabis seeds can germinate in kitchen paper or in water. But germinating cannabis seeds directly in the soil is also feasible. Another popular method is germination in jiffies or so-called peat swell balls / peat swell pots. Regardless of the medium in which you germinate the cannabis seeds, however, there are a few things to keep in mind. Follow our instructions to germinate your cannabis seeds.
Cannabis is a dark seedling, so it doesn't need direct light exposure to start the germination process. The temperature of the medium in which you germinate the cannabis seeds should be between 20 and 25 degrees. At higher or lower temperatures, there is a risk that the seeds will not sprout. Optimal is 24 degrees. Furthermore, the humidity is crucial. Only when the seeds are supplied with sufficient moisture, they initiate the germination process. Therefore, you should regularly check the moisture content of the germination medium and add new water if necessary. Germination usually takes only a few days. After 5 to 10 days at the latest, seedlings should have developed from the seeds. However, sometimes there are outliers that do take longer and germinate only after two or three weeks. The process can not be accelerated, but the better the required conditions are met, the earlier germination should occur.
Germinate hemp seeds in kitchen paper
For the first method of germinating hemp seeds, use kitchen paper. This involves placing a sheet of kitchen paper on a straight surface, on which the seeds are placed a few centimeters apart from each other. Then a second sheet is placed over it as a cover. Now it is important to keep both cloths moist at all times. However, they should also not be so wet that drops form. After a few days, the seeds should have opened and developed about 2 to 3 mm long root tips, they are ready to be inserted into the soil. To do this, for example, with your finger, or even better with tweezers, drill holes 5 to 10 mm deep in the soil and gently place the seedlings inside. When doing this, make sure that the root should be directed downwards and the casing of the seed should point towards the surface of the soil. The advantage of this method is that you need nothing more than kitchen paper. Besides, you can always control the development of the seeds by covering the upper sheet of kitchen paper. The disadvantage is that you have to handle and plant the very young seedlings. If you do not handle them carefully enough, they can be damaged, which can affect their later development or even cause them to die. Instead of kitchen paper, other similar materials can be used, such as cotton swabs or otherwise absorbent paper.
The water glass method - germinating cannabis seeds in water.
Another method to germinate your seeds is the water glass method. As you guessed correctly, this involves placing the seeds in a glass filled with water to germinate. The water should have a temperature of 22-24 degrees Celsius. Warmer water contains less oxygen, which can cause germination to fail. After two to three days, the seeds should open and small root tips should emerge. As with the kitchen paper method, they are ready for planting once the roots reach a length of 2 to 3 mm. When removing the seeds from the jar, you should be extremely careful and not use your fingers. A pair of tweezers or a sterile spoon is suitable for this purpose. Planting is done in the same way as described above. In a way, this method is very convenient, but it is not very efficient. The risk that some seeds will not germinate here is the highest. Opinions differ as to whether the water jar should be in the light or in the dark. Ultimately, however, both should be possible. Timing is also important. If the seeds remain in the water too long, the seedling will be damaged and die.
Germinating cannabis seeds in the soil
You can also plant your cannabis seeds directly into the soil. This has the advantage that you do not have to touch the young seedlings again. This eliminates a potential source of damage. Fill your pots with sterilized growing soil and add water so that the soil is well moist. Then, using your finger or tweezers, drill a hole 5 to 10 mm deep and carefully place the seed inside. Cover the seed loosely with soil and make sure the soil does not dry out over the next few days. For this, it can be helpful to cover the plant pot with plastic wrap, but it should have some holes for ventilation. You can poke these holes in the foil with a toothpick, for example. This keeps the moisture in the soil longer. After about 4 to 10 days you should see the result in the form of a small seedling breaking through the soil to the surface. Continue to provide a humid climate and after a few more days you can transplant the seedling including the surrounding soil into a larger pot.
This method has the advantage that the seedlings are hardly exposed to stress during their first days. However, you will have to be patient a little longer to observe the results of your seeds. But in general, this method has very good chances of success if you keep the soil nice and moist.
Germinating hemp seeds in rockwool
A professional medium to germinate hemp seeds is rockwool. This is thin threads of solidified volcanic magma. For cultivation, rock wool blocks are available in different sizes. This variant is especially recommended if you want to grow later in hydroponics, whatever kind. Rockwool does not contain any nutrients, so it must be prepared before it is used for germination and growing. In other words, a special, light fertilizer solution must be prepared. You need to adjust the pH and EC (conductivity) value of the solution and soak the rockwool in it. The EC value of rockwool is neutral, which means that the nutrient supply can be controlled very precisely. Rockwool has a natural pH of 7-8, which you should lower to 5.5. You can achieve this by soaking the rockwool in pH adjusted water. Then you should administer a fertilizer solution with a TDS of 600 per million.
Now, using a pointed knife or tweezers, drill a small hole in the wool block and insert the seed so deep that you can't see it. From now on, it is a matter of keeping the humidity of the rockwool constant. This is best done in a closed container, such as a bowl covered with plastic wrap (again, make small holes with a toothpick) or an indoor greenhouse. However, make sure to air the container once a day.
With this method, very good results can be achieved, but it is more suitable for advanced growers, because on the one hand you need some equipment and on the other hand a certain knowledge of how to handle it, moreover, the necessary measuring devices are expensive to buy.
A disadvantage of rockwool is that its production requires a lot of energy and thus pollutes the environment.
Germinating cannabis seeds in jiffy / peat pots
Another popular and for beginners the safest method to germinate your cannabis seeds is the use of so-called Jiffys or peat pots. These are small plates surrounded by a net, filled with peat (recently also with coco), fertilizer and minerals and sterilized. Put them in water so they can soak up moisture and expand into a small cylinder. Then press the seed into the opening at the top about 4-8 mm deep into the substrate. Now store the jiffy swell pot at the ideal temperature if possible and in a container that prevents moisture from escaping, such as a mini-greenhouse for growing plants. After a few days a small seedling should rise to the surface and a little later the first roots will penetrate the outer net of the peat well ball, usually this happens at the bottom first. Now you can move the seedling together with the jiffy into a larger pot. Be careful with the young plant and do not overwater the soil in the beginning, because the Jiffy retains moisture for a long time.
This method offers very good success rates and is easy to practice. Thanks to the high nutrient content of the jiffy, the roots develop quickly and quickly become strong. The disadvantage is that you have to buy Jiffys for this, however, you can order them easily and cheaply on the Internet, for example, at Linda Seeds:
Common beginner mistakes when germinating cannabis seeds
Even though most of the methods presented are relatively straightforward, they harbor many sources of potential mistakes. As mentioned at the outset, it is exceedingly important that the temperature does not fall below or exceed the limits mentioned. But temperature fluctuations should, at best, be avoided altogether. This is best achieved with the use of a heating mat and by positioning the seeds in a place that is not exposed to large temperature fluctuations. For example, a storage room or a larger built-in cupboard is suitable for this.
Furthermore, it is important to maintain the correct humidity of the germination medium. While it is central to not let the medium dry out, too much humidity can also affect the germination of your cannabis seeds and cause a fungal infection. Your substrate (if you're using a method other than the water glass method) should only be well moist, but never dripping wet. When in doubt, familiarize yourself with how much water your substrate can handle before planting the seeds.
Another source of error is transplanting the seeds. The root tips have microscopic hairs that you can easily injure if you touch the seedlings with your fingers. Therefore, it is better to use tweezers and touch the seedlings only on the hard shell of the seed. Do not squeeze too hard, otherwise the seed may break and the necessary protection of the young plant is lost. So a delicate touch is required! Finally, you should hold back on fertilizing. All common growing media except rockwool carry enough nutrients for the first days. Therefore, you should not add fertilizer, as it will harm rather than help the seedlings. You should also hold back with the lighting in the beginning. In the seedling stage it is sufficient to use a small fluorescent lamp. Only when the plants form the first serrated leaves, you should switch to a more potent lamp. Otherwise you will achieve the opposite and the young plants will suffer a light shock, stop growing and die.
And finally, above all, you need patience. Give your seeds the time they need to germinate. Constantly checking to see if anything has sprouted yet can be detrimental to the germination process. You can find everything you need for successful and uncomplicated growing in the online store of Linda Seeds. All beginnings are difficult, but the proof of the pudding is in the eating! Good luck!

A lot of movement despite adverse circumstances - cannabis growers in the 90s
The Climate is Changing
Medical use and decriminalization

USA strains in Holland - a perfect breeding ground
Amsterdam - the breeders' place of desire
Foundation for future generations

Mexican magic mushrooms - ancient tradition
Great diversity
Ways of consumption
Mushroom regions of Mexico
Current use
Cultivation with mushroom cultivation box

Spring time is outdoor time
Seeds and jiffys
Which variety is well suited for outdoor cultivation?
Autoflowering strains work anytime
Especially fast flowering strains
Outdoor classics
Growing, but where?

Runtz Strain: characteristics, genetics and origins
What makes the Runtz Strain such a special strain?
Where does such a strain come from?
Fundamental characteristics of the Runtz Strain marijuana

Tropicanna Cookies: characteristics, genetics and origins
Effect & taste
Indoor & outdoor growing
Indoor: Tropicanna Cookies
Terpene structure & aroma
